Tag: recipe

  • 7 Delectable Cheesecake Recipes You Need to Try

    7 Delectable Cheesecake Recipes You Need to Try

    Cheesecake is a creamy and delicious dessert that has won the hearts of many. With its rich, smooth texture and endless flavor possibilities, it’s perfect for any occasion. Whether you like it classic with a simple graham cracker crust or topped with fresh fruit, there’s a cheesecake out there for everyone to enjoy!

    Matcha Green Tea Cheesecake

    A slice of matcha green tea cheesecake on a black plate with the whole cheesecake in the background.

    Matcha green tea cheesecake is a delightful twist on the classic dessert. Combining the creamy richness of cheesecake with the earthy, slightly bitter notes of matcha creates a unique flavor profile that is both refreshing and indulgent. This dessert is perfect for matcha lovers and anyone looking to impress their guests with something a little different.

    Making matcha green tea cheesecake is simpler than it might seem. With just a few ingredients and a bit of patience, you can whip up this beautiful dessert that will leave everyone asking for seconds. The smooth texture and vibrant green color make it not just tasty but also visually stunning.

    Ingredients

    • 1 1/2 cups graham cracker crumbs
    • 1/4 cup unsalted butter, melted
    • 2 cups cream cheese, softened
    • 1 cup granulated sugar
    • 1 tablespoon all-purpose flour
    • 3 large eggs
    • 1/4 cup heavy cream
    • 2 tablespoons matcha green tea powder
    • 1 teaspoon vanilla extract

    Instructions

    1. Preheat the oven to 325°F (160°C). In a bowl, mix graham cracker crumbs and melted butter. Press the mixture firmly into the bottom of a 9-inch springform pan to form the crust.
    2. In a large mixing bowl, beat the cream cheese until smooth. Gradually add the sugar and flour, mixing well. Add the eggs one at a time, mixing until just combined.
    3. Mix in the heavy cream, matcha powder, and vanilla extract until smooth and evenly colored.
    4. Pour the batter into the prepared crust and smooth the top. Bake for about 50-60 minutes, until the center is set but still slightly jiggly.
    5. Let the cheesecake cool at room temperature, then refrigerate for at least 4 hours or overnight before serving. Enjoy your matcha green tea cheesecake with a dusting of matcha on top!

    No-Bake Strawberry Cheesecake

    Delicious no-bake strawberry cheesecake with fresh strawberries on top

    No-bake strawberry cheesecake is a delightful dessert that combines creamy cheesecake with fresh strawberries. It’s light, refreshing, and perfect for any occasion. The best part? You don’t have to turn on the oven!

    This cheesecake is super simple to prepare, making it great for both beginners and seasoned bakers. The rich, creamy filling pairs perfectly with the sweet-tart strawberries, creating a delicious treat that everyone will love.

    Ingredients

    • 1 ½ cups graham cracker crumbs
    • ½ cup unsalted butter, melted
    • 2 cups cream cheese, softened
    • 1 cup powdered sugar
    • 1 teaspoon vanilla extract
    • 1 ½ cups whipped cream
    • 2 cups fresh strawberries, sliced

    Instructions

    1. Prepare the Crust: In a bowl, mix the graham cracker crumbs with melted butter until combined. Press the mixture firmly into the bottom of a pie dish to form the crust.
    2. Make the Filling: In a large bowl, beat the cream cheese until smooth. Gradually add powdered sugar and vanilla extract, combining well. Fold in the whipped cream until fully incorporated.
    3. Assemble: Spread the cheesecake filling over the crust evenly. Top with sliced strawberries, arranging them as desired.
    4. Chill: Cover the cheesecake and refrigerate for at least 4 hours, or until set. Serve chilled and enjoy!

    Classic New York Cheesecake

    A slice of classic New York cheesecake with raspberry topping on a plate.

    New York cheesecake is a creamy, rich dessert that everyone loves. It has a smooth texture and a slightly tangy flavor that balances perfectly with its sweet crust. This cheesecake is a classic favorite for any occasion and is surprisingly simple to make, making it great for both novice bakers and seasoned pros.

    With just a few key ingredients, you can whip up a delicious cheesecake that will impress your friends and family. It’s perfect on its own or topped with fresh fruit or a fruit sauce for an extra burst of flavor. Try this recipe, and you’ll see just how easy it is to create this timeless dessert!

    Ingredients

    • 2 cups graham cracker crumbs
    • 1/4 cup sugar
    • 1/2 cup unsalted butter, melted
    • 4 (8-ounce) packages cream cheese, softened
    • 1 cup sugar
    • 1 teaspoon vanilla extract
    • 4 large eggs
    • 1 cup sour cream
    • 1 tablespoon lemon juice

    Instructions

    1. Preheat the oven to 325°F (160°C). Grease a 9-inch springform pan.
    2. Make the crust: In a bowl, mix graham cracker crumbs, 1/4 cup sugar, and melted butter until combined. Press the mixture into the bottom of the prepared pan.
    3. Prepare the filling: In a large mixing bowl, beat the softened cream cheese until smooth. Gradually add 1 cup sugar and vanilla extract, mixing well.
    4. Add the eggs one at a time, mixing on low speed after each addition. Then blend in the sour cream and lemon juice until smooth.
    5. Pour the filling over the crust and smooth the top. Bake for about 60-70 minutes, or until the center is set and the edges are lightly browned.
    6. Turn off the oven and let the cheesecake cool inside with the door slightly ajar for about an hour. Then remove from the oven and refrigerate for at least 4 hours, preferably overnight, before serving.

    Pumpkin Spice Cheesecake

    A delicious pumpkin spice cheesecake topped with whipped cream and garnished with spices.

    Pumpkin spice cheesecake is a delightful twist on the classic dessert, blending creamy cheesecake with the warm, cozy flavors of autumn. It offers a smooth texture and rich taste, making it a perfect treat for fall gatherings or holiday celebrations.

    This recipe is simple enough for anyone to try, featuring a buttery crust that complements the spiced filling beautifully. With a few basic ingredients, you can whip up a cheesecake that will impress family and friends alike!

    Ingredients

    • 1 1/2 cups graham cracker crumbs
    • 1/4 cup granulated sugar
    • 1/2 cup unsalted butter, melted
    • 3 (8-ounce) packages cream cheese, softened
    • 1 cup pumpkin puree
    • 1 cup granulated sugar
    • 3 large eggs
    • 1 teaspoon vanilla extract
    • 1 teaspoon ground cinnamon
    • 1/2 teaspoon ground nutmeg
    • 1/4 teaspoon ground ginger
    • 1/4 teaspoon salt

    Instructions

    1. Prepare the crust: Preheat your oven to 325°F (160°C). In a medium bowl, mix together graham cracker crumbs, sugar, and melted butter until well combined. Press the mixture into the bottom of a 9-inch springform pan.
    2. Make the filling: In a large mixing bowl, beat the cream cheese until smooth. Add the pumpkin puree, sugar, eggs, vanilla, and spices. Mix until fully combined and creamy.
    3. Fill the crust: Pour the cheesecake filling over the prepared crust, smoothing the top with a spatula.
    4. Bake: Place the springform pan in the preheated oven and bake for about 60 minutes, or until the center is set but still slightly jiggly.
    5. Cool and chill: Allow the cheesecake to cool at room temperature for about an hour, then refrigerate for at least 4 hours or overnight before serving.

    Lemon Zest Cheesecake

    A delicious lemon zest cheesecake topped with fresh lemon slices and mint leaves.

    This Lemon Zest Cheesecake is a delightful treat that perfectly balances creamy sweetness with a zesty lemon kick. It’s an easy recipe that anyone can whip up, making it ideal for casual gatherings or a refreshing dessert at the end of a meal.

    The bright lemon flavor shines through in every bite, making this cheesecake feel light and refreshing. With a simple crust and a smooth filling, it’s a dessert that’s sure to impress without requiring much fuss.

    Ingredients

    • 1 1/2 cups graham cracker crumbs
    • 1/3 cup granulated sugar
    • 1/2 cup unsalted butter, melted
    • 4 (8-ounce) packages cream cheese, softened
    • 1 cup granulated sugar
    • 4 large eggs
    • 1/4 cup all-purpose flour
    • 1/4 cup sour cream
    • 3 tablespoons lemon zest
    • 1 teaspoon vanilla extract
    • 1/4 cup fresh lemon juice

    Instructions

    1. Preheat the oven to 325°F (163°C). Grease a 9-inch springform pan.
    2. In a bowl, mix the graham cracker crumbs, 1/3 cup sugar, and melted butter until combined. Press this mixture firmly into the bottom of the prepared pan.
    3. In a large mixing bowl, beat the softened cream cheese until smooth. Gradually add in the 1 cup sugar, mixing well.
    4. Add the eggs one at a time, mixing on low speed after each addition. Then mix in the flour, sour cream, lemon zest, vanilla extract, and lemon juice until smooth.
    5. Pour the cream cheese mixture over the crust in the springform pan and smooth the top with a spatula.
    6. Bake for 50-60 minutes or until the center is set but still slightly jiggly. Turn off the oven and let the cheesecake cool in the oven with the door slightly ajar for about 1 hour.
    7. Remove the cheesecake from the oven and cool completely at room temperature. Refrigerate for at least 4 hours before serving.
    8. Garnish with fresh lemon slices or mint leaves if desired.

    Chocolate Swirl Cheesecake

    A beautifully swirled chocolate cheesecake with a graham cracker crust

    Chocolate Swirl Cheesecake is a delightful twist on the classic dessert. This rich and creamy cheesecake features a luscious chocolate swirl that adds a touch of decadence. The combination of smooth cream cheese and bold chocolate creates a perfect balance that melts in your mouth.

    This recipe is simple to make, making it a great choice for both beginner and experienced bakers. With just a few key ingredients, you’ll whip up a stunning dessert that will impress your guests and satisfy your sweet tooth.

    Ingredients

    • 1 1/2 cups graham cracker crumbs
    • 1/4 cup granulated sugar
    • 1/2 cup unsalted butter, melted
    • 3 (8-ounce) packages cream cheese, softened
    • 1 cup granulated sugar
    • 1 teaspoon vanilla extract
    • 3 large eggs
    • 1 cup sour cream
    • 1 cup semisweet chocolate chips
    • 2 tablespoons cocoa powder

    Instructions

    1. Preheat your oven to 325°F (160°C). Grease a 9-inch springform pan.
    2. Make the crust: In a bowl, mix graham cracker crumbs, 1/4 cup sugar, and melted butter. Press the mixture into the bottom of the prepared pan.
    3. Prepare the filling: In a large bowl, beat the cream cheese and 1 cup sugar until smooth. Add vanilla and mix well. Beat in the eggs one at a time, then stir in the sour cream until combined.
    4. Divide the batter in half. Melt the chocolate chips in the microwave and mix them with one half of the batter. Add cocoa powder for extra flavor.
    5. Spoon the cheesecake batters alternately into the crust, creating a swirl effect with a knife or skewer.
    6. Bake for 50-60 minutes, until the center is set but slightly jiggly. Turn off the oven and crack the door, letting the cheesecake cool for an hour.
    7. Refrigerate for at least 4 hours or overnight before serving. Enjoy your Chocolate Swirl Cheesecake!

    Salted Caramel Cheesecake

    A delicious salted caramel cheesecake with a smooth top and caramel drizzle.

    This salted caramel cheesecake is a delightful combination of creamy, rich flavors and a touch of sweet and salty. The smooth cheesecake pairs perfectly with the luscious caramel drizzle, making it a treat that’s hard to resist. Plus, it’s quite simple to whip up, even if you’re new to baking!

    The buttery crust adds a satisfying crunch, while the caramel topping gives every bite a perfect hint of sweetness. It’s a wonderful dessert for any occasion, and you can easily impress your friends and family with this indulgent cheesecake.

    Ingredients

    • 1 1/2 cups graham cracker crumbs
    • 1/3 cup unsalted butter, melted
    • 1/4 cup granulated sugar
    • 3 (8 oz) packages cream cheese, softened
    • 1 cup granulated sugar
    • 1 teaspoon vanilla extract
    • 3 large eggs
    • 1 cup sour cream
    • 1/2 cup caramel sauce
    • 1/2 teaspoon sea salt
    • Extra caramel sauce for drizzling

    Instructions

    1. Preheat Oven: Preheat your oven to 325°F (160°C) and grease a 9-inch springform pan.
    2. Make the Crust: In a bowl, mix graham cracker crumbs, melted butter, and sugar until combined. Press this mixture firmly into the bottom of the prepared pan.
    3. Prepare the Cheesecake Filling: In a large bowl, beat the softened cream cheese and sugar until smooth. Add the vanilla and mix well. Then, add eggs one at a time, blending until just combined. Stir in sour cream, caramel sauce, and sea salt until smooth.
    4. Pour and Bake: Pour the cheesecake filling over the crust in the springform pan. Bake for 55-60 minutes or until the center is set but slightly jiggly.
    5. Cool and Chill: Turn off the oven and crack the door open, letting the cheesecake cool in the oven for an hour. Remove from the oven and refrigerate for at least 4 hours or overnight.
    6. Serve: Drizzle with additional caramel sauce before serving and enjoy!
  • 7 Delectable Lemon Bar Recipes You Need to Try

    7 Delectable Lemon Bar Recipes You Need to Try

    Lemon bars are a delightful treat that brings a burst of sunshine to any dessert table. With their buttery crust and tangy lemon filling, they strike the perfect balance between sweet and sour. Whether enjoyed as a mid-afternoon snack or a finishing touch to a meal, these bars are simple to make and offer a refreshing taste that’s sure to please everyone.

    Vegan Lemon Bars

    Delicious vegan lemon bars with a crumbly crust and bright yellow lemon topping, garnished with mint leaves.

    These vegan lemon bars offer a refreshing twist on a classic treat. With a bright, tangy lemon filling and a crumbly oat base, they strike a perfect balance between sweet and tart. The buttery texture of the crust pairs beautifully with the smooth lemon topping, making each bite a delightful experience.

    Making these lemon bars is simple and straightforward. With only a handful of ingredients, you’ll whip them up in no time. They’re perfect for a sunny day or as a sweet ending to any meal!

    Ingredients

    • 1 cup rolled oats
    • 1/2 cup almond flour
    • 1/4 cup coconut oil, melted
    • 1/4 cup maple syrup
    • 1/2 teaspoon vanilla extract
    • 1 cup fresh lemon juice
    • 1/2 cup granulated sugar
    • 2 tablespoons cornstarch
    • 1/4 teaspoon turmeric (for color)

    Instructions

    1. Preheat the oven to 350°F (175°C) and line an 8-inch square pan with parchment paper.
    2. In a bowl, mix rolled oats, almond flour, melted coconut oil, maple syrup, and vanilla extract until combined. Press this mixture into the bottom of the prepared pan.
    3. Bake the crust for 10-12 minutes or until lightly golden and set. Let it cool slightly.
    4. In a separate bowl, whisk together lemon juice, sugar, cornstarch, and turmeric until smooth. Pour this mixture over the cooled crust.
    5. Bake for an additional 20-25 minutes until the filling is set. Let cool completely before slicing into bars.

    No-Bake Lemon Bars

    No-bake lemon bars with a creamy lemon filling and a graham cracker crust

    No-bake lemon bars are a delightful treat that packs a punch of citrus flavor while being incredibly easy to make. With a creamy lemon filling and a buttery crust, each bite is refreshing and satisfying. Perfect for warm days or anytime you’re craving something sweet and tangy!

    This recipe skips the oven, making it a breeze to whip up. You’ll love the simplicity of blending ingredients and letting them set in the fridge. These bars are a great way to enjoy a slice of summer, no matter the season!

    Ingredients

    • 1 cup graham cracker crumbs
    • 1/2 cup unsalted butter, melted
    • 1/4 cup granulated sugar
    • 1 cup sweetened condensed milk
    • 1/2 cup fresh lemon juice
    • 1 tablespoon lemon zest
    • 1/4 teaspoon salt

    Instructions

    1. Prepare the Crust: In a bowl, combine graham cracker crumbs, melted butter, and sugar. Mix until well combined. Press the mixture into the bottom of a square baking dish to form an even crust.
    2. Make the Filling: In another bowl, whisk together condensed milk, lemon juice, lemon zest, and salt until smooth. Pour the filling over the crust.
    3. Chill: Cover the dish with plastic wrap and refrigerate for at least 3 hours or until the filling is firm.
    4. Serve: Cut into squares and enjoy your refreshing no-bake lemon bars!

    Lemon Bars with a Coconut Twist

    Delicious lemon bars topped with toasted coconut.

    These lemon bars bring a refreshing zing to your dessert table, brightened by the sunny flavor of lemons and complemented by a delightful hint of coconut. The creamy lemon filling is perfectly balanced with a crisp, buttery crust, making each bite a treat for the senses. Simple to whip up, these bars are a great choice for both seasoned bakers and those just starting out.

    The addition of toasted coconut on top adds a lovely texture and a tropical flair. These lemon bars are not just a dessert; they’re a burst of sunshine on a plate. Whether for a family gathering or just a sweet indulgence at home, they’re sure to impress!

    Ingredients

    • 1 cup all-purpose flour
    • 1/4 cup powdered sugar
    • 1/2 cup unsalted butter, softened
    • 2 large eggs
    • 1 cup granulated sugar
    • 1/4 cup fresh lemon juice
    • 1 tablespoon lemon zest
    • 1/2 teaspoon baking powder
    • 1/2 cup shredded coconut, toasted

    Instructions

    1. Preheat the oven to 350°F (175°C). Grease an 8×8-inch baking dish.
    2. Make the Crust: In a bowl, mix together flour and powdered sugar. Cut in the butter until crumbly. Press this mixture into the bottom of the prepared baking dish.
    3. Bake the Crust: Bake in the preheated oven for 15 minutes or until lightly golden.
    4. Prepare the Filling: In a separate bowl, whisk together eggs, granulated sugar, lemon juice, lemon zest, and baking powder until smooth.
    5. Combine: Pour the filling mixture over the baked crust. Sprinkle the toasted coconut on top.
    6. Bake Again: Return to the oven and bake for an additional 20-25 minutes or until the filling is set.
    7. Cool and Serve: Let cool completely before cutting into squares. Enjoy your lemon bars with a coconut twist!

    Gluten-Free Lemon Bars

    A delicious slice of lemon bar on parchment paper, surrounded by fresh lemon slices and ingredients.

    Gluten-free lemon bars are a delightful treat that perfectly balance tartness and sweetness. With a bright lemon flavor, these bars are refreshing and satisfying, making them a great dessert choice for any occasion. Plus, they are easy to whip up, requiring minimal ingredients and effort!

    The crust is usually made with almond flour or a gluten-free blend, giving it a buttery texture that complements the creamy lemon filling. Once baked, these bars are often topped with a light dusting of powdered sugar for an extra touch of sweetness. You’ll find that they are not only delicious but also a wonderful gluten-free option that is sure to impress your friends and family.

    Ingredients

    • 1 ½ cups almond flour
    • 1/4 cup granulated sugar
    • 1/4 cup unsalted butter, melted
    • 1/4 teaspoon salt
    • 2 large eggs
    • 1 cup granulated sugar (for filling)
    • 1/4 cup freshly squeezed lemon juice
    • 1 tablespoon lemon zest
    • 2 tablespoons cornstarch

    Instructions

    1. Prepare the Crust: Preheat your oven to 350°F (175°C). In a bowl, mix almond flour, 1/4 cup sugar, melted butter, and salt until combined. Press the mixture into the bottom of a greased 8-inch square baking dish.
    2. Bake the Crust: Bake the crust for about 10-12 minutes, or until lightly golden. Allow to cool slightly.
    3. Make the Filling: In another bowl, whisk together the eggs, 1 cup sugar, lemon juice, lemon zest, and cornstarch until smooth.
    4. Add the Filling: Pour the lemon filling over the baked crust, spreading it evenly.
    5. Bake Again: Return to the oven and bake for an additional 20-25 minutes, or until the filling is set. Let cool completely before slicing into bars.
    6. Serve: Dust with powdered sugar before serving for a lovely finish!

    Mini Lemon Bar Bites

    Mini lemon bar bites arranged on a plate with lemon slices

    Mini lemon bar bites are a delightful treat that perfectly balance tartness and sweetness. These little squares are crisp on the bottom with a creamy lemon filling on top, making them a refreshing dessert for any occasion. They are simple to prepare, requiring just a handful of ingredients and minimal effort.

    Ideal for parties or casual gatherings, these bites are sure to impress your guests. Their bright flavor and cute size make them perfect for satisfying a sweet craving without being too heavy. Plus, they’re easy to cut into perfect little squares!

    Ingredients

    • 1 cup all-purpose flour
    • 1/4 cup powdered sugar
    • 1/2 cup unsalted butter, softened
    • 1 cup granulated sugar
    • 2 large eggs
    • 1/4 cup freshly squeezed lemon juice
    • 1 tablespoon lemon zest
    • 1/2 teaspoon baking powder

    Instructions

    1. Preheat the oven to 350°F (175°C) and grease a small baking dish.
    2. In a bowl, mix flour and powdered sugar, then cut in the butter until crumbly. Press this mixture into the bottom of the prepared dish.
    3. Bake for about 15 minutes or until lightly golden.
    4. In another bowl, whisk together granulated sugar, eggs, lemon juice, lemon zest, and baking powder until smooth.
    5. Pour the lemon mixture over the baked crust and return to the oven. Bake for an additional 20 minutes, or until set.
    6. Let cool completely before cutting into small squares. Dust with powdered sugar before serving.

    Classic Lemon Bar Recipe

    Delicious lemon bars dusted with powdered sugar, garnished with lemon slices.

    Lemon bars are the perfect balance of sweet and tart, making them a delightful treat for any occasion. These bars feature a buttery crust topped with a creamy lemon filling that is both refreshing and satisfying. They are simple to make and require just a handful of ingredients, making them a favorite for bakers of all levels.

    With their bright flavor and lovely texture, lemon bars are a great way to showcase fresh lemons. Whether you’re sharing them at a gathering or enjoying them with a cup of tea, these treats are sure to bring a smile to your face. Plus, they can be made ahead of time, making them an ideal dessert for busy days!

    Ingredients

    • 1 cup all-purpose flour
    • 1/4 cup powdered sugar
    • 1/2 cup unsalted butter, softened
    • 1 cup granulated sugar
    • 2 large eggs
    • 1/4 cup freshly squeezed lemon juice
    • 1 teaspoon lemon zest
    • 1/2 teaspoon baking powder
    • 1/4 teaspoon salt

    Instructions

    1. Preheat the oven to 350°F (175°C). Grease an 8×8-inch baking pan.
    2. Make the Crust: In a mixing bowl, combine flour and powdered sugar. Cut in the softened butter until the mixture resembles coarse crumbs. Press the mixture evenly into the bottom of the prepared pan.
    3. Bake the Crust: Bake in the preheated oven for about 15 minutes or until lightly golden.
    4. Prepare the Filling: In another bowl, whisk together granulated sugar, eggs, lemon juice, lemon zest, baking powder, and salt until smooth.
    5. Combine and Bake: Pour the lemon filling over the baked crust and return to the oven. Bake for an additional 20-25 minutes, or until the filling is set.
    6. Cool and Serve: Allow the bars to cool completely in the pan. Once cooled, dust with additional powdered sugar, cut into squares, and enjoy!

    Lemon Lavender Bars

    Delicious lemon lavender bars garnished with lemon slices and lavender flowers.

    Lemon lavender bars are a delightful treat that perfectly combines the tangy flavor of fresh lemons with the subtle floral notes of lavender. These bars are refreshing and light, making them a fantastic dessert for any occasion. The bright lemon flavor paired with the aromatic lavender adds a unique twist that is sure to impress your family and friends.

    Making lemon lavender bars is straightforward, requiring just a few simple ingredients and minimal effort. Whether you’re a baking novice or an experienced pro, this recipe is easy to follow and yields delicious results!

    Ingredients

    • 1 cup all-purpose flour
    • 1/2 cup unsalted butter, softened
    • 1/4 cup powdered sugar
    • 1/4 teaspoon salt
    • 2 large eggs
    • 1 cup granulated sugar
    • 1/4 cup fresh lemon juice (about 2 lemons)
    • 1 tablespoon lemon zest
    • 1 tablespoon dried culinary lavender
    • 1/4 teaspoon baking powder
    • Powdered sugar for dusting

    Instructions

    1. Preheat your oven to 350°F (175°C) and grease an 8×8 inch baking pan.
    2. In a mixing bowl, combine flour, softened butter, powdered sugar, and salt. Mix until crumbly. Press the mixture into the bottom of the prepared pan to form a crust.
    3. Bake the crust for 15-20 minutes until lightly golden. Remove from the oven and let cool slightly.
    4. In another bowl, whisk together eggs, granulated sugar, lemon juice, lemon zest, lavender, and baking powder until smooth.
    5. Pour the lemon mixture over the crust and bake for an additional 20-25 minutes until the center is set.
    6. Let the bars cool completely in the pan before slicing. Dust with powdered sugar before serving.
  • 7 Irresistible Tiramisu Recipes You Need to Try

    7 Irresistible Tiramisu Recipes You Need to Try

    Tiramisu is a beloved Italian dessert that brings together layers of coffee-soaked ladyfingers and a rich mascarpone cream. It’s a perfect blend of flavors, offering a delightful balance of sweetness and a hint of bitterness from the coffee. This classic treat is a crowd-pleaser, whether you’re enjoying it at a fancy dinner or a casual get-together.

    Dairy-Free Tiramisu Alternatives

    A slice of dairy-free tiramisu on a plate garnished with chocolate shavings and cocoa powder.

    Tiramisu is a classic Italian dessert known for its creamy layers and rich coffee flavor. For those looking for a dairy-free twist, there are several tasty alternatives that maintain the essence of this beloved treat without the use of dairy. These options can still deliver that indulgent taste and satisfying texture we all love.

    Making dairy-free tiramisu is straightforward and fun. You’ll use ingredients like coconut cream or cashew cream to create a luscious filling. With the right coffee-soaked layers, you won’t miss the traditional ingredients at all. It’s a delightful dessert that everyone can enjoy!

    Ingredients

    • 1 cup coconut cream
    • 1/4 cup powdered sugar
    • 1 teaspoon vanilla extract
    • 1 cup strong brewed coffee, cooled
    • 2 tablespoons coffee liqueur (optional)
    • 1 package dairy-free ladyfingers
    • Cocoa powder for dusting
    • Chocolate shavings (for garnish)

    Instructions

    1. Prepare the Cream: In a mixing bowl, whip the coconut cream, powdered sugar, and vanilla extract together until smooth and fluffy.
    2. Mix the Coffee: In a shallow dish, combine the cooled coffee and coffee liqueur.
    3. Assemble the Layers: Quickly dip each ladyfinger into the coffee mixture, making sure not to soak them too long. Lay them in a dish to form the first layer.
    4. Add the Cream: Spread half of the whipped coconut cream over the ladyfingers. Repeat the process with another layer of dipped ladyfingers and the remaining cream.
    5. Chill: Cover and refrigerate for at least 4 hours, or overnight if possible.
    6. Serve: Before serving, dust the top with cocoa powder and sprinkle with chocolate shavings.

    Layering Techniques for Perfect Texture

    Layered Tiramisu dessert in a glass dish with ladyfingers, mascarpone, and cocoa powder.

    Tiramisu is a delightful Italian dessert that balances coffee-soaked layers of ladyfingers with rich mascarpone cheese. Its creamy and slightly sweet flavor makes it a favorite for many, and it’s surprisingly simple to prepare at home. The result is a treat that’s both indulgent and comforting, perfect for any occasion.

    When it comes to achieving the perfect texture, layering is key. Each layer of ladyfingers should be evenly soaked in coffee or coffee liqueur, allowing them to absorb just enough moisture without becoming soggy. The mascarpone mixture should be spread evenly to create a smooth finish, ensuring that each bite has a harmonious blend of flavors.

    Ingredients

    • 1 cup strong brewed coffee, cooled
    • 2 tablespoons coffee liqueur (optional)
    • 3 large egg yolks
    • 1/2 cup granulated sugar
    • 1 cup mascarpone cheese
    • 1 cup heavy cream
    • 24 ladyfingers
    • Cocoa powder for dusting

    Instructions

    1. Prepare the Coffee: Brew a strong cup of coffee and allow it to cool. Mix in coffee liqueur if desired.
    2. Make the Cream Mixture: In a mixing bowl, whisk together egg yolks and sugar until thick and pale. Gently fold in mascarpone until smooth. In another bowl, whip heavy cream until stiff peaks form, then fold into the mascarpone mixture.
    3. Layer the Dessert: Quickly dip each ladyfinger into the coffee mixture, ensuring they’re just soaked. Arrange half of them in a serving dish. Spread half of the mascarpone mixture over the ladyfingers. Repeat with remaining ladyfingers and mascarpone.
    4. Chill: Cover and refrigerate for at least 4 hours, or overnight for best results, allowing the flavors to meld.
    5. Serve: Dust the top with cocoa powder just before serving for an elegant finish.

    Traditional Italian Tiramisu Recipe

    A delicious traditional Italian tiramisu dessert with layers of coffee-soaked ladyfingers and creamy mascarpone.

    Tiramisu is a classic Italian dessert that combines coffee-soaked ladyfingers with a rich mascarpone cheese mixture. This treat is both creamy and light, offering a perfect balance of sweetness and a hint of bitterness from the coffee. Its layers create a delightful contrast in textures, making each bite a little piece of heaven.

    Surprisingly simple to prepare, tiramisu doesn’t require any baking, which makes it a favorite for home cooks. With just a few ingredients, you can whip up this delicious dessert that’s sure to impress your guests or enjoy it just for yourself!

    Ingredients

    • 6 egg yolks
    • 3/4 cup granulated sugar
    • 2/3 cup milk
    • 1 1/4 cups heavy cream
    • 1 cup mascarpone cheese
    • 1 cup strong brewed coffee, cooled
    • 1 tablespoon coffee liqueur (optional)
    • 24-30 ladyfinger cookies
    • Cocoa powder for dusting

    Instructions

    1. In a medium saucepan, whisk together the egg yolks and sugar. Add the milk and cook over low heat, stirring constantly until the mixture thickens. Remove from heat and let it cool.
    2. In a large bowl, whip the heavy cream until soft peaks form. Gently fold in the mascarpone cheese into the whipped cream until smooth.
    3. Combine the cooled custard with the mascarpone mixture. Stir until fully incorporated.
    4. In a shallow dish, mix the brewed coffee with the coffee liqueur. Quickly dip each ladyfinger into the coffee mixture and layer them at the bottom of a dish.
    5. Spread a layer of the mascarpone mixture over the ladyfingers. Repeat the layers until you run out of ingredients, ending with the mascarpone mixture on top.
    6. Cover and refrigerate for at least 4 hours, or overnight for better flavor. Before serving, dust the top with cocoa powder.

    Tiramisu Storage: Keeping It Fresh

    A glass dish filled with layered tiramisu topped with cocoa powder.

    Tiramisu is a delightful Italian dessert that layers coffee-soaked ladyfingers with a rich mascarpone cheese filling. Its creamy texture and coffee flavor make it an irresistible treat. While it may seem a bit fancy, it’s surprisingly simple to make at home.

    To enjoy your tiramisu at its best, proper storage is key. Keep it in the refrigerator, tightly covered, to maintain its freshness. It can last for about 3 to 4 days, but the flavors only get better as it sits. Just remember to avoid freezing, as it can alter the texture of the cream.

    Ingredients

    • 6 egg yolks
    • 3/4 cup granulated sugar
    • 2/3 cup milk
    • 1 1/4 cups heavy cream
    • 8 ounces mascarpone cheese
    • 1 cup strong brewed coffee, cooled
    • 2 tablespoons coffee liqueur (optional)
    • 24 ladyfingers
    • Cocoa powder for dusting

    Instructions

    1. Make the Custard: In a saucepan, whisk together egg yolks and sugar over medium heat. Slowly add milk while stirring and cook until thickened. Remove from heat and let it cool.
    2. Whip the Cream: In a large bowl, beat heavy cream until stiff peaks form. Gently fold in mascarpone cheese until smooth.
    3. Combine: Once the custard is cool, fold it into the whipped cream mixture until well combined.
    4. Assemble: Dip ladyfingers in coffee (and liqueur if using) and layer them in a dish. Spread half of the cream mixture over the ladyfingers. Repeat layers, finishing with cream.
    5. Chill: Cover and refrigerate for at least 4 hours or overnight for best flavor. Dust with cocoa powder before serving.

    Serving Suggestions for Tiramisu

    A beautifully arranged tiramisu dessert with coffee cups and flowers in the background.

    Tiramisu is a classic Italian dessert that combines rich coffee flavors with creamy mascarpone cheese and delicate ladyfingers. The taste is a delightful balance of sweetness and a hint of bitterness from the coffee, making it an irresistible treat. This recipe is simple enough for anyone to try, whether you’re a seasoned baker or just starting out.

    When serving tiramisu, presentation can enhance the experience. Consider layering slices on elegant plates and pairing them with a cup of freshly brewed espresso or cappuccino. You can also sprinkle cocoa powder or chocolate shavings on top for a decorative touch. Fresh berries or a sprig of mint can add a pop of color to your dessert table, making every serving feel like a special occasion.

    Ingredients

    • 1 cup strong brewed coffee, cooled
    • 3 large eggs, separated
    • 1/2 cup granulated sugar
    • 1 cup mascarpone cheese
    • 1 teaspoon vanilla extract
    • 24 ladyfingers
    • Cocoa powder for dusting
    • Dark chocolate shavings (optional)

    Instructions

    1. Prepare the Coffee: Brew a strong cup of coffee and allow it to cool completely.
    2. Make the Cream: In a bowl, whisk the egg yolks and sugar until pale and creamy. Add the mascarpone cheese and vanilla extract, mixing until smooth.
    3. Whip the Egg Whites: In a separate bowl, beat the egg whites until stiff peaks form. Carefully fold the whipped egg whites into the mascarpone mixture.
    4. Assemble the Tiramisu: Quickly dip each ladyfinger into the cooled coffee and layer them in a dish. Spread half of the mascarpone mixture over the ladyfingers. Repeat with another layer of dipped ladyfingers and the remaining mascarpone mix.
    5. Chill: Cover the dish and refrigerate for at least 4 hours, preferably overnight.
    6. Serve: Dust the top with cocoa powder and sprinkle with chocolate shavings just before serving.

    Variations on Tiramisu: Flavors and Ingredients

    A variety of tiramisu desserts in layered cubes with different colors and flavors.

    Tiramisu is a classic Italian dessert that blends creamy mascarpone cheese with rich coffee flavors. This delightful treat is loved for its light, fluffy texture and indulgent taste. Making tiramisu is quite simple, making it a perfect choice for both novice bakers and experienced chefs alike.

    There are several exciting variations to explore, each adding a unique twist. You can try flavored liqueurs like hazelnut or fruit-infused options, which can transform the traditional recipe. Additionally, experimenting with different types of coffee or even incorporating chocolate layers can elevate your tiramisu game!

    Ingredients

    • 1 cup brewed espresso or strong coffee, cooled
    • 1/2 cup coffee liqueur (like Kahlua)
    • 6 large egg yolks
    • 3/4 cup granulated sugar
    • 2 cups mascarpone cheese
    • 1 1/2 cups heavy cream
    • 1 teaspoon vanilla extract
    • 24 ladyfinger cookies
    • Cocoa powder for dusting
    • Dark chocolate shavings for garnish (optional)

    Instructions

    1. Prepare the Coffee Mixture: In a shallow dish, mix the cooled espresso and coffee liqueur. Set aside.
    2. Make the Cream Mixture: In a large bowl, whisk egg yolks and sugar together until pale and fluffy. Fold in mascarpone cheese until smooth.
    3. Whip the Cream: In another bowl, beat heavy cream and vanilla extract until soft peaks form. Gently fold the whipped cream into the mascarpone mixture.
    4. Assemble the Tiramisu: Dip each ladyfinger briefly in the coffee mixture and layer them in a dish. Spread half of the mascarpone mixture over the ladyfingers, followed by another layer of dipped ladyfingers, and top with the remaining mascarpone mixture.
    5. Chill: Cover and refrigerate for at least 4 hours, or overnight for best results. Before serving, dust with cocoa powder and garnish with chocolate shavings if desired.

    History of Tiramisu: From Italy to the World

    A beautifully presented tiramisu dessert with layers of coffee-soaked ladyfingers and mascarpone cream, garnished with strawberries.

    Tiramisu is a classic Italian dessert that layers coffee-soaked ladyfingers with a rich, creamy mascarpone mixture. It offers a delightful balance of sweet and slightly bitter flavors, making it a favorite among dessert lovers. While it may seem fancy, tiramisu is surprisingly simple to make, requiring just a handful of ingredients and a bit of patience for the chilling process.

    This beloved treat has traveled far from its Italian roots, winning hearts globally. Each bite brings a taste of Italy, filled with tradition and warmth. Whether served after a hearty meal or enjoyed as an afternoon pick-me-up, tiramisu remains a timeless indulgence.

    Ingredients

    • 1 cup strong brewed coffee, cooled
    • 3 large eggs, separated
    • 1/2 cup granulated sugar
    • 1 cup mascarpone cheese
    • 1 teaspoon vanilla extract
    • 24 ladyfinger cookies
    • Cocoa powder for dusting

    Instructions

    1. Prepare the Coffee: Brew strong coffee and let it cool. You can add a splash of rum or coffee liqueur for extra flavor, if desired.
    2. Mix the Egg Yolks: In a bowl, whisk together the egg yolks and sugar until pale and creamy. Add the mascarpone cheese and vanilla extract, mixing until smooth.
    3. Beat the Egg Whites: In another bowl, whisk the egg whites until stiff peaks form. Gently fold the egg whites into the mascarpone mixture.
    4. Assemble the Tiramisu: Quickly dip each ladyfinger into the coffee, ensuring they’re soaked but not soggy. Layer half of the soaked ladyfingers in a dish, followed by half of the mascarpone mixture. Repeat with the remaining ingredients.
    5. Chill: Cover and refrigerate for at least 4 hours, or overnight for best results. Before serving, dust with cocoa powder for a finishing touch.
  • 6 Irresistible Dessert Recipes You Must Try

    6 Irresistible Dessert Recipes You Must Try

    If you’re in the mood for something sweet, we’ve rounded up six dessert recipes that are pure bliss. These heavenly treats are easy to whip up and are sure to impress anyone with a sweet tooth. Get ready to satisfy those cravings with delightful flavors and simple ingredients!

    7 Irresistible Tiramisu Recipes You Need to Try

    A delicious layered tiramisu dessert on a plate.

    Tiramisu is a classic dessert that everyone loves. Its layers of coffee-soaked ladyfingers and creamy mascarpone are simply irresistible. Check out these delightful recipes and treat yourself to a slice of heaven!

    7 Delectable Cheesecake Recipes You Need to Try

    A slice of cheesecake topped with fresh berries on a white plate.

    Cheesecake is a crowd-pleaser, and this one is no exception. Topped with fresh strawberries, blueberries, and raspberries, it’s as beautiful as it is tasty. Check out this amazing cheesecake recipe for a delightful treat you’ll want to make again and again.

    7 Delectable Lemon Bar Recipes You Need to Try

    A tray of freshly baked lemon bars topped with powdered sugar and lemon slices.

    Lemon bars are the perfect sweet treat for any occasion. Their tangy flavor and soft, buttery texture make them hard to resist. Check out these amazing recipes and get ready to whip up some delicious lemon bars of your own!

    For a delightful twist, try this classic lemon bar recipe that everyone will love.

    7 Irresistible Chocolate Chip Cookie Recipes to Try

    A plate of freshly baked chocolate chip cookies with a glass of milk

    Chocolate chip cookies are an all-time favorite, and they’re perfect for any occasion. Whether you like them soft and gooey or crispy and chewy, there’s a recipe for everyone. Check out these amazing chocolate chip cookie recipes that you won’t want to miss!

    7 Irresistible Brownie Recipes You Need to Try

    Stack of brownies dusted with powdered sugar

    If you’re a brownie lover, you’re in for a treat! These heavenly brownie recipes are sure to satisfy your sweet tooth. From classic fudgy bites to creative twists, each recipe brings something delicious to the table.

    7 Irresistible Cinnamon Roll Recipes You Need to Try

    Delicious cinnamon rolls drizzled with cream cheese icing and garnished with cinnamon sticks.

    Cinnamon rolls are the ultimate comfort food, perfect for any occasion. These warm, gooey treats topped with cream cheese icing are hard to resist. Check out this cinnamon roll recipe that will make your kitchen smell heavenly!

  • 5 Best Cobb Salad Recipes You Need to Try

    5 Best Cobb Salad Recipes You Need to Try

    Cobb salad is a classic favorite that brings together fresh ingredients in a delicious, satisfying way. With crispy lettuce, juicy tomatoes, creamy avocado, and a variety of protein options, it’s a perfect choice for any meal. This salad not only looks appealing but also packs a punch with its flavors and textures, making it a go-to for gatherings or quick lunches. Let’s dig into what makes the best Cobb salad shine!

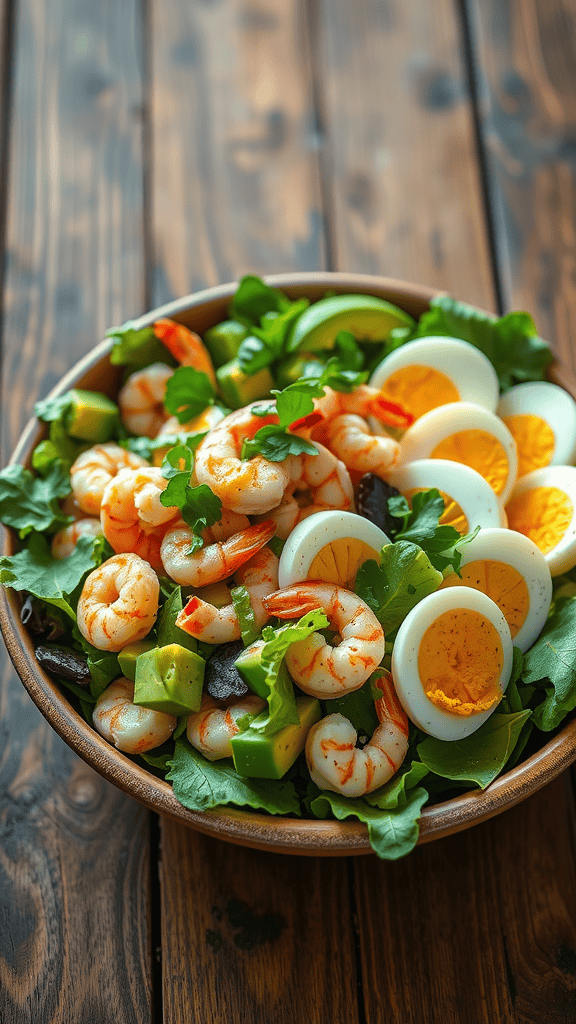
    Seafood Cobb

    A vibrant Seafood Cobb salad with shrimp, avocado, hard-boiled eggs, and greens.

    The Seafood Cobb is a delightful twist on the classic Cobb salad, featuring fresh shrimp and creamy avocado that make for a light yet satisfying meal. This recipe brings together crisp greens, hard-boiled eggs, and a zesty dressing, creating a perfect balance of flavors and textures.

    It’s simple to prepare and perfect for a quick lunch or a light dinner. The combination of seafood and veggies offers a refreshing taste, making it a great option for warm days or whenever you’re in the mood for something fresh.

    Ingredients

    • 4 cups mixed salad greens
    • 1 cup cooked shrimp, peeled and deveined
    • 2 hard-boiled eggs, sliced
    • 1 avocado, diced
    • 1/2 cup cherry tomatoes, halved
    • 1/4 cup crumbled feta cheese
    • 1/4 cup chopped fresh parsley
    • 3 tablespoons olive oil
    • 2 tablespoons lemon juice
    • Salt and pepper to taste

    Instructions

    1. Prepare the Salad Base: In a large bowl, layer the mixed greens to create a bed for the toppings.
    2. Add Seafood and Toppings: Scatter the cooked shrimp, sliced hard-boiled eggs, diced avocado, cherry tomatoes, and feta cheese over the greens.
    3. Make the Dressing: In a small bowl, whisk together olive oil, lemon juice, salt, and pepper until well combined.
    4. Dress the Salad: Drizzle the dressing over the salad and gently toss to combine all ingredients.
    5. Garnish and Serve: Sprinkle the chopped parsley on top, and serve immediately for a fresh and tasty meal.

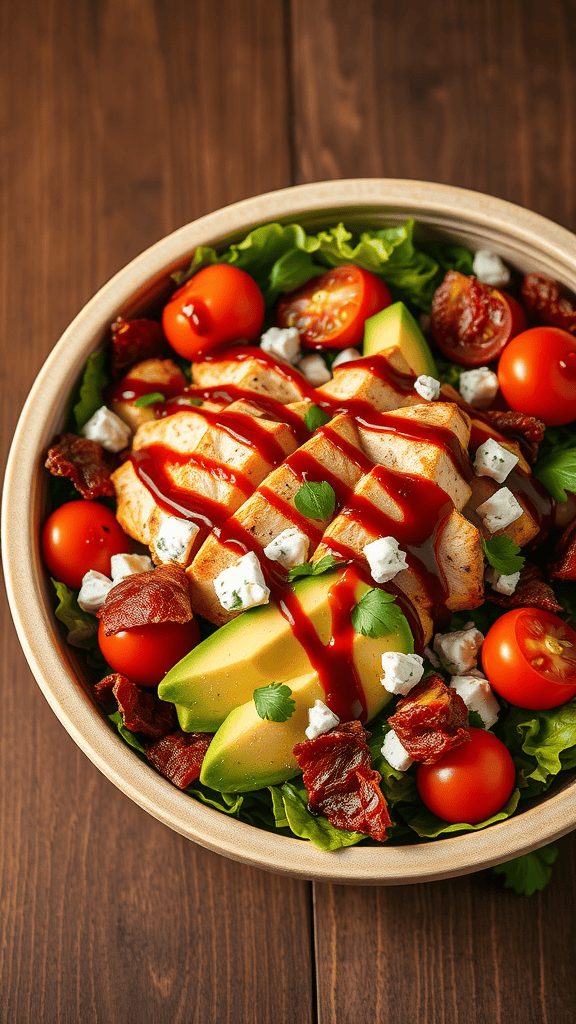
    BBQ Cobb

    A vibrant BBQ Cobb salad with grilled chicken, avocado, bacon, and BBQ sauce

    The BBQ Cobb salad takes the classic Cobb to a new level with a smoky twist. It combines tender grilled chicken, crispy bacon, fresh veggies, and a tangy BBQ sauce for a delightful flavor explosion. Perfect for a casual lunch or a hearty dinner, this salad is simple to whip up and will impress your guests!

    Each bite offers a balance of textures, from the crunchy lettuce to the creamy blue cheese. This dish is not just satisfying; it’s also visually appealing, making it a great choice for gatherings. Enjoy the smoky goodness of BBQ while keeping it fresh and light!

    Ingredients

    • 2 cups romaine lettuce, chopped
    • 1 cup grilled chicken, sliced
    • 4 slices crispy bacon, crumbled
    • 1/2 cup cherry tomatoes, halved
    • 1 avocado, sliced
    • 1/2 cup blue cheese, crumbled
    • 1/4 cup BBQ sauce
    • Salt and pepper to taste

    Instructions

    1. Prepare the Chicken: Season the grilled chicken with salt and pepper. Slice and set aside.
    2. Assemble the Salad: In a large bowl, layer the romaine lettuce, grilled chicken, crumbled bacon, cherry tomatoes, and avocado.
    3. Add Cheese: Sprinkle the blue cheese on top of the salad.
    4. Drizzle with BBQ Sauce: Pour the BBQ sauce over the salad for that smoky flavor.
    5. Toss and Serve: Gently toss the salad to combine. Serve immediately and enjoy!

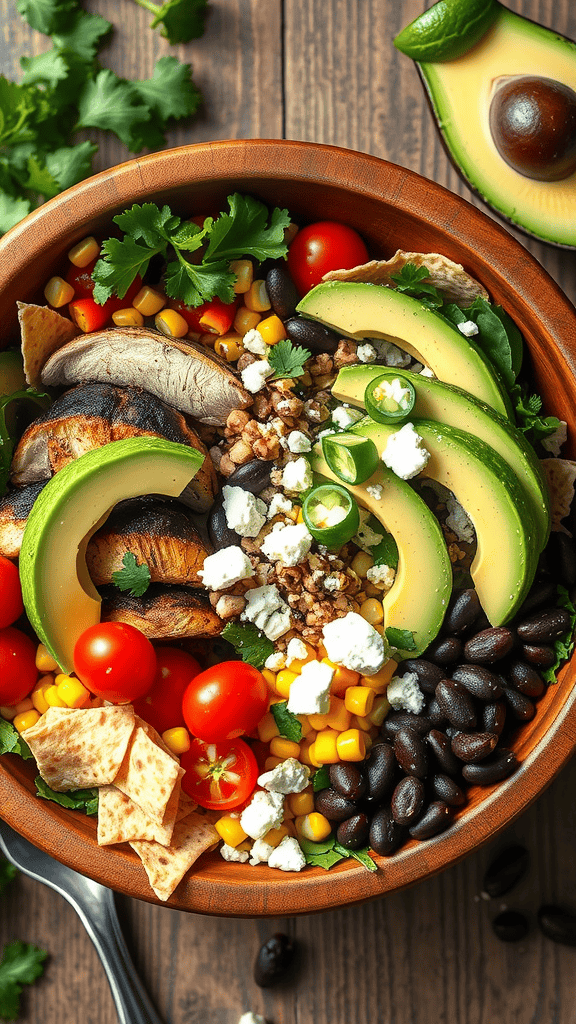
    Southwestern Cobb

    A vibrant Southwestern Cobb salad with greens, grilled chicken, avocado, and colorful vegetables.

    The Southwestern Cobb salad is a delightful twist on the classic, packed with vibrant flavors and textures that will brighten your meal. With fresh greens, smoky grilled chicken, and a medley of colorful veggies, this salad is both satisfying and nutritious. The combination of creamy avocado, crunchy tortilla strips, and zesty dressing makes each bite a burst of deliciousness.

    This salad is not only tasty but also simple to prepare. It’s perfect for a quick lunch or a hearty dinner. Whether you’re feeding the family or impressing friends, the Southwestern Cobb is sure to be a hit!

    Ingredients

    • 4 cups mixed greens
    • 1 cup grilled chicken, sliced
    • 1/2 cup black beans, rinsed and drained
    • 1 cup corn kernels (fresh or frozen)
    • 1 cup cherry tomatoes, halved
    • 1 avocado, sliced
    • 1/4 cup crumbled feta cheese
    • 1/4 cup tortilla strips
    • 1/4 cup fresh cilantro, chopped
    • 1/4 cup lime juice
    • 1/4 cup olive oil
    • 1 teaspoon cumin
    • Salt and pepper to taste

    Instructions

    1. Prepare the Dressing: In a small bowl, whisk together lime juice, olive oil, cumin, salt, and pepper. Set aside.
    2. Assemble the Salad: In a large salad bowl, layer the mixed greens, grilled chicken, black beans, corn, cherry tomatoes, and avocado slices.
    3. Add Toppings: Sprinkle the feta cheese, tortilla strips, and chopped cilantro over the top.
    4. Dress the Salad: Drizzle the dressing over the salad just before serving and toss gently to combine.
    5. Serve: Enjoy your Southwestern Cobb salad immediately for the best flavor and freshness!

    Italian Cobb

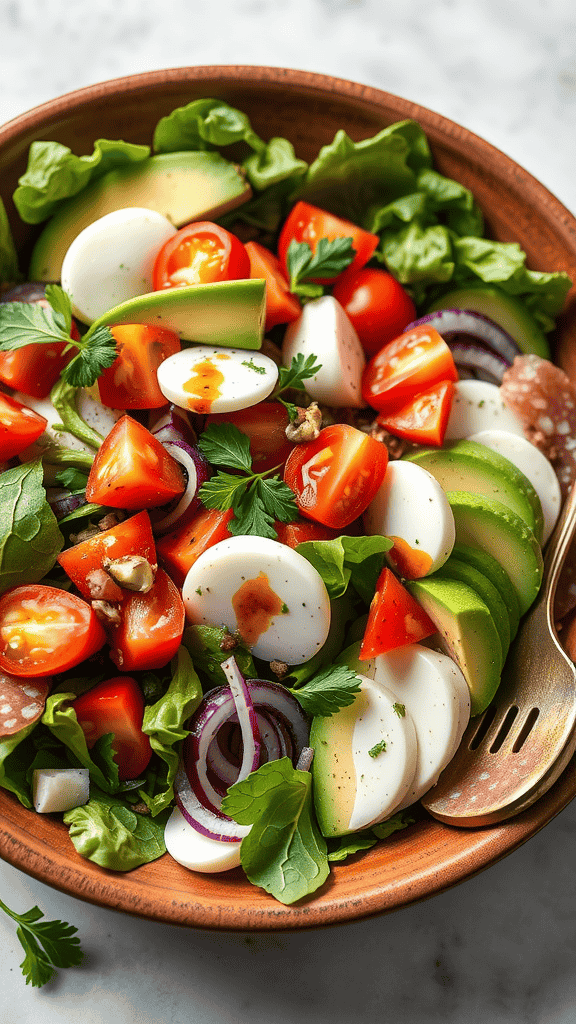
    A vibrant Italian Cobb salad with fresh ingredients like romaine lettuce, cherry tomatoes, avocado, mozzarella, and more.

    The Italian Cobb is a delightful twist on the classic salad, combining fresh ingredients with zesty Italian flavors. This vibrant dish features crisp greens, creamy mozzarella, and savory meats, making it a satisfying meal any time of day.

    With its mix of textures and flavors, the Italian Cobb is not just tasty but also simple to prepare. Perfect for lunch or a light dinner, it’s a hearty salad that feels indulgent without being heavy.

    Ingredients

    • 1 large head of romaine lettuce, chopped
    • 1 cup cherry tomatoes, halved
    • 1 avocado, diced
    • 8 ounces fresh mozzarella, sliced
    • 4 hard-boiled eggs, sliced
    • 1/2 cup red onion, thinly sliced
    • 1/2 cup salami, sliced
    • 1/4 cup olives, sliced
    • 1/4 cup fresh basil, chopped
    • Olive oil and balsamic vinegar for dressing

    Instructions

    1. Prepare the Base: In a large salad bowl, layer the chopped romaine lettuce as the base.
    2. Add the Veggies: Top the lettuce with cherry tomatoes, diced avocado, and sliced red onion.
    3. Layer the Proteins: Add the slices of fresh mozzarella, hard-boiled eggs, and salami evenly over the salad.
    4. Finish with Olives and Herbs: Sprinkle the olives and chopped basil on top for added flavor.
    5. Dress the Salad: Drizzle with olive oil and balsamic vinegar before serving, tossing gently to combine all the ingredients.

    Vegetarian Cobb

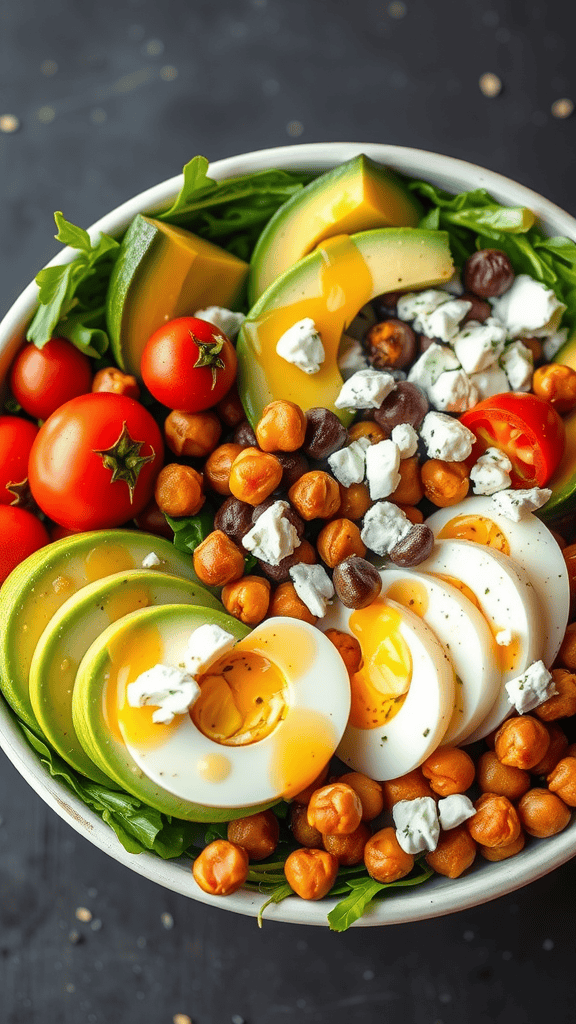
    A colorful vegetarian Cobb salad with mixed greens, cherry tomatoes, sliced avocado, chickpeas, feta cheese, and hard-boiled eggs.

    A Vegetarian Cobb Salad is a vibrant twist on the classic, layered with fresh veggies, creamy avocado, and protein-packed ingredients. This salad bursts with flavor from the juicy tomatoes, crunchy chickpeas, and rich feta cheese, making it not only delicious but also satisfying. It’s a simple dish that comes together quickly, perfect for a light lunch or a hearty dinner.

    The combination of colors and textures makes each bite enjoyable. With the creamy dressing tying everything together, this salad is sure to please everyone at the table, whether they’re vegetarian or not. Gather your ingredients and whip up this refreshing and nutritious meal in no time!

    Ingredients

    • 4 cups mixed greens
    • 1 cup cherry tomatoes, halved
    • 1 avocado, sliced
    • 1 cup canned chickpeas, rinsed and drained
    • 1/2 cup feta cheese, crumbled
    • 4 hard-boiled eggs, sliced
    • 1/4 cup red onion, thinly sliced
    • 1/4 cup olive oil
    • 2 tablespoons red wine vinegar
    • 1 teaspoon Dijon mustard
    • Salt and pepper to taste

    Instructions

    1. Prepare the Dressing: In a small bowl, whisk together olive oil, red wine vinegar, Dijon mustard, salt, and pepper until well combined.
    2. Assemble the Salad: In a large bowl, place the mixed greens as the base. Layer on the cherry tomatoes, avocado slices, chickpeas, feta cheese, sliced eggs, and red onion.
    3. Drizzle with Dressing: Pour the dressing over the salad and toss gently to combine, or serve it on the side.
    4. Serve: Enjoy immediately as a refreshing meal or cover and refrigerate for later.
  • 5 Classic Caesar Salad Recipes You Need to Try

    5 Classic Caesar Salad Recipes You Need to Try

    Classic Caesar salad is a timeless favorite that combines crisp romaine lettuce, tangy dressing, and crunchy croutons for a deliciously satisfying side or main dish. Here, we’ve gathered some of the finest recipes that put a fresh twist on this staple while still honoring its beloved roots. Get ready to whip up the perfect Caesar salad!

    Kale Caesar

    A bowl of Kale Caesar salad with croutons and lemon slices.

    Kale Caesar is a fresh twist on the classic Caesar salad, bringing a nutritious punch to your plate. This version uses hearty kale, which adds a slightly bitter yet satisfying crunch, perfectly balanced by creamy dressing and crunchy croutons. You’ll love how the flavors blend together with just the right amount of tang from the lemon.

    Not only is it delicious, but it’s also simple to prepare. With just a few ingredients, you can whip up this salad in no time. Whether it’s a side dish or the star of your meal, Kale Caesar is sure to impress!

    Ingredients

    • 4 cups chopped kale, stems removed
    • 1 cup croutons
    • 1/2 cup grated Parmesan cheese
    • 1/4 cup Caesar dressing
    • 1 tablespoon fresh lemon juice
    • Salt and pepper to taste

    Instructions

    1. Prepare the Kale: Rinse the kale thoroughly and remove the tough stems. Chop the leaves into bite-sized pieces and place them in a large bowl.
    2. Add Dressing: Drizzle the Caesar dressing and lemon juice over the kale. Toss well to ensure all the leaves are coated.
    3. Mix in Croutons and Cheese: Add croutons and grated Parmesan to the bowl, mixing gently to combine.
    4. Season and Serve: Taste the salad and add salt and pepper as needed. Serve immediately and enjoy your Kale Caesar salad!

    Avocado Caesar

    Bowl of avocado Caesar salad with croutons and dressing

    The Avocado Caesar is a delightful twist on the classic version that brings creaminess and richness to the table. The fresh taste of the romaine lettuce pairs perfectly with the smoothness of ripe avocado, creating a salad that’s both satisfying and refreshing. It’s a quick and easy dish to prepare, making it perfect for a light lunch or a side at dinner.

    This salad combines crunchy croutons with a creamy dressing, making each bite a burst of flavor. Whether you’re a fan of traditional Caesar salads or looking for something new, this avocado variation is sure to impress and satisfy.

    Ingredients

    • 1 head romaine lettuce, chopped
    • 1 ripe avocado, diced
    • 1 cup croutons
    • 1/4 cup grated Parmesan cheese
    • 1/4 cup Caesar dressing
    • Salt and pepper to taste

    Instructions

    1. Prepare the Lettuce: Wash and chop the romaine lettuce into bite-sized pieces. Place it in a large salad bowl.
    2. Add Avocado: Cut the ripe avocado in half, remove the pit, and dice it. Gently add the avocado to the lettuce.
    3. Add Croutons and Cheese: Sprinkle the croutons and grated Parmesan cheese over the salad.
    4. Dress the Salad: Pour the Caesar dressing over the salad and toss gently to combine. Make sure everything is well-coated.
    5. Season: Add salt and pepper to taste, and give it one last gentle toss before serving.

    Grilled Caesar

    A vibrant grilled Caesar salad with fresh romaine, croutons, and Parmesan cheese.

    Grilled Caesar salad brings a delightful twist to the classic recipe. The combination of smoky, charred romaine and creamy dressing creates a blend of flavors that’s refreshing and satisfying. It’s easy to prepare, making it a fantastic choice for a quick lunch or a side dish for dinner.

    The grill enhances the fresh taste of the lettuce while the croutons add a satisfying crunch. Toss in some Parmesan shavings, and you’ve got a meal that’s simple yet feels special. Let’s get cooking!

    Ingredients

    • 2 heads of romaine lettuce
    • 1 cup homemade or store-bought Caesar dressing
    • 1 cup croutons
    • 1/2 cup shaved Parmesan cheese
    • 1 tablespoon olive oil
    • Salt and pepper to taste

    Instructions

    1. Preheat the grill to medium heat.
    2. Cut the romaine heads in half lengthwise and brush the cut sides with olive oil. Season with salt and pepper.
    3. Place the romaine on the grill, cut side down, and grill for about 2-3 minutes until lightly charred. Flip and grill for another minute.
    4. Remove from the grill and let cool slightly before chopping into bite-sized pieces.
    5. In a large bowl, combine the grilled romaine, Caesar dressing, croutons, and Parmesan cheese. Toss gently to combine.
    6. Serve immediately and enjoy your grilled Caesar salad!

    Mexican-Style Caesar

    A colorful Mexican-Style Caesar salad with avocado, tortilla strips, and feta cheese.

    The Mexican-Style Caesar Salad puts a delicious twist on a classic favorite. With fresh ingredients like crunchy romaine, creamy avocado, and zesty cilantro, it’s a vibrant dish bursting with flavor. The addition of tortilla strips adds a satisfying crunch, while the lime dressing gives it a refreshing kick.

    This salad is super easy to whip up, making it perfect for a quick lunch or a light dinner. Whether you’re serving it at a family gathering or just treating yourself, this recipe is sure to impress your taste buds!

    Ingredients

    • 4 cups romaine lettuce, chopped
    • 1 ripe avocado, sliced
    • 1 cup cherry tomatoes, halved
    • 1/2 cup crumbled feta cheese
    • 1 cup tortilla strips
    • 1/4 cup fresh cilantro, chopped
    • 2 tablespoons lime juice
    • 1/4 cup olive oil
    • Salt and pepper to taste

    Instructions

    1. Prepare the Dressing: In a small bowl, whisk together lime juice, olive oil, salt, and pepper until well combined.
    2. Assemble the Salad: In a large bowl, combine chopped romaine, cherry tomatoes, and tortilla strips. Gently toss with the dressing until everything is evenly coated.
    3. Add the Avocado and Cheese: Top the salad with sliced avocado and crumbled feta cheese. Sprinkle with fresh cilantro for added flavor.
    4. Serve: Divide the salad into bowls and enjoy immediately for the best texture and flavor.

    Caesar with Crispy Chickpeas

    A bowl of Caesar salad with crispy chickpeas, lettuce, croutons, and creamy dressing.

    This Caesar salad with crispy chickpeas adds a delightful twist to a classic favorite. The chickpeas provide a satisfying crunch while absorbing the rich flavors of the dressing, making each bite enjoyable. The combination of fresh greens, creamy dressing, and crunchy toppings creates a balanced dish that’s not only tasty but also easy to prepare.

    If you’re looking for a quick yet impressive meal, this salad is a great option. It’s perfect for a light lunch or as a side at dinner. Plus, it’s simple enough for anyone to whip up, even on busy days!

    Ingredients

    • 1 can (15 oz) chickpeas, drained and rinsed
    • 1 tablespoon olive oil
    • 1 teaspoon garlic powder
    • 1 teaspoon paprika
    • 1 teaspoon salt
    • 6 cups romaine lettuce, chopped
    • 1/2 cup Caesar dressing
    • 1/4 cup grated Parmesan cheese
    • 1 cup croutons
    • Fresh parsley, for garnish

    Instructions

    1. Preheat your oven to 400°F (200°C). On a baking sheet, toss the chickpeas with olive oil, garlic powder, paprika, and salt until evenly coated.
    2. Spread the chickpeas in a single layer and roast for about 25-30 minutes, or until golden and crispy.
    3. In a large bowl, combine the chopped romaine lettuce and Caesar dressing. Toss well to coat the lettuce evenly.
    4. Add the roasted chickpeas, croutons, and Parmesan cheese on top. Toss gently to combine.
    5. Garnish with fresh parsley and serve immediately for the best crunch!
  • 5 Delicious Greek Salad Recipes to Try Today

    5 Delicious Greek Salad Recipes to Try Today

    If you’re on the hunt for fresh, flavorful Greek salad recipes, you’re in the right place! Packed with vibrant veggies, tangy feta, and a drizzle of olive oil, Greek salads are a simple and satisfying dish perfect for any occasion. Here’s a collection of our favorite recipes to help you whip up your own delicious version in no time!

    Greek Pasta Salad

    A colorful bowl of Greek Pasta Salad with cherry tomatoes, olives, cucumbers, and feta cheese.

    Greek Pasta Salad is a delightful mix of fresh flavors and textures that brings the taste of the Mediterranean right to your table. It’s a simple dish, perfect for busy weeknights or gatherings, combining pasta with vibrant vegetables and creamy feta cheese for a satisfying meal.

    This salad offers a refreshing crunch from cucumbers and bell peppers, sweetness from cherry tomatoes, and the briny goodness of olives. Tossed in a tangy dressing, it’s not only delicious but also quick to prepare, making it a go-to recipe for any occasion.

    Ingredients

    • 8 ounces pasta (penne or rotini)
    • 1 cup cherry tomatoes, halved
    • 1 cucumber, diced
    • 1 bell pepper, diced
    • 1/2 red onion, thinly sliced
    • 1 cup Kalamata olives, pitted
    • 1 cup feta cheese, crumbled
    • 1/4 cup olive oil
    • 2 tablespoons red wine vinegar
    • 1 teaspoon dried oregano
    • Salt and pepper to taste

    Instructions

    1. Cook the Pasta: In a large pot, bring salted water to a boil and cook the pasta according to package instructions. Drain and rinse under cold water.
    2. Prepare the Vegetables: In a large bowl, combine the cherry tomatoes, cucumber, bell pepper, red onion, and olives.
    3. Mix the Salad: Add the cooked pasta to the vegetable mixture, then sprinkle with feta cheese.
    4. Make the Dressing: In a small bowl, whisk together olive oil, red wine vinegar, oregano, salt, and pepper.
    5. Toss and Serve: Pour the dressing over the salad and toss to combine. Serve chilled or at room temperature.

    Greek Watermelon & Feta Salad

    A bowl of Greek Watermelon & Feta Salad garnished with mint leaves.

    This Greek Watermelon & Feta Salad is a delightful twist on traditional flavors. It combines the sweetness of ripe watermelon with the salty touch of feta cheese, creating a refreshing dish perfect for warm days. The vibrant colors and contrasting flavors make it a feast for the eyes and the palate.

    Simple to prepare, this salad comes together in just a few minutes, making it an easy addition to any meal. Whether enjoyed as a light lunch or a side dish at a summer barbecue, it’s sure to impress friends and family.

    Ingredients

    • 4 cups diced watermelon
    • 1 cup crumbled feta cheese
    • 1/4 cup finely chopped red onion
    • 1/4 cup chopped fresh mint
    • 2 tablespoons olive oil
    • 1 tablespoon balsamic vinegar
    • Salt and pepper to taste

    Instructions

    1. In a large bowl, combine the diced watermelon, crumbled feta, chopped red onion, and fresh mint.
    2. In a small bowl, whisk together the olive oil, balsamic vinegar, salt, and pepper.
    3. Drizzle the dressing over the salad and gently toss to combine.
    4. Serve immediately or chill for a bit to let the flavors meld.

    Roasted Veggie Greek Salad

    A colorful bowl of roasted veggie Greek salad with feta, olives, and fresh vegetables.

    This Roasted Veggie Greek Salad is a tasty twist on the classic dish. The combination of vibrant roasted vegetables and fresh ingredients creates a medley of flavors that dances on your palate. It’s simple to make and perfect for a light meal or as a side dish for gatherings.

    Roasting the veggies enhances their natural sweetness and adds a delicious char. Tossed with tangy feta cheese, olives, and a drizzle of olive oil, this salad is both satisfying and refreshing. Whether you’re a fan of Greek cuisine or trying something new, this recipe is sure to please.

    Ingredients

    • 1 zucchini, sliced
    • 1 bell pepper, sliced
    • 1 red onion, sliced
    • 1 cup cherry tomatoes, halved
    • 1 cup black olives
    • 1 cup feta cheese, cubed
    • 2 tablespoons olive oil
    • 1 teaspoon dried oregano
    • Salt and pepper to taste
    • Fresh parsley for garnish

    Instructions

    1. Preheat your oven to 400°F (200°C).
    2. In a large bowl, combine zucchini, bell pepper, and red onion. Drizzle with olive oil, and sprinkle with oregano, salt, and pepper. Toss to coat.
    3. Spread the vegetables on a baking sheet in a single layer. Roast for 20-25 minutes, or until tender and slightly charred.
    4. In a large serving bowl, combine roasted vegetables, cherry tomatoes, black olives, and feta cheese.
    5. Garnish with fresh parsley and serve warm or at room temperature.

    Greek Couscous Salad

    A bowl of Greek Couscous Salad filled with colorful vegetables, olives, and feta cheese.

    Greek Couscous Salad is a fresh and vibrant dish bursting with Mediterranean flavors. This salad combines fluffy couscous with crisp vegetables, salty feta cheese, and olives, all tossed in a zesty dressing. It’s light, refreshing, and perfect for warm days or as a side for any meal.

    Preparing this salad is simple and quick, making it an excellent choice for both busy weeknights and laid-back gatherings. The combination of textures and flavors, from the soft couscous to the crunchy peppers and tangy feta, creates a delightful dish that everyone will enjoy.

    Ingredients

    • 1 cup couscous
    • 1 1/4 cups vegetable broth
    • 1 cup cherry tomatoes, halved
    • 1 cucumber, diced
    • 1/2 red onion, thinly sliced
    • 1/2 cup Kalamata olives, pitted and halved
    • 1 cup feta cheese, diced
    • 1/4 cup fresh parsley, chopped
    • 1/4 cup olive oil
    • 2 tablespoons red wine vinegar
    • 1 teaspoon dried oregano
    • Salt and pepper to taste

    Instructions

    1. Cook the Couscous: In a saucepan, bring the vegetable broth to a boil. Stir in the couscous, cover, and remove from heat. Let it sit for about 5 minutes, then fluff with a fork.
    2. Prepare the Vegetables: While the couscous is resting, chop the cherry tomatoes, cucumber, and red onion. Combine them in a large bowl.
    3. Add Olives and Feta: Stir in the Kalamata olives and diced feta cheese to the vegetable mixture.
    4. Make the Dressing: In a small bowl, whisk together olive oil, red wine vinegar, dried oregano, salt, and pepper.
    5. Combine: Add the fluffed couscous to the bowl with the vegetables and feta. Pour the dressing over the salad and toss gently to combine. Sprinkle with fresh parsley before serving.

    Greek Chicken Wrap

    A delicious Greek chicken wrap filled with grilled chicken, fresh vegetables, and a drizzle of yogurt sauce.

    The Greek Chicken Wrap combines the fresh and vibrant flavors of Greek cuisine in a quick, healthy meal. With marinated grilled chicken, crunchy veggies, and a creamy yogurt sauce, this wrap offers a delicious balance of taste and texture. It’s not just tasty; it’s also simple to make, making it perfect for a lunch on the go or a light dinner.

    This recipe incorporates classic Greek ingredients into a handheld delight, making it fun to eat. The juicy chicken pairs wonderfully with crisp lettuce, ripe tomatoes, and tangy feta cheese, all wrapped up in a soft pita. You can whip this up in no time, and it’s customizable based on your preferences!

    Ingredients

    • 2 boneless, skinless chicken breasts
    • 2 tablespoons olive oil
    • 1 teaspoon dried oregano
    • Salt and pepper to taste
    • 4 whole wheat pita breads
    • 1 cup lettuce, chopped
    • 1 tomato, diced
    • 1/2 cucumber, sliced
    • 1/4 cup feta cheese, crumbled
    • 1/2 cup Greek yogurt
    • 1 tablespoon lemon juice
    • 1 clove garlic, minced

    Instructions

    1. Marinate the Chicken: In a bowl, mix olive oil, oregano, salt, and pepper. Add chicken and coat well. Let it marinate for at least 30 minutes.
    2. Grill the Chicken: Preheat your grill or skillet over medium heat. Cook the chicken for 6-7 minutes on each side until fully cooked. Let it rest for a few minutes, then slice into strips.
    3. Prepare the Sauce: In a small bowl, combine Greek yogurt, lemon juice, and minced garlic. Mix until smooth.
    4. Assemble the Wrap: On each pita, layer lettuce, diced tomato, cucumber slices, feta cheese, and sliced chicken. Drizzle with the yogurt sauce.
    5. Wrap and Serve: Fold the pita around the filling, cut in half if desired, and enjoy your Greek Chicken Wrap!
  • 5 Delicious Asian Sesame Chicken Salad Recipes You Must Try

    5 Delicious Asian Sesame Chicken Salad Recipes You Must Try

    Asian sesame chicken salad is a delightful blend of flavors and textures that adds a fresh twist to your meal rotation. This collection of recipes showcases easy-to-follow preparations that highlight tender chicken, crunchy vegetables, and a sesame dressing that’s both tangy and nutty. Perfect for a light lunch or a satisfying dinner, these salads are not just delicious but also quick to whip up, making them ideal for busy days.

    Thai-Inspired Chicken Salad

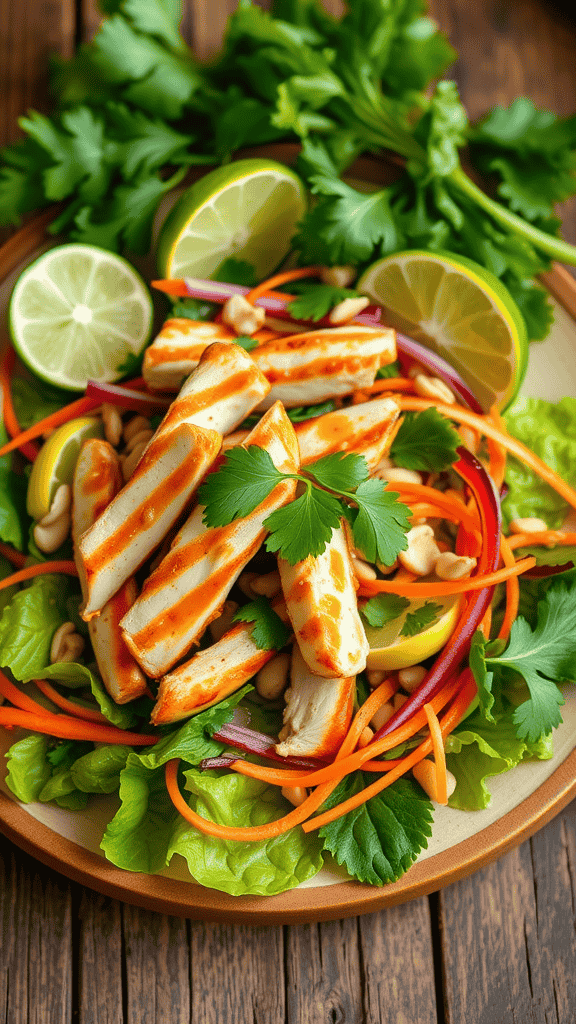
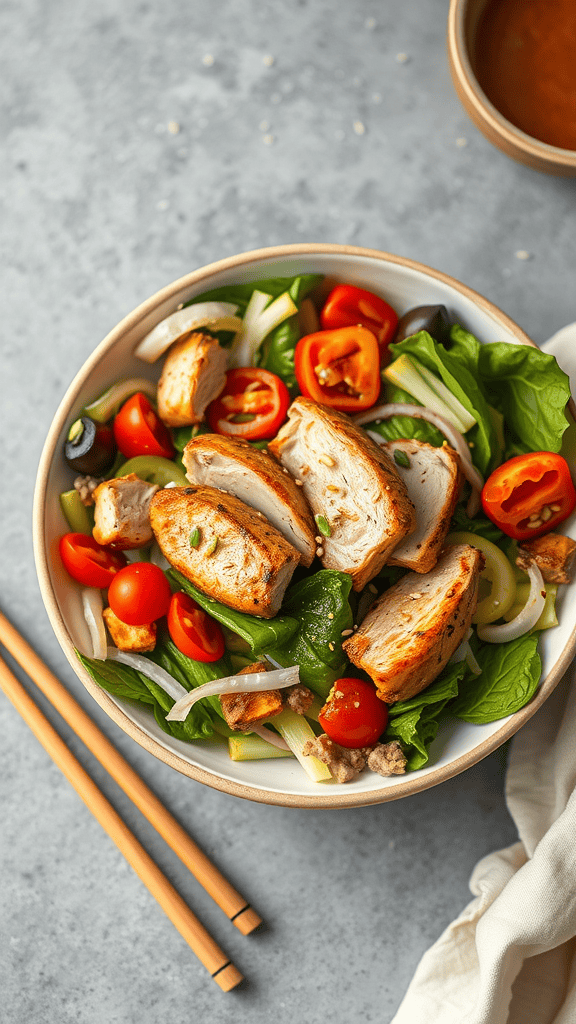
    A colorful Thai-inspired chicken salad with grilled chicken, fresh vegetables, and a lime dressing.

    This Thai-inspired chicken salad is a burst of fresh flavors and textures. It’s light yet satisfying, thanks to the grilled chicken and crunchy veggies, all tossed in a zesty dressing that ties everything together. The combination of citrusy lime, savory soy sauce, and a hint of sweetness creates a delightful balance that is refreshing and easy to love.

    Making this salad is simple and quick, perfect for a light lunch or dinner. With just a few ingredients and a short prep time, you can whip up a vibrant dish that’s sure to impress. Let’s dive into the recipe!

    Ingredients

    • 2 cups cooked, shredded chicken
    • 4 cups mixed salad greens
    • 1 cup shredded carrots
    • 1 cup red bell pepper, thinly sliced
    • 1/2 cup red onion, thinly sliced
    • 1/4 cup chopped fresh cilantro
    • 1/4 cup roasted peanuts
    • 2 tablespoons soy sauce
    • 2 tablespoons lime juice
    • 1 tablespoon honey
    • 1 tablespoon sesame oil

    Instructions

    1. In a large bowl, combine the salad greens, shredded chicken, carrots, bell pepper, red onion, cilantro, and peanuts.
    2. In a small bowl, whisk together soy sauce, lime juice, honey, and sesame oil to create the dressing.
    3. Pour the dressing over the salad and toss gently to combine all ingredients.
    4. Serve immediately, garnished with extra cilantro and peanuts if desired.

    Mandarin & Almond Chicken Salad

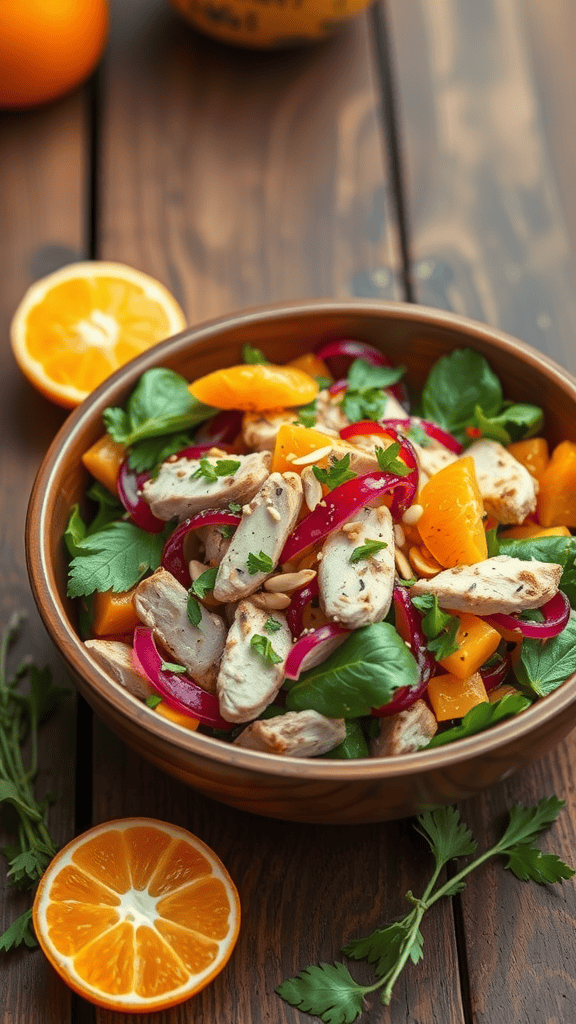
    Mandarin & Almond Chicken Salad with sliced chicken, mandarins, almonds, greens, and red onion in a bowl

    This Mandarin & Almond Chicken Salad is a delightful mix of fresh flavors and textures. Each bite is a burst of sweetness from the mandarin oranges, paired perfectly with tender chicken and crunchy almonds. It’s light yet satisfying, making it a perfect choice for lunch or a light dinner.

    What makes this recipe stand out is its simplicity. You can whip it up in no time, and it requires just a few fresh ingredients. The combination of savory chicken, sweet mandarins, and the nutty crunch of almonds creates a salad that’s not only delicious but also refreshing.

    Ingredients

    • 2 cups cooked chicken breast, sliced
    • 1 cup mandarin oranges, drained
    • 1/2 cup sliced almonds, toasted
    • 2 cups mixed greens
    • 1/4 cup red onion, thinly sliced
    • 1/4 cup fresh cilantro, chopped
    • 1/4 cup sesame dressing

    Instructions

    1. In a large bowl, combine the cooked chicken, mandarin oranges, toasted almonds, mixed greens, red onion, and cilantro.
    2. Drizzle the sesame dressing over the salad and toss gently to combine.
    3. Serve immediately, or refrigerate for 15-30 minutes to let the flavors meld.

    Korean-Style Chicken Salad

    Bowl of Korean-Style Chicken Salad with sliced chicken, greens, and vegetables

    Korean-Style Chicken Salad is a delightful mix of fresh ingredients that pack a punch of flavor and crunch. The tender chicken, marinated in a savory sauce, pairs perfectly with crisp vegetables and a light dressing. It’s a refreshing dish that balances sweet, spicy, and umami tastes, making every bite exciting.

    This salad is simple to prepare, making it a great option for a quick weeknight meal or a gathering with friends. With just a few ingredients and minimal cooking, you’ll have a tasty and satisfying dish that everyone will love!

    Ingredients

    • 2 cups shredded cooked chicken
    • 4 cups mixed salad greens
    • 1 cup cherry tomatoes, halved
    • 1/2 cucumber, sliced
    • 1/4 cup red onion, thinly sliced
    • 1/4 cup sliced almonds
    • 1/4 cup sesame dressing
    • 2 tablespoons sesame seeds

    Instructions

    1. In a large bowl, combine the mixed salad greens, cherry tomatoes, cucumber, and red onion.
    2. Add the shredded chicken on top of the salad mixture.
    3. Drizzle the sesame dressing over the salad and toss gently to combine all ingredients.
    4. Sprinkle sliced almonds and sesame seeds over the top before serving.
    5. Enjoy your refreshing Korean-Style Chicken Salad right away!

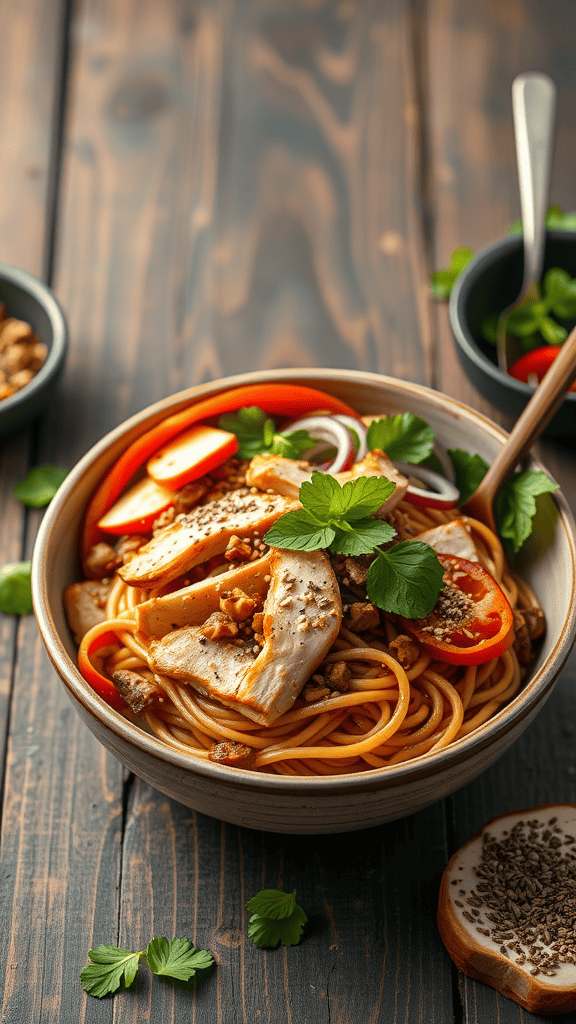
    Teriyaki Chicken & Soba Noodle Salad

    A colorful bowl of Teriyaki Chicken & Soba Noodle Salad with fresh vegetables and garnished with cilantro.

    This Teriyaki Chicken & Soba Noodle Salad is a delightful blend of flavors and textures. It features tender teriyaki-glazed chicken served over a bed of nutty soba noodles, complemented by fresh vegetables. The dish is not only tasty but also simple to prepare, making it perfect for a quick weeknight dinner or a refreshing lunch.

    The sweet and savory notes of the teriyaki sauce pair perfectly with the earthy undertones of the soba noodles. Crisp veggies add crunch, while a sprinkle of sesame seeds finishes it all off. This salad is light yet satisfying, ensuring you feel good after every bite!

    Ingredients

    • 2 boneless, skinless chicken breasts
    • 1/4 cup teriyaki sauce
    • 8 oz soba noodles
    • 1 red bell pepper, sliced
    • 1 cucumber, julienned
    • 1/4 red onion, thinly sliced
    • 1 cup shredded carrots
    • 2 green onions, chopped
    • 1 tablespoon sesame seeds
    • Fresh cilantro for garnish

    Instructions

    1. Marinate the Chicken: In a bowl, combine chicken breasts with teriyaki sauce. Let it marinate in the fridge for at least 30 minutes.
    2. Cook the Noodles: In a pot of boiling water, cook the soba noodles according to package instructions. Drain and rinse under cold water.
    3. Cook the Chicken: Heat a grill or skillet over medium heat. Cook the marinated chicken for about 6-7 minutes on each side, until fully cooked. Let it rest before slicing.
    4. Assemble the Salad: In a large bowl, combine soba noodles, bell pepper, cucumber, red onion, and carrots. Toss with remaining teriyaki sauce.
    5. Serve: Place the salad on a plate, top with sliced chicken, sprinkle sesame seeds, and garnish with cilantro and green onions.

    Spicy Peanut Chicken Salad

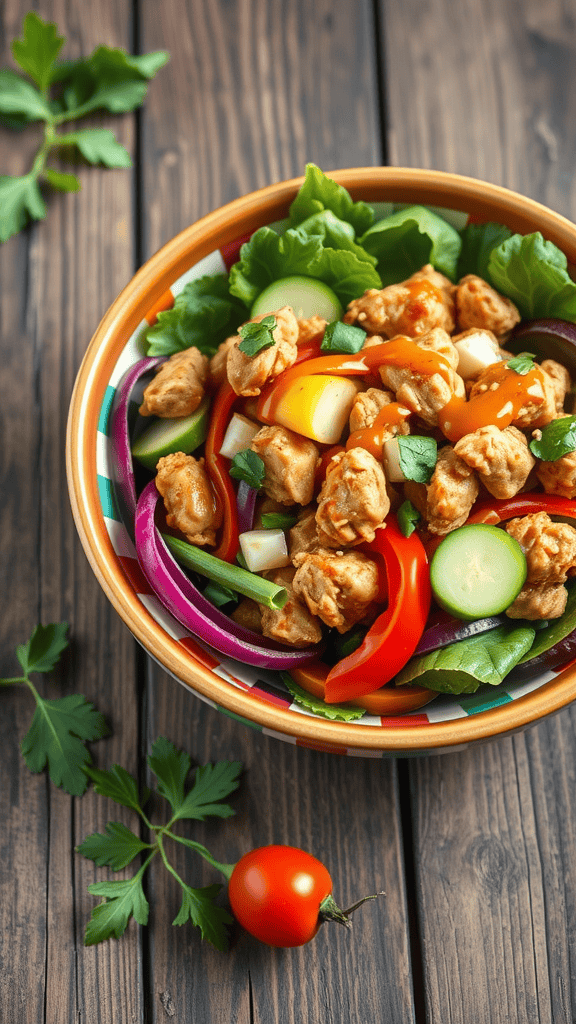
    A colorful bowl of spicy peanut chicken salad with fresh vegetables and chicken pieces.

    This Spicy Peanut Chicken Salad is a delightful mix of flavors that packs a punch! With juicy chicken, fresh veggies, and a zesty peanut dressing, it’s both refreshing and satisfying. Perfect for lunch or dinner, this salad is simple to whip up, making it a go-to for busy weeknights.

    The combination of tender chicken, crisp greens, and a hint of spice creates a delicious balance that will excite your taste buds. Whether you’re enjoying it on its own or as a side dish, this salad is sure to please everyone at the table.

    Ingredients

    • 2 cups cooked chicken, shredded
    • 4 cups mixed salad greens
    • 1 red bell pepper, sliced
    • 1 cucumber, diced
    • 1/2 cup shredded carrots
    • 1/4 cup red onion, thinly sliced
    • 1/4 cup roasted peanuts, chopped
    • 1/4 cup fresh cilantro, chopped
    • 1/3 cup peanut butter
    • 2 tablespoons soy sauce
    • 1 tablespoon honey
    • 1 tablespoon rice vinegar
    • 1 teaspoon sriracha (adjust for spice level)
    • 1 tablespoon sesame oil

    Instructions

    1. In a large bowl, combine the cooked chicken, salad greens, bell pepper, cucumber, carrots, red onion, peanuts, and cilantro.
    2. In a separate bowl, whisk together peanut butter, soy sauce, honey, rice vinegar, sriracha, and sesame oil until smooth.
    3. Pour the dressing over the salad and toss gently to combine.
    4. Serve immediately and enjoy your flavorful Spicy Peanut Chicken Salad!
  • 5 Must-Try Paella Recipes for a Flavorful Feast

    5 Must-Try Paella Recipes for a Flavorful Feast

    Paella is a beloved Spanish dish that brings a splash of color and flavor to any table. Originating from Valencia, this one-pot meal combines rice with a variety of ingredients, like seafood, chicken, rabbit, and an array of veggies, all seasoned with saffron for that distinctive hue and taste. It’s perfect for gatherings, as everyone can dig in and enjoy this hearty and satisfying feast together!

    Innovative Fusion Paella with Asian Flavors

    A colorful fusion paella featuring vegetables and tofu in a savory broth.

    This fusion paella combines traditional Spanish elements with vibrant Asian flavors for a delightful twist. Expect a medley of textures and tastes, blending savory soy sauce, fresh vegetables, and aromatic spices. It’s an exciting dish that brings together the best of both culinary worlds.

    Making this paella is straightforward and perfect for a weeknight dinner or a special gathering. With minimal prep and cooking time, you’ll enjoy a hearty and satisfying meal that will impress your guests.

    Ingredients

    • 1 cup jasmine rice
    • 2 cups vegetable broth
    • 2 tablespoons soy sauce
    • 1 tablespoon sesame oil
    • 1 red bell pepper, diced
    • 1 cup baby bok choy, chopped
    • 1 cup diced firm tofu
    • 1/2 cup green peas
    • 3 cloves garlic, minced
    • 1 inch ginger, grated
    • 1 tablespoon chili paste (optional)
    • 2 green onions, sliced
    • 1 lemon, sliced for garnish
    • Salt and pepper to taste

    Instructions

    1. Heat sesame oil in a large pan over medium heat. Add garlic and ginger, sautéing for about 1 minute until fragrant.
    2. Add the diced red bell pepper and tofu. Stir-fry for 3-4 minutes until the vegetables soften.
    3. Stir in jasmine rice, followed by vegetable broth, soy sauce, and chili paste if using. Bring to a boil.
    4. Reduce heat to low, cover, and simmer for 15-20 minutes until the rice is cooked and has absorbed the liquid.
    5. In the last 5 minutes of cooking, add baby bok choy and green peas to the pan. Cover again until vegetables are tender.
    6. Season with salt and pepper, then fluff the rice with a fork. Garnish with sliced green onions and lemon before serving.

    Seafood Paella with Fresh Mussels and Shrimp

    A colorful seafood paella with shrimp and mussels, garnished with lemon slices.

    Seafood paella is a vibrant dish bursting with flavors from the sea. It’s a delightful mix of fresh mussels, juicy shrimp, and aromatic spices that create a delicious experience in every bite. This dish brings together the rich essence of saffron and the bright freshness of lemon, making it both comforting and refreshing.

    Even if you’re new to cooking, this recipe is simple and straightforward. With just a few ingredients and steps, you can impress your friends and family with a stunning seafood paella that feels like a culinary celebration.

    Ingredients

    • 2 cups Bomba rice
    • 4 cups seafood stock
    • 1 lb fresh shrimp, peeled and deveined
    • 1 lb mussels, cleaned
    • 1 medium onion, chopped
    • 3 cloves garlic, minced
    • 1 bell pepper, diced
    • 1 can (14 oz) diced tomatoes
    • 1/2 tsp saffron threads
    • 1 lemon, sliced
    • 1/4 cup olive oil
    • Salt and pepper to taste
    • Fresh parsley for garnish

    Instructions

    1. Heat olive oil in a large paella pan over medium heat. Add onion and garlic, sautéing until softened.
    2. Add bell pepper and cook for another 2-3 minutes. Stir in the rice and cook for a couple of minutes, allowing it to absorb the flavors.
    3. Pour in the seafood stock and add the saffron, diced tomatoes, salt, and pepper. Bring to a simmer.
    4. Arrange the shrimp and mussels on top of the rice mixture. Cover the pan with a lid or foil and cook for about 15-20 minutes, or until the rice is tender and the seafood is cooked through.
    5. Remove from heat, let it rest for a few minutes, and garnish with lemon slices and parsley before serving. Enjoy your homemade seafood paella!

    Chicken and Chorizo Paella for a Hearty Meal

    A hearty chicken and chorizo paella with vibrant colors and garnished with parsley.

    Chicken and chorizo paella is a vibrant dish that brings together bold flavors and hearty ingredients. This Spanish classic is not only satisfying but also simple to prepare, making it perfect for a family dinner or a gathering with friends. The combination of tender chicken pieces, spicy chorizo, and fragrant saffron rice creates a meal that is both comforting and delightful.

    As the rice cooks, it absorbs the delicious juices from the chicken and chorizo, resulting in a rich and flavorful base. This dish is sure to impress and can be customized with additional vegetables or seafood if desired. Gather your ingredients, and let’s dive into this tasty recipe!

    Ingredients

    • 2 tablespoons olive oil
    • 1 pound chicken thighs, cut into pieces
    • 200 grams chorizo, sliced
    • 1 onion, chopped
    • 2 garlic cloves, minced
    • 1 bell pepper, chopped
    • 2 cups Arborio rice
    • 4 cups chicken broth
    • 1 teaspoon smoked paprika
    • 1/2 teaspoon saffron threads
    • 1 cup peas (fresh or frozen)
    • Salt and pepper to taste
    • Fresh parsley, for garnish

    Instructions

    1. Heat olive oil in a large skillet over medium heat. Add the chicken pieces and chorizo, cooking until browned on all sides. Remove and set aside.
    2. In the same skillet, sauté the onion and garlic until translucent. Add the bell pepper and cook for another 2-3 minutes.
    3. Stir in the rice, ensuring it gets coated in the oil and flavors. Add the chicken broth, smoked paprika, saffron, salt, and pepper. Bring to a boil.
    4. Reduce the heat to low and return the chicken and chorizo to the skillet. Cover and simmer for about 20 minutes, or until the rice is cooked and the liquid is absorbed.
    5. In the last 5 minutes of cooking, add the peas. Once done, remove from heat and let it sit for 5 minutes before serving.
    6. Garnish with fresh parsley and enjoy your delicious chicken and chorizo paella!

    Traditional Spanish Paella with Saffron

    A vibrant dish of traditional Spanish paella featuring saffron rice, shrimp, mussels, and colorful vegetables.

    Paella is a vibrant rice dish that hails from Valencia, Spain, showcasing the region’s rich culinary traditions. Bursting with flavors, it combines saffron’s warm, earthy tones with a medley of fresh seafood, meats, and vegetables. This dish is not only a feast for the eyes but also a delight for the taste buds, making it a favorite for gatherings and celebrations.

    Making traditional Spanish paella at home is surprisingly simple, even for beginners. With just a few key ingredients and steps, you can create a dish that transports you straight to the sunny coasts of Spain. Gather your friends and family, as this colorful dish is perfect for sharing and enjoying together.

    Ingredients

    • 2 cups Bomba or Arborio rice
    • 4 cups chicken or seafood broth
    • 1/2 teaspoon saffron threads
    • 1 pound shrimp, peeled and deveined
    • 1/2 pound mussels, cleaned
    • 1/2 pound squid, sliced into rings
    • 1 bell pepper, diced
    • 1 medium onion, chopped
    • 2 cloves garlic, minced
    • 1 cup peas (fresh or frozen)
    • 1 medium tomato, diced
    • 1 teaspoon smoked paprika
    • Olive oil
    • Salt and pepper to taste
    • Fresh parsley for garnish
    • Lemon wedges for serving

    Instructions

    1. Prepare the Broth: In a saucepan, heat the broth and add the saffron. Let it simmer to infuse the flavors.
    2. Sauté Vegetables: In a large paella pan or skillet, heat olive oil over medium heat. Add the onion and bell pepper, cooking until soft. Stir in the garlic and tomato, cooking for another 2 minutes.
    3. Add Rice and Spices: Stir in the rice and smoked paprika, cooking for about a minute until the rice is well coated with the oil and spices.
    4. Pour in Broth: Add the saffron-infused broth to the pan. Season with salt and pepper. Bring it to a boil, then reduce heat to low. Allow it to simmer without stirring for about 15 minutes.
    5. Add Seafood: Gently place the shrimp, mussels, and squid on top of the rice. Cover the pan with a lid or aluminum foil and cook for an additional 10 minutes until the seafood is cooked through and the rice is tender.
    6. Rest and Serve: Remove from heat and let the paella sit for 5 minutes. Garnish with fresh parsley and serve with lemon wedges on the side.

    Vegetarian Paella Loaded with Seasonal Vegetables

    A vibrant vegetarian paella featuring seasonal vegetables like butternut squash, cherry tomatoes, and green beans, garnished with fresh basil.

    This vegetarian paella is a colorful and hearty dish, perfect for showcasing fresh seasonal vegetables. Bursting with flavors, it combines the earthiness of roasted veggies with the aromatic spices typical of traditional paella. The dish is not only delicious but also simple to prepare, making it an excellent choice for both family dinners and entertaining friends.

    The blend of textures—from tender roasted squash to juicy cherry tomatoes—creates a satisfying meal that pleases the palate. Using a variety of seasonal vegetables ensures that every bite is exciting and full of freshness, while the saffron adds a touch of sophistication. Let’s dive into this easy recipe that’s sure to impress!

    Ingredients

    • 1 cup Arborio rice
    • 2 tablespoons olive oil
    • 1 small onion, diced
    • 3 cloves garlic, minced
    • 1 bell pepper, chopped
    • 1 zucchini, sliced
    • 1 cup butternut squash, cubed
    • 1 cup cherry tomatoes, halved
    • 1 cup green beans, trimmed
    • 1 teaspoon smoked paprika
    • 1/4 teaspoon saffron threads
    • 4 cups vegetable broth
    • Salt and pepper to taste
    • Fresh basil for garnish

    Instructions

    1. Heat olive oil in a large paella pan or skillet over medium heat. Add onion and garlic, cooking until softened.
    2. Stir in the bell pepper, zucchini, and butternut squash. Cook for about 5 minutes until they start to soften.
    3. Add the rice, smoked paprika, and saffron, stirring to coat the rice with the oil and spices.
    4. Pour in the vegetable broth, season with salt and pepper, and bring to a gentle simmer. Cook for about 15-20 minutes without stirring until the rice absorbs most of the liquid.
    5. Top the rice with cherry tomatoes and green beans, covering the pan to steam the vegetables for another 5-7 minutes until they are tender.
    6. Remove from heat and let it sit for a few minutes before serving. Garnish with fresh basil and enjoy your vibrant vegetarian paella!
  • 5 Delicious Spaghetti Bolognese Variations to Try at Home

    5 Delicious Spaghetti Bolognese Variations to Try at Home

    Spaghetti Bolognese is a comforting classic that brings together the rich flavors of ground meat, tomatoes, and herbs, all served over a bed of perfectly cooked pasta. This hearty dish originates from Italy and has become a family favorite around the world, perfect for cozy dinners or meal prep for the week. Simple to make and delicious, it’s a go-to recipe that everyone can enjoy!

    Perfectly Cooked Spaghetti

    A plate of spaghetti bolognese topped with basil and grated cheese

    Spaghetti Bolognese is a classic dish that brings warmth and comfort to any meal. The rich, meaty sauce paired with perfectly cooked spaghetti creates a delicious combination that can satisfy even the heartiest of appetites. This recipe is simple to make, making it perfect for both weeknight dinners and special occasions.

    The key to a great Spaghetti Bolognese lies in how you cook the spaghetti. You want it to be al dente, a little firm to the bite, which will hold up beautifully against the sauce. With just a few steps, you can elevate this dish to perfection.

    Ingredients

    • 400g spaghetti
    • 4 liters of water
    • 2 teaspoons salt

    Instructions

    1. Boil the Water: In a large pot, bring 4 liters of water to a rolling boil. This helps the spaghetti cook evenly.
    2. Add Salt: Once boiling, add 2 teaspoons of salt to the water. This enhances the flavor of the pasta.
    3. Add the Spaghetti: Carefully add the spaghetti to the boiling water, stirring gently to prevent sticking.
    4. Cook: Refer to the package instructions for cooking time, usually around 8-10 minutes for al dente. Stir occasionally.
    5. Taste Test: About a minute before the time is up, taste a strand of spaghetti. It should be tender yet firm.
    6. Drain: Once cooked, drain the spaghetti in a colander and do not rinse, as this removes the starch that helps the sauce cling.
    7. Combine: Toss the hot spaghetti with your Bolognese sauce immediately for the best results. Serve with grated cheese on top.

    Layering Flavors with Aromatics

    A pan with chopped vegetables being sautéed in olive oil for a flavorful sauce.

    Spaghetti Bolognese is a classic Italian dish that combines rich meat sauce with spaghetti pasta. The resulting flavors are savory, comforting, and satisfying. This dish is simple to make, yet it feels special enough for a family dinner or a gathering with friends.

    The key to a great Bolognese lies in layering flavors with aromatics. Starting with finely chopped onions, carrots, and celery, you create a foundation of taste. Sauté these vegetables in olive oil until they soften, allowing their natural sweetness to emerge. Garlic adds a punch, while herbs like oregano and bay leaves infuse the sauce with depth. This careful preparation ensures that every bite of your Spaghetti Bolognese is bursting with flavor.

    Ingredients

    • 2 tablespoons olive oil
    • 1 onion, finely chopped
    • 1 carrot, finely chopped
    • 1 celery stalk, finely chopped
    • 2 garlic cloves, minced
    • 1 pound ground beef
    • 1 can (14 oz) crushed tomatoes
    • 2 tablespoons tomato paste
    • 1 cup beef broth
    • 1 teaspoon dried oregano
    • 1 bay leaf
    • Salt and pepper to taste
    • 8 ounces spaghetti
    • Fresh basil for garnish (optional)

    Instructions

    1. Heat olive oil in a large skillet over medium heat. Add the chopped onion, carrot, and celery. Sauté for about 5 minutes until softened.
    2. Add minced garlic and cook for another minute until fragrant.
    3. Increase the heat to medium-high and add the ground beef. Cook until browned, breaking it up with a spoon.
    4. Stir in crushed tomatoes, tomato paste, beef broth, oregano, bay leaf, salt, and pepper. Bring to a simmer.
    5. Reduce heat to low and let the sauce cook for about 30 minutes, stirring occasionally.
    6. While the sauce simmers, cook the spaghetti according to package instructions. Drain and set aside.
    7. Remove the bay leaf from the sauce. Serve the sauce over spaghetti and garnish with fresh basil if desired.

    Vegetarian Alternative: Lentil Bolognese

    A bowl of spaghetti topped with lentil bolognese sauce, garnished with fresh herbs.

    Lentil Bolognese is a hearty and satisfying twist on the classic spaghetti Bolognese. With rich flavors and a satisfying texture, it’s perfect for anyone looking for a delicious vegetarian option. The lentils provide a substantial base, soaking up the savory tomato sauce and spices, making each bite a delight.

    This recipe is simple to prepare and can be made in under an hour, making it ideal for a weeknight dinner. The combination of fresh vegetables and herbs adds a vibrant touch, while the lentils ensure you won’t miss the meat. Serve it over your favorite pasta for a comforting meal that everyone will enjoy.

    Ingredients

    • 1 cup green or brown lentils, rinsed
    • 2 tablespoons olive oil
    • 1 onion, diced
    • 2 cloves garlic, minced
    • 1 carrot, diced
    • 1 celery stalk, diced
    • 1 bell pepper, diced
    • 1 can (14 oz) crushed tomatoes
    • 2 tablespoons tomato paste
    • 1 teaspoon dried oregano
    • 1 teaspoon dried basil
    • Salt and pepper to taste
    • Fresh parsley, for garnish
    • Spaghetti or any pasta of choice

    Instructions

    1. Cook the Lentils: In a pot, bring 3 cups of water to a boil. Add the lentils and cook for 20-25 minutes until tender. Drain and set aside.
    2. Sauté the Vegetables: In a large skillet, heat olive oil over medium heat. Add onion, garlic, carrot, celery, and bell pepper. Sauté for about 5-7 minutes until the vegetables are softened.
    3. Add the Tomato Base: Stir in the crushed tomatoes, tomato paste, oregano, basil, salt, and pepper. Bring to a simmer.
    4. Combine: Add the cooked lentils to the sauce. Stir well and let simmer for another 10 minutes, allowing the flavors to meld.
    5. Cook the Pasta: Meanwhile, cook the spaghetti according to package instructions. Drain and serve topped with the lentil Bolognese. Garnish with fresh parsley.

    Traditional Italian Bolognese Sauce

    Traditional Italian Bolognese Sauce cooking in a pot

    Spaghetti Bolognese is a classic dish that features a rich, hearty meat sauce. This sauce combines ground meat, tomatoes, and aromatic vegetables, creating a flavor that is both savory and comforting. It’s perfect for family dinners or cozy nights in, and surprisingly simple to prepare with just a few basic ingredients.

    The taste of traditional Bolognese sauce is deep and satisfying, thanks to the slow cooking that melds the flavors beautifully. Every bite brings a taste of Italy right into your home, making it a beloved favorite for many. Plus, it’s a great opportunity to try your hand at cooking something authentic!

    Ingredients

    • 2 tablespoons olive oil
    • 1 onion, finely chopped
    • 2 carrots, diced
    • 2 celery stalks, diced
    • 3 cloves garlic, minced
    • 1 pound ground beef
    • 1 can (14 oz) crushed tomatoes
    • 2 tablespoons tomato paste
    • 1 cup red wine
    • 1 cup beef or vegetable broth
    • 1 teaspoon dried oregano
    • Salt and pepper to taste
    • Fresh basil or parsley for garnish
    • Spaghetti, cooked according to package instructions

    Instructions

    1. Heat olive oil in a large pot over medium heat. Add onion, carrots, and celery, sautéing until softened, about 5 minutes.
    2. Stir in the garlic and cook for another minute until fragrant.
    3. Add the ground beef, cooking until browned. Drain any excess fat.
    4. Mix in crushed tomatoes, tomato paste, red wine, broth, and oregano. Season with salt and pepper.
    5. Bring to a simmer, then reduce heat to low. Cover and cook for at least 30 minutes, stirring occasionally.
    6. Serve the sauce over spaghetti and garnish with fresh herbs.

    Serving Suggestions and Pairings

    A plate of spaghetti Bolognese garnished with cheese and parsley, served with sliced bread and red wine.

    Spaghetti Bolognese is a classic Italian dish that combines rich, meaty sauce with perfectly cooked pasta. The hearty flavors of the sauce, made with ground meat, tomatoes, and aromatic herbs, create a satisfying meal that warms the heart. Plus, it’s quite simple to whip up, making it a go-to for family dinners or casual gatherings.

    For serving suggestions, consider garnishing your spaghetti Bolognese with freshly grated Parmesan cheese and a sprinkle of chopped parsley for a pop of color. Pair it with a glass of robust red wine, like Chianti or Merlot, to complement the savory flavors. A side of garlic bread or a fresh green salad rounds out the meal beautifully. Enjoy this comforting dish with loved ones for a delightful dining experience!

    Ingredients

    • 400g spaghetti
    • 2 tablespoons olive oil
    • 1 onion, chopped
    • 2 garlic cloves, minced
    • 500g ground beef or pork
    • 1 can (400g) diced tomatoes
    • 2 tablespoons tomato paste
    • 1 teaspoon dried oregano
    • 1 teaspoon dried basil
    • Salt and pepper to taste
    • Fresh parsley, chopped (for garnish)
    • Grated Parmesan cheese (for serving)

    Instructions

    1. Cook the Spaghetti: Bring a large pot of salted water to a boil. Add the spaghetti and cook according to package instructions until al dente. Drain and set aside.
    2. Prepare the Sauce: In a large skillet, heat the olive oil over medium heat. Add the chopped onion and minced garlic, cooking until softened.
    3. Add the Meat: Stir in the ground meat, breaking it apart with a spoon. Cook until browned, about 5-7 minutes.
    4. Mix in Tomatoes: Add the diced tomatoes and tomato paste to the skillet. Stir in the oregano, basil, salt, and pepper. Let the sauce simmer for about 15-20 minutes, allowing the flavors to meld.
    5. Combine and Serve: Toss the cooked spaghetti with the sauce. Serve hot, garnished with chopped parsley and grated Parmesan cheese.

Pin It on Pinterest