Category: Recipe

  • Authentic Greek Salad 

    Authentic Greek Salad 

    Authentic Greek Salad (Horiatiki)

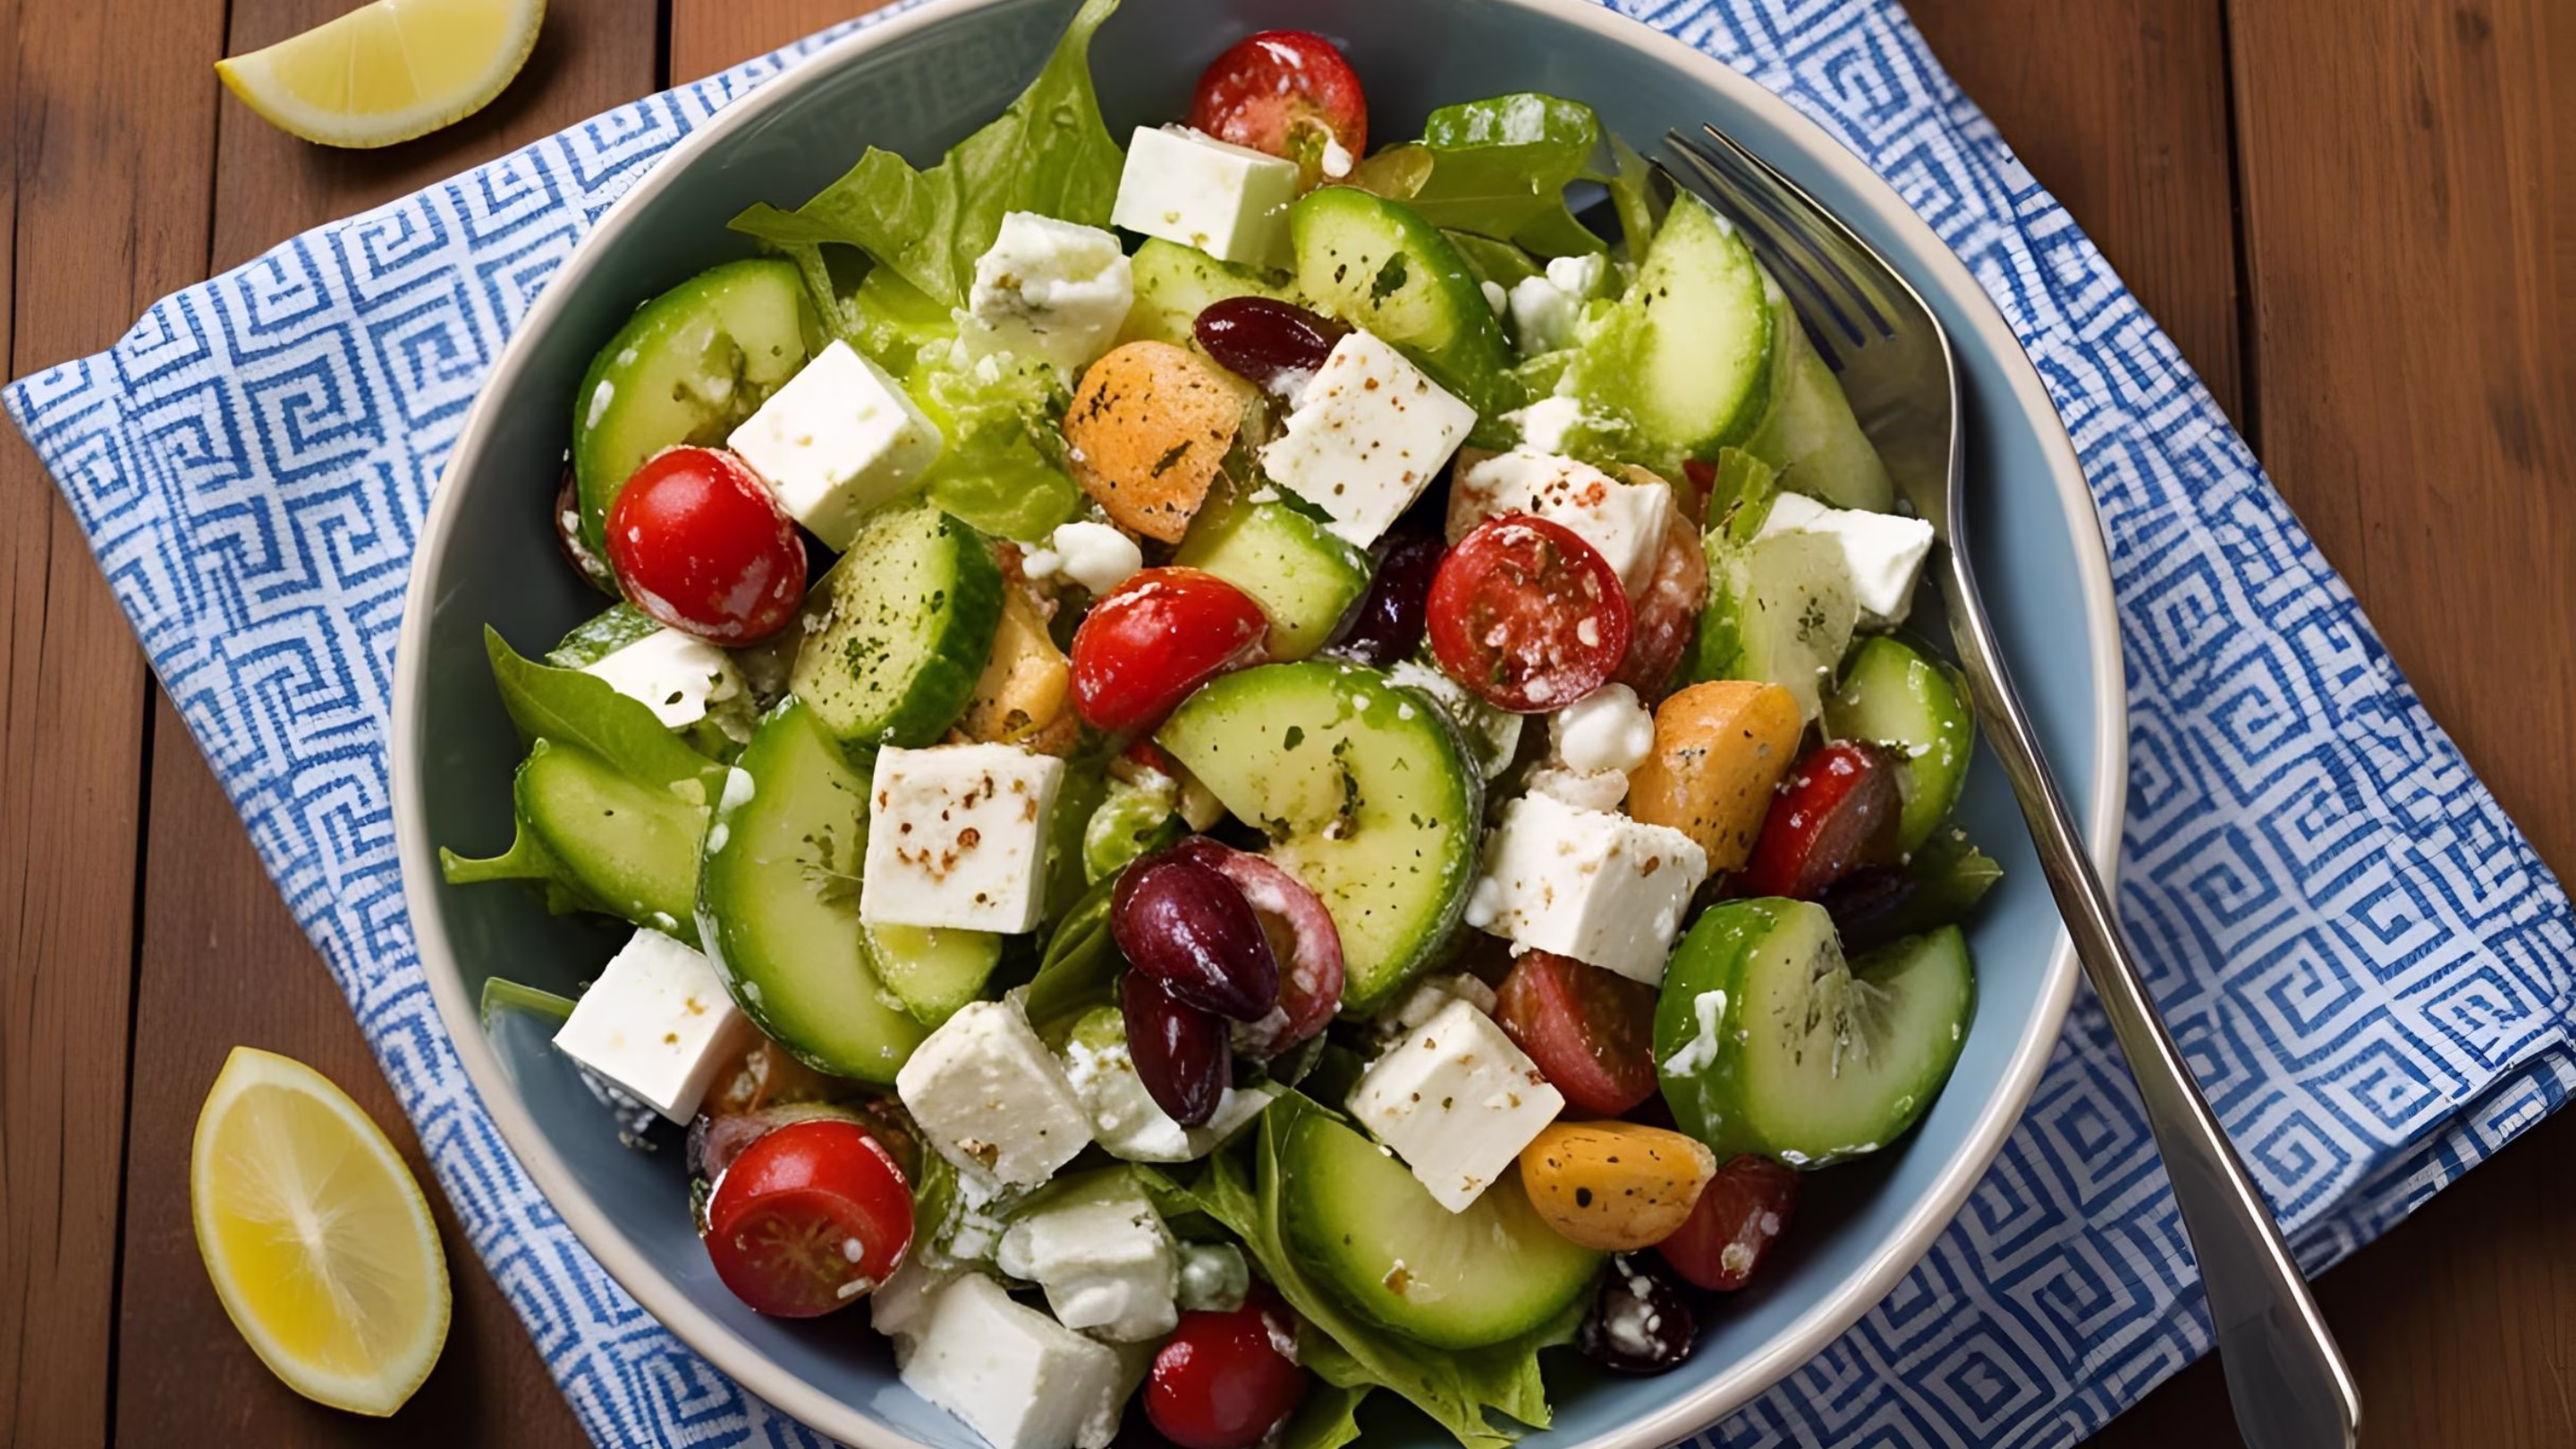
    Authentic Greek Salad (Horiatiki): A Refreshing Taste of the Mediterranean

    There’s something incredibly special about a true Greek salad, or “Horiatiki Salata” as it’s known in Greece. Forget the limp lettuce and overly complicated versions you might have encountered elsewhere. The authentic Horiatiki is a celebration of rustic simplicity, showcasing the vibrant flavors of sun-ripened vegetables, salty feta, and glorious Greek olive oil. It’s sunshine in a bowl, a taste of Greek village life, and remarkably easy to recreate in your own kitchen. Let’s make one!

    What Makes a Greek Salad “Horiatiki”?

    “Horiatiki” translates to “village” or “country” salad. This tells you everything about its soul – it’s unfussy, made with readily available, fresh ingredients, and relies on their quality rather than complicated techniques. The key components are:

    • Ripe tomatoes
    • Crisp cucumber
    • Sharp red onion
    • Flavorful Kalamata olives
    • A generous slab of creamy feta cheese
    • Good quality extra virgin olive oil
    • A sprinkle of aromatic dried oregano

    Notably, a traditional Horiatiki never contains lettuce or any other leafy greens. The beauty lies in the chunky, substantial bite of the vegetables themselves.

    Why You’ll Adore This Recipe

    • Peak Freshness: It’s bursting with the flavors of summer produce.
    • Incredibly Simple: Minimal chopping, no cooking – perfect for a quick lunch or side.
    • Healthy & Wholesome: Packed with nutrients and good fats.
    • Versatile: A fantastic side dish for grilled meats or fish, or a satisfying light meal on its own with some crusty bread.

    Ingredients You’ll Need (Serves 4 as a side, 2 as a light main)

    • Tomatoes: 2-3 large, ripe, and flavorful tomatoes (about 1 lb / 450g). Vine-ripened, beefsteak, or heirloom varieties work beautifully.
      Tip: Look for tomatoes that are heavy for their size and fragrant. Room temperature tomatoes have the best flavor!
    • Cucumber: 1 medium cucumber (Kirby or English cucumbers are great).
      Tip: If using a waxy-skinned cucumber, you might want to peel it fully. For thinner-skinned varieties, you can partially peel it in stripes for a nice look, or leave the skin on if it’s tender.
    • Red Onion: ½ medium red onion.
      Tip: If you find raw red onion too pungent, slice it thinly and then soak it in a bowl of ice-cold water for 10-15 minutes. Drain well before using. This mellows its bite considerably.
    • Kalamata Olives: ½ cup (about 75-100g) good quality Kalamata olives, preferably with pits (they often have more flavor, but pitted is fine for convenience).
    • Feta Cheese: One 4-6 oz (115-170g) block of good quality Greek feta cheese, preferably made from sheep’s milk or a sheep/goat milk blend, packed in brine.
      Tip: Avoid pre-crumbled feta; it’s often drier and lacks the creamy texture of block feta. The brine keeps it moist and flavorful.
    • Green Bell Pepper (Optional): ½ medium green bell pepper. Some regions include it, others don’t. If you like them, add them!
    • Extra Virgin Olive Oil: ¼ to ⅓ cup (60-80ml) high-quality extra virgin olive oil. Use the good stuff – its flavor is prominent here!
    • Red Wine Vinegar: 1-2 tablespoons, or to taste.
    • Dried Greek Oregano: 1-2 teaspoons, or to taste.
      Tip: Greek oregano has a specific, robust flavor that’s perfect for this salad. Rub it between your fingers when adding it to release its aromatic oils.
    • Sea Salt Flakes & Freshly Ground Black Pepper: To taste. Be mindful that feta and olives are already salty.

    Essential Equipment

    • Sharp knife
    • Cutting board
    • Large salad bowl (a wide, shallow bowl works well)

    Let’s Get Chopping: Step-by-Step Instructions

    Prep Time: Approximately 15 minutes

    1. Prepare the Tomatoes: Wash the tomatoes thoroughly. Remove the cores. Cut them into large, irregular wedges or chunks. Don’t dice them too small; you want substantial pieces. Add them directly to your large salad bowl.
    2. Prepare the Cucumber: Wash the cucumber. Peel it fully, partially, or leave the skin on, according to your preference and the cucumber type (see tip above). Slice it into thick half-moons or chunks (about ½ inch / 1-1.5 cm thick). Add to the bowl with the tomatoes.
    3. Prepare the Red Onion: Peel the red onion and slice it thinly into half-moons or rings. If you’re soaking it (see tip above), do this now while you prep other ingredients, then drain well. Add the onion to the bowl.
    4. Prepare the (Optional) Bell Pepper: If using, wash the green bell pepper, remove the stem, seeds, and white pith. Slice it into thin strips or rings. Add to the bowl.
    5. Add the Olives: Add the Kalamata olives to the vegetable mixture.
    6. Initial Seasoning (Gentle!): Sprinkle a small pinch of sea salt and a few grinds of black pepper over the vegetables in the bowl. Toss very gently to distribute. Remember, the feta and olives will add more saltiness later.
    7. Dress the Salad: Drizzle the extra virgin olive oil generously over the vegetables. Follow with the red wine vinegar. Start with a smaller amount of vinegar; you can always add more if needed. Gently toss everything together a couple of times to coat the vegetables.
    8. The Feta Finale: Now for the star! Take your block of feta cheese. The most traditional way is to place the entire slab right on top of the salad. Alternatively, you can break it into large, rustic chunks with your hands and scatter them over the top. Avoid crumbling it too finely.
    9. Oregano Power: Sprinkle the dried Greek oregano generously over the feta and the rest of the salad. For an extra burst of aroma, rub the oregano between your palms as you sprinkle it.
    10. Serve and Enjoy: Your Horiatiki is ready! It’s best served immediately. However, letting it sit for about 10-15 minutes at room temperature allows the flavors to meld beautifully.

    Top Tips for an Unforgettable Greek Salad

    • Quality Over Quantity: This salad is a testament to the “less is more” philosophy. Use the best, freshest ingredients you can find. The flavor difference is remarkable.
    • Don’t Over-Mix: You want the integrity of each ingredient to shine. A gentle toss is all that’s needed.
    • Room Temperature is Best: For optimal flavor, especially from the tomatoes, try to assemble and serve the salad with ingredients at room temperature. If your veggies are chilled, let them sit out for a bit.
    • The “Papara” Tradition: One of the great joys of eating Horiatiki is the “papara” – using crusty bread to soak up the delicious, oily, tomato-infused juices left at the bottom of the bowl. Don’t let that goodness go to waste!
    • A Splash of Brine: For an extra tangy kick, you can add a teaspoon or two of the feta brine into the dressing.
    • No Lettuce, Seriously! We’ve said it before, but it’s worth repeating: authentic Horiatiki does not contain lettuce. Adding it changes the texture and character of the salad entirely.

    Common Variations (Keeping it Authentic-ish)

    While the core recipe is classic, you might encounter:

    • Capers: A few pickled capers can add a briny punch.
    • Purslane (Glistrida): In some parts of Greece, especially in summer, wild purslane leaves are sometimes added. They have a slightly lemony, succulent quality.

    Serving Your Horiatiki

    Greek salad is wonderfully versatile:

    • Perfect Side Dish: Serve alongside grilled chicken souvlaki, lamb chops, roasted fish, or moussaka.
    • Light Lunch: Enjoy a generous portion with a side of crusty bread (for that papara!).
    • Mezze Platter Star: A fantastic addition to any Greek mezze spread with tzatziki, hummus, and pita bread.

    Storing Leftovers

    Greek salad is undeniably best when freshly made. If you do have leftovers:

    • Store them in an airtight container in the refrigerator for up to 24 hours.
    • Be aware that the vegetables, especially the tomatoes and cucumbers, will soften and release more liquid over time. The salad will still be tasty, just with a slightly different texture.
    • If making ahead for a party, you can chop the vegetables and store them separately from the dressing and feta. Combine just before serving for the freshest result.

    Savor Every Rustic Bite!

    There you have it – a simple, authentic Greek salad that will transport your taste buds straight to a sunny taverna by the Aegean Sea. Enjoy the fresh flavors, the beautiful colors, and the wholesome goodness of this Mediterranean classic. Kali Orexi! (Good Appetite!)

  • The Perfect Caprese Salad: A Celebration of Summer’s Finest Ingredients

    The Perfect Caprese Salad: A Celebration of Summer’s Finest Ingredients

    Caprese Salad: Fresh, Flavorful, and Fantastically Easy

    There’s something truly special about a Caprese salad. With just a handful of ingredients, it manages to be incredibly flavorful, beautifully vibrant, and a perfect representation of Italian simplicity. Named after the island of Capri, this salad is a celebration of summer’s best: ripe tomatoes, creamy fresh mozzarella, and fragrant basil, all brought together with a drizzle of good olive oil. It’s the kind of dish that needs no complicated techniques, just love and the best ingredients you can find. Let’s make one!

    Why You’ll Adore This Caprese

    • Effortlessly Elegant: Looks stunning on any table with minimal effort.
    • Peak Freshness: Highlights the natural, delicious flavors of summer produce.
    • Super Quick: From fridge to table in about 10-15 minutes.
    • Versatile: Perfect as a light lunch, a refreshing appetizer, or a beautiful side dish.

    What You’ll Need: The Stars of the Show

    The magic of Caprese lies in its simplicity, which means the quality of your ingredients is paramount.

    Ripe Tomatoes:
    2-3 large, ripe tomatoes (about 1 lb or 450g). Heirloom, beefsteak, or vine-ripened varieties are fantastic. The key is flavor and juiciness! Avoid hard, pale tomatoes.
    Fresh Mozzarella Cheese:
    8 ounces (225g) of fresh, high-quality mozzarella. This could be a large ball (often sold in water or whey), ovoline (egg-sized balls), or bocconcini (small balls). Do not use low-moisture shredded mozzarella meant for pizza.
    Fresh Basil Leaves:
    A generous handful, about 1/2 to 1 cup of loosely packed leaves.
    Extra Virgin Olive Oil:
    2-3 tablespoons of good quality, flavorful extra virgin olive oil. This is where you can really taste the difference.
    Flaky Sea Salt:
    To taste. Maldon or another flaky salt works beautifully. Kosher salt is a good alternative.
    Freshly Ground Black Pepper:
    To taste.
    Optional: Balsamic Glaze:
    About 1-2 tablespoons. You can buy pre-made balsamic glaze or easily make your own (see tips!). Traditional Caprese often doesn’t include balsamic, but many enjoy the sweet tang it adds.

    Equipment

    • Sharp knife (a serrated knife can be helpful for tomatoes and soft mozzarella)
    • Cutting board
    • Serving platter or individual plates

    Let’s Assemble Your Beautiful Caprese Salad

    1. Prep Your Tomatoes:

    • Gently wash and dry your tomatoes.
    • If using large tomatoes with a tough core, you can remove it with the tip of your knife.
    • Slice the tomatoes into 1/4 to 1/3-inch thick rounds. Try to make them relatively uniform in thickness.

    2. Prep Your Mozzarella:

    • If your mozzarella is packed in water or whey, drain it well.
    • Gently pat the mozzarella dry with paper towels. This helps prevent the salad from becoming watery.
    • Slice the mozzarella into rounds of a similar thickness to your tomato slices. If using smaller bocconcini, you can halve or quarter them, or leave them whole if they are very small (like pearl mozzarella).

    3. Arrange the Salad:

    • On your chosen serving platter or individual plates, begin arranging the tomato and mozzarella slices.
    • The classic way is to alternate them, overlapping slightly: a slice of tomato, then a slice of mozzarella, then tomato, and so on. You can arrange them in a circle, a line, or any pattern you find pleasing.
    • If using smaller mozzarella balls and cherry or grape tomatoes (halved), you can simply toss them together gently or artfully scatter them.

    4. Add the Basil:

    • Tuck the fresh basil leaves in between the tomato and mozzarella slices. You can use whole leaves or, if they are very large, you can gently tear them or stack a few and thinly slice them (chiffonade). I prefer whole leaves tucked in for visual appeal and bursts of flavor.

    5. Dress and Season:

    • Drizzle the arranged salad generously with your best extra virgin olive oil.
    • Sprinkle evenly with flaky sea salt and freshly ground black pepper. Be mindful of the salt, especially if your mozzarella is already a bit salty.

    6. The Optional Balsamic Glaze:

    • If you’re using balsamic glaze, drizzle it sparingly over the salad. A little goes a long way.

    7. Let it Mingle (Highly Recommended!):

    • For the best flavor, let the Caprese salad sit at room temperature for about 10-15 minutes before serving. This allows the flavors to meld together beautifully. Don’t refrigerate it once dressed, as chilling dulls the tomato flavor.

    Tips & Tricks for Caprese Perfection

    • Ingredient Quality is Non-Negotiable: I can’t stress this enough! Since there are so few ingredients, each one needs to shine. Use the ripest, most flavorful tomatoes you can find and good quality fresh mozzarella.
    • Tomatoes at Room Temp: Cold tomatoes have less flavor. If you store your tomatoes in the fridge, take them out at least 30 minutes before making the salad.
    • Don’t Drown It: While good olive oil is key, you don’t want your salad swimming in it. A nice, even drizzle is perfect.
    • Salt Smartly: Salt draws moisture out of tomatoes. For the freshest look and less watery results, season just before serving, or up to 15 minutes before if you like the juices to meld.
    • DIY Balsamic Glaze: It’s super easy! Pour about 1/2 cup of good balsamic vinegar into a small saucepan. Bring to a gentle simmer over medium-low heat and cook, stirring occasionally, until the vinegar has reduced by about half and has a syrupy consistency (about 5-10 minutes). It will thicken more as it cools. Let it cool completely before drizzling.
    • Slicing Soft Mozzarella: If your fresh mozzarella is very soft and hard to slice, try chilling it in the freezer for just 10-15 minutes. This firms it up slightly, making slicing easier. A serrated knife can also work wonders.
    • Basil Last: Add basil just before serving or as one of the final steps, as it can wilt or darken over time, especially if it comes into contact with acidic ingredients for too long.

    Fun Variations to Try

    While classic Caprese is hard to beat, here are a few ideas:

    • Pesto Drizzle: Swap some or all of the olive oil for a drizzle of fresh pesto.
    • Add Peaches or Nectarines: Sliced ripe peaches or nectarines add a lovely sweetness that complements the other flavors surprisingly well.
    • Creamy Avocado: Tuck in some slices of ripe avocado for extra creaminess and healthy fats.
    • Grilled Caprese: Lightly grill the tomato slices (and even the mozzarella, carefully!) for a smoky twist.
    • Caprese Skewers: Use cherry tomatoes, small mozzarella balls (ciliegine or pearl), and basil leaves threaded onto skewers for a party-friendly appetizer.
    • Add Prosciutto: For a salty, savory kick, drape a few thin slices of prosciutto over the salad.

    Savor Every Fresh Bite!

    And there you have it – a Caprese salad that’s as delightful to look at as it is to eat. It’s a testament to how simple, high-quality ingredients can create something truly memorable. Whether you’re enjoying it on a sunny afternoon or as a light, elegant starter, this salad is sure to please. Grab your best tomatoes and mozzarella, and enjoy a taste of Italy!

  • The Absolute Best Bean Salad: Fresh, Flavorful, and So Easy!

    The Absolute Best Bean Salad: Fresh, Flavorful, and So Easy!

    If there’s one dish that screams “versatile, healthy, and delicious,” it’s a good bean salad. Perfect for picnics, potlucks, a quick weekday lunch, or a light side dish, this recipe is my go-to. It’s packed with plant-based protein, fiber, and vibrant veggies, all tossed in a zesty dressing that ties everything together beautifully. Forget those bland, forgettable bean salads – this one is bright, crunchy, and utterly satisfying. Let’s get to it!

    Why You’ll Adore This Bean Salad:

    • Super Speedy: Using canned beans means this comes together in a flash.
    • Crowd-Pleaser: Seriously, everyone loves this. It’s colorful and tastes amazing.
    • Make-Ahead Marvel: It actually tastes better after a few hours (or even the next day!) as the flavors meld.
    • Customizable: I’ll give you my favorite combo, but feel free to swap in your favorite beans or veggies.
    • Healthy & Hearty: A fantastic way to get your beans and greens.

    What You’ll Need (The Ingredients):

    • For the Salad:
      • 1 can (15 ounces / 425g) kidney beans, rinsed and drained
      • 1 can (15 ounces / 425g) chickpeas (garbanzo beans), rinsed and drained
      • 1 can (15 ounces / 425g) black beans, rinsed and drained
      • 1 red bell pepper, cored, seeded, and finely diced (about 1 cup)
      • 1 green or yellow bell pepper, cored, seeded, and finely diced (about 1 cup)
      • 1/2 medium red onion, finely diced (about 1/2 cup)
      • 2-3 celery stalks, finely diced (about 3/4 cup)
      • 1 cup frozen corn, thawed (no need to cook, just thaw!)
      • 1/2 cup fresh parsley, finely chopped
    • For the Zesty Dressing:
      • 1/3 cup extra virgin olive oil
      • 1/4 cup red wine vinegar
      • 1 tablespoon Dijon mustard
      • 1-2 teaspoons maple syrup or granulated sugar (optional, to balance acidity)
      • 1-2 cloves garlic, minced (or 1/2 teaspoon garlic powder)
      • 1/2 teaspoon salt (or to taste)
      • 1/4 teaspoon black pepper (or to taste)
      • Pinch of dried oregano (optional, but nice!)

    Essential Kitchen Tools:

    • Large mixing bowl
    • Cutting board
    • Sharp knife
    • Can opener
    • Measuring cups and spoons
    • Small bowl or jar with a lid (for the dressing)
    • Whisk

    Let’s Make Some Magic: Step-by-Step Instructions

    1. Bean Prep is Key: Open your cans of kidney beans, chickpeas, and black beans. Pour them into a colander and rinse them really well under cold running water. This removes excess sodium and the starchy liquid from the can, which can make your salad cloudy and taste a bit “canny.” Give them a good shake to drain as much water as possible. Set aside.
      • Tip: Gently pat the beans dry with a paper towel if they seem overly wet.
    2. Veggie Chopping Time:
      • Wash your bell peppers and celery.
      • For the bell peppers: Cut them in half, remove the core, seeds, and white pith. Then, slice them into strips and dice them finely. Aim for pieces similar in size to the beans.
      • For the red onion: Peel it, and dice it finely. If you find raw red onion a bit too sharp, you can soak the diced onion in a small bowl of cold water for 10-15 minutes, then drain it well. This mellows the flavor.
      • For the celery: Dice it finely.
      • If your frozen corn isn’t thawed yet, you can quickly thaw it by running it under cool water in a fine-mesh sieve or placing it in a bowl of cool water for a few minutes. Drain well.
    3. Herb Happiness: Wash your fresh parsley, pat it dry thoroughly with paper towels (wet herbs don’t chop well and can make the salad watery), and then chop it finely.
    4. Whip Up the Dressing:
      • In your small bowl or jar, add the extra virgin olive oil, red wine vinegar, Dijon mustard, maple syrup (if using), minced garlic, salt, pepper, and dried oregano (if using).
      • Whisk everything together vigorously until the dressing is emulsified (meaning it looks smooth and slightly thickened, not separated). Alternatively, if using a jar, secure the lid tightly and shake it like you mean it!
      • Taste Test! This is important. Dip a piece of celery or a bean into the dressing. Does it need more salt? A bit more sweetness? A touch more vinegar for tang? Adjust it now to your liking.
    5. Combine and Conquer:
      • In your large mixing bowl, add the rinsed and drained beans, all your beautifully diced bell peppers, red onion, celery, thawed corn, and the chopped fresh parsley.
      • Pour the prepared dressing all over the bean and vegetable mixture.
      • Using a large spoon or spatula, gently toss everything together until all the ingredients are evenly coated with the dressing. Be gentle – you don’t want to mash the beans!
    6. The Magic Marination: Cover the bowl with plastic wrap or a lid and refrigerate the bean salad for at least 30 minutes before serving. Honestly, 1-2 hours is even better, and it’s fantastic the next day. This chilling time allows all those wonderful flavors to meld and get friendly with each other.

    Tips, Tricks, and Fun Variations:

    • Bean Swaps: Don’t have black beans? Use cannellini beans, pinto beans, or even edamame (shelled). A can of green beans (the crisp French-cut style, drained) can also be a classic addition.
    • Veggie Adventures:
      • Add 1 cup of diced cucumber for extra freshness.
      • Halved cherry or grape tomatoes are a great juicy addition (add them just before serving if making far ahead, as they can release a lot of water).
      • Shredded carrots add color and sweetness.
      • Finely diced jalapeño (seeds removed for less heat) can give it a nice kick.
    • Dressing Twists:
      • Use apple cider vinegar or fresh lemon juice instead of red wine vinegar.
      • Add a pinch of cumin or chili powder to the dressing for a Southwestern vibe.
      • Fresh dill or cilantro can be used instead of, or in addition to, parsley.
    • Serving Savvy: This salad is fantastic on its own, but also great:
      • As a side for grilled chicken, fish, or burgers.
      • Scooped into lettuce cups for a light lunch.
      • Mixed with quinoa or pasta for a more substantial meal.
      • Topped with crumbled feta or cotija cheese just before serving for a salty, creamy element.
      • Avocado chunks are a delicious addition, but add them right before serving to prevent browning.
    • Storage: Store leftover bean salad in an airtight container in the refrigerator for up to 3-4 days. The flavors will continue to develop!

    Ready to Enjoy Your Vibrant Bean Salad!

    There you have it – a simple, delicious, and incredibly versatile bean salad that’s sure to become a staple in your kitchen. It’s proof that healthy food can be exciting and full of flavor. Give it a try, and feel free to play around with the ingredients to make it your own. Happy cooking!

  • Creamy & Crunchy Chickpea Salad: Your New Lunchbox Favorite

    Creamy & Crunchy Chickpea Salad: Your New Lunchbox Favorite

    Looking for a quick, healthy meal that’s packed with flavor and texture? Say hello to chickpea salad! This plant-based mash-up is incredibly easy to whip up and is endlessly versatile. Perfect for sandwiches, wraps, or scooping with crackers or veggies, it’s a satisfying meal you’ll make again and again. Forget soggy, boring lunches – this vibrant salad is here to save the day!

    Why You’ll Love This Recipe

    • Speedy: Comes together in minutes.
    • Healthy: Full of fiber and plant-based protein.
    • Customizable: Easily swap ingredients to suit your taste.
    • Delicious: Creamy, crunchy, tangy, and savory!

    Let’s get started on making your new go-to lunch!

    Ingredients:

    • 1 (15-ounce) can chickpeas (garbanzo beans), drained and rinsed
    • 1/4 cup finely diced celery (about 1 stalk)
    • 2 tablespoons finely diced red onion
    • 2 tablespoons finely diced bell pepper (any color, optional for extra crunch)
    • 2 tablespoons pickle relish or finely chopped dill pickles
    • 1/4 cup mayonnaise (use vegan mayo for a dairy-free option)
    • 1 teaspoon Dijon mustard
    • 1 teaspoon fresh lemon juice (bottled works in a pinch, but fresh is better!)
    • Salt, to taste
    • Freshly ground black pepper, to taste
    • 1 tablespoon chopped fresh herbs (dill, parsley, chives, or a mix), optional but highly recommended

    Equipment:

    • Large mixing bowl
    • Fork or potato masher
    • Knife and cutting board
    • Measuring cups and spoons

    Let’s Make It! Step-by-Step Instructions:

    1. Prep the Chickpeas: First, drain and rinse your can of chickpeas thoroughly under cold water. This helps remove that starchy liquid and any residual canning flavor. Pat them dry gently with a paper towel. This little step makes a difference in texture!
    2. Mash ‘Em Up: Transfer the drained and dried chickpeas to your large mixing bowl. Now, grab a fork or a potato masher. Gently mash the chickpeas. The goal here isn’t a smooth paste! You want about 1/2 to 3/4 of the chickpeas mashed, leaving plenty of whole or half chickpeas for texture. This mix of mashed and whole is key to a good chickpea salad.
    3. Add the Crunchy Bits: Toss in your finely diced celery, red onion, and bell pepper (if using) into the bowl with the mashed chickpeas. The finer you dice these, the better they integrate into the salad. Add the pickle relish or chopped pickles – this brings a lovely tanginess!
    4. Whisk the Dressing: In a separate small bowl (or you can just add them directly to the big bowl, but mixing separately helps ensure everything is combined), whisk together the mayonnaise, Dijon mustard, and fresh lemon juice. Stir until it’s smooth and well combined.
    5. Combine Everything: Pour the dressing mixture over the chickpea and vegetable mixture in the large bowl.
    6. Mix Gently: Use a spoon or spatula to gently fold everything together. Make sure the dressing coats all the ingredients evenly. Don’t overmix, or you’ll mash the remaining whole chickpeas too much.
    7. Add Herbs (If Using): If you’re using fresh herbs, now’s the time to stir them in. They add a wonderful pop of freshness.
    8. Season to Taste: This is a crucial step! Grab a spoon and take a small taste. Does it need more salt? More pepper? A little more lemon juice for brightness? Maybe a tiny bit more mustard for tang? Adjust the seasonings until it tastes perfect to you. Chickpeas can be a bit bland on their own, so don’t be shy with the seasoning.
    9. Chill (Recommended): While you can eat it right away, chickpea salad tastes even better after it’s had a little time for the flavors to meld. Cover the bowl and pop it in the fridge for at least 15-30 minutes. An hour is even better if you have the time.

    Tips and Tricks for the Best Chickpea Salad:

    • Rinse & Dry: Seriously, rinsing and patting the chickpeas dry prevents a slimy texture.
    • Don’t Over-Mash: That mix of mashed and whole chickpeas gives you the best of both creamy and chunky textures.
    • Finely Dice Veggies: Small, uniform pieces ensure crunch in every bite without being overwhelming.
    • Taste & Adjust: Seasoning is personal! Always taste and add salt, pepper, or acidity as needed.
    • Fresh is Best: Fresh lemon juice and fresh herbs really elevate the flavor compared to bottled juice or dried herbs.
    • Chill Out: Letting the salad sit in the fridge allows the flavors to meld and deepen.

    Serving Suggestions:

    The beauty of chickpea salad is its versatility! Here are a few ways to enjoy it:

    • Classic Sandwich: Serve it between two slices of your favorite bread (toasted or not) with lettuce and tomato.
    • Wrap It Up: Spoon it into tortillas, lettuce wraps, or pita pockets.
    • Scoop & Snack: Serve it with crackers, pita chips, cucumber slices, bell pepper strips, or carrot sticks.
    • On a Bed of Greens: Pile it onto a simple green salad.
    • Stuffed: Fill half an avocado, hollowed-out tomatoes, or bell pepper halves with the salad.

    Storage:

    Store leftover chickpea salad in an airtight container in the refrigerator for 3-4 days. It’s a great meal prep option! We don’t recommend freezing it, as the texture of the chickpeas and veggies can change quite a bit.

    Variations to Try:

    Get creative and make this recipe your own!

    • Curry Chickpea Salad: Add a teaspoon or two of curry powder and a pinch of garlic powder. A handful of raisins or chopped apple can be a great addition here too!
    • Mediterranean Twist: Stir in chopped sun-dried tomatoes, Kalamata olives, and swap the dill/parsley for fresh oregano. Use a mix of mayo and a little olive oil or tahini.
    • Crunch Factor: Add chopped nuts (like walnuts or pecans) or seeds (sunflower or pumpkin) for extra crunch.
    • Sweet & Savory: Mix in a handful of chopped grapes or diced apple.
    • Creamy Avocado: Mash in half a ripe avocado along with the mayo for extra creaminess (and healthy fats!).

    Get Scooping!

    This chickpea salad is such a satisfying and easy dish. Whether you’re packing lunch for work, need a quick weeknight meal, or want a simple side dish, this recipe has you covered. Give it a try and let us know how you like it! Enjoy!

  • The Best Classic Chicken Salad Recipe (Plus Fun Variations!)

    The Best Classic Chicken Salad Recipe (Plus Fun Variations!)

    Chicken salad. Just the words conjure up images of sunny picnics, light lunches, and comforting sandwiches. It’s a timeless classic for a reason – it’s easy to make, incredibly versatile, and utterly delicious. But not all chicken salads are created equal! Some are bland, some are dry, and some are just…meh. This recipe? This is the one you’ll come back to again and again. We’re talking creamy, flavorful, and perfectly textured chicken salad that’s amazing on bread, crackers, lettuce wraps, or straight from the bowl (we won’t judge!).

    Let’s dive into making the ultimate chicken salad, step-by-step, with all my best tips and tricks for chicken salad perfection.

    What You’ll Need to Make This Amazing Chicken Salad:

    • For the Chicken:
      • 1.5 – 2 pounds boneless, skinless chicken breasts (about 2-3 large breasts)
      • Water or chicken broth (enough to cover the chicken)
      • 1 teaspoon salt
      • ½ teaspoon black pepper
      • Optional: 1 bay leaf, a few sprigs of fresh thyme or rosemary for extra flavor while cooking the chicken.
    • For the Salad:
      • ½ cup mayonnaise (use your favorite! Full-fat mayo gives the richest flavor, but light mayo works too)
      • ¼ cup celery, finely diced
      • ¼ cup red onion, finely diced (for a milder flavor, soak diced red onion in cold water for 10 minutes and drain)
      • ¼ cup grapes (red or green, halved or quartered if large) – Optional, but adds a lovely sweetness and texture!
      • ¼ cup toasted pecans or walnuts, chopped – Optional, for crunch and nutty flavor.
      • 2 tablespoons fresh lemon juice (or apple cider vinegar for a slightly different tang)
      • 1 tablespoon Dijon mustard (adds a nice depth of flavor)
      • ½ teaspoon salt (or to taste)
      • ¼ teaspoon black pepper (or to taste)
      • Optional: 1-2 tablespoons chopped fresh herbs like parsley, dill, or chives for extra freshness.
      • Optional: Pinch of paprika or celery seed for a little extra flavor kick.

    Let’s Get Cooking: Step-by-Step Chicken Salad Recipe

    Step 1: Cook the Chicken to Juicy Perfection

    The foundation of a great chicken salad is, of course, perfectly cooked chicken. Dry, overcooked chicken will make for a dry, disappointing salad. Here’s how to get it right:

    1. Choose your cooking method: You have a few options here. Poaching is my go-to for the most tender and moist chicken. You can also bake or even use rotisserie chicken for speed.
      • Poaching (Recommended): Place the chicken breasts in a large pot. Cover them completely with water or chicken broth. Add 1 teaspoon of salt, ½ teaspoon of pepper, and any optional aromatics like bay leaf or herbs. Bring the liquid to a gentle simmer over medium heat. Crucially, do NOT boil vigorously! Simmering gently will keep the chicken tender. Reduce the heat to low, cover the pot, and simmer for about 12-15 minutes, or until the chicken is cooked through. A meat thermometer inserted into the thickest part should read 165°F (74°C). Pro Tip: Don’t overcook! Overcooked chicken is dry chicken. Check for doneness on the earlier side, and remove it as soon as it’s cooked through.
      • Baking: Preheat your oven to 375°F (190°C). Place the chicken breasts in a baking dish. You can drizzle them with a little olive oil and season with salt and pepper. Bake for 20-25 minutes, or until cooked through (internal temperature of 165°F/74°C).
      • Rotisserie Chicken (Quickest): If you’re short on time, a rotisserie chicken is your best friend. Simply shred the meat, discarding the skin and bones. You’ll need about 2-3 cups of shredded chicken for this recipe.
    2. Let the Chicken Rest (Important!): Once the chicken is cooked, remove it from the pot (if poaching) or oven (if baking). Place it on a plate and let it rest for at least 10 minutes. This resting time is crucial! It allows the juices to redistribute throughout the chicken, resulting in much more tender and flavorful meat. Tip: If you poached the chicken, don’t discard the cooking liquid! It’s now a delicious chicken broth you can use for soups or other recipes.

    Step 2: Shred or Dice the Chicken

    1. Shredding vs. Dicing: For chicken salad, you can either shred or dice the chicken. Shredding creates a finer texture, while dicing gives you more distinct pieces of chicken. It’s really a matter of personal preference. I often prefer a mix of both – slightly shredded with some small chunks.
    2. How to Shred: Using two forks, pull the chicken apart into shreds. You can also use your hands (once it’s cool enough to handle).
    3. How to Dice: Cut the chicken into small, bite-sized cubes, about ½ inch in size.

    Step 3: Prep the Veggies and Other Goodies

    While the chicken is resting and cooling, get your other ingredients ready:

    1. Celery and Red Onion: Finely dice the celery and red onion. For the red onion, if you find the raw onion flavor too strong, soak the diced onion in cold water for 10 minutes, then drain thoroughly and pat dry. This will mellow out the sharpness.
    2. Grapes (Optional): If using grapes, halve or quarter them, depending on their size.
    3. Nuts (Optional): If using nuts, toast them for extra flavor. Spread pecans or walnuts on a baking sheet and bake at 350°F (175°C) for 5-7 minutes, or until fragrant. Let them cool completely before chopping.
    4. Fresh Herbs (Optional): Chop any fresh herbs you are using, like parsley, dill, or chives.

    Step 4: Make the Creamy Dressing

    In a large bowl, whisk together the mayonnaise, lemon juice (or apple cider vinegar), Dijon mustard, salt, and pepper. Taste and adjust seasonings as needed. This is your base dressing.

    Step 5: Combine Everything!

    1. Add the Chicken and Veggies: Add the shredded or diced chicken, diced celery, diced red onion, and optional grapes and toasted nuts to the bowl with the dressing.
    2. Gently Mix: Gently stir everything together until the chicken and vegetables are evenly coated in the dressing. Be careful not to overmix, as this can make the chicken salad mushy.
    3. Taste and Adjust: Now is the time to taste your chicken salad and make any adjustments. Does it need more salt? Pepper? A little more lemon juice for brightness? Add your optional fresh herbs and paprika or celery seed if desired. Make it perfect to your taste!

    Step 6: Chill Out (and the Chicken Salad Too!)

    For the best flavor, cover the chicken salad and refrigerate it for at least 30 minutes, or even better, for 1-2 hours. Chilling allows the flavors to meld together beautifully and the salad to firm up slightly. This also makes it perfect for making ahead of time.

    Serving Suggestions & Variations to Keep Things Exciting:

    • Classic Sandwich: Serve your chicken salad on toasted bread, croissants, or rolls with lettuce and tomato.
    • Lettuce Wraps: For a lighter, low-carb option, spoon chicken salad into crisp lettuce cups (like romaine or butter lettuce).
    • Crackers or Veggies: Serve with crackers, cucumber slices, bell pepper strips, or celery sticks for dipping.
    • Stuffed Avocado or Tomato: Halve an avocado or tomato and fill it with chicken salad for a beautiful and healthy lunch.
    • Spice it Up: Add a pinch of cayenne pepper or a dash of hot sauce to the dressing for a spicy kick.
    • Curry Chicken Salad: Add 1-2 teaspoons of curry powder to the dressing for a delicious curried chicken salad. You can also add raisins and mango chutney for extra flavor.
    • Cranberry Walnut Chicken Salad: Replace grapes with dried cranberries and use walnuts instead of pecans for a festive twist.
    • Herby Chicken Salad: Load up on fresh herbs! Add a mix of parsley, dill, chives, and tarragon for a super flavorful and fresh chicken salad.

    Tips and Tricks for Chicken Salad Success:

    • Don’t Overcook the Chicken! Moist chicken is key. Use a meat thermometer to ensure it’s cooked to 165°F (74°C) and don’t cook it any longer.
    • Let the Chicken Cool Completely: Allow the cooked chicken to cool down before mixing it with the mayonnaise dressing. Warm chicken can make the mayonnaise separate and the salad greasy.
    • Don’t Overmix: Gently stir the ingredients together just until combined. Overmixing can make the chicken salad mushy.
    • Taste and Adjust Seasoning: Always taste your chicken salad before chilling and adjust the seasonings to your liking.
    • Make Ahead: Chicken salad is a great make-ahead dish! It can be stored in the refrigerator for up to 3-4 days. In fact, the flavor often improves after a day in the fridge.
    • Fresh is Best: While you can use dried herbs, fresh herbs really elevate the flavor of chicken salad. If possible, use fresh herbs for the best results.

    Chicken Salad Bliss: A Recipe You’ll Make Again and Again

    This classic chicken salad recipe is more than just a recipe; it’s a starting point for endless delicious variations. Whether you keep it simple and classic or experiment with different flavors and textures, you’re sure to create a chicken salad that’s perfect for any occasion. Enjoy every creamy, flavorful bite!

  • Beat the Heat with the Best Ever Cold Pasta Salad

    Beat the Heat with the Best Ever Cold Pasta Salad

    When the sun is blazing and the last thing you want to do is stand over a hot stove, cold pasta salad is your absolute best friend. It’s the ultimate make-ahead dish, perfect for picnics, BBQs, potlucks, or just a satisfying light meal on a warm day. The beauty of pasta salad lies in its incredible versatility – you can toss in just about anything you have in your fridge and create something delicious and refreshing. This recipe is a fantastic starting point, packed with flavor and texture, and easy to customize to your liking. Let’s get cooking!

    What You’ll Need (Ingredients):

    • Pasta: 1 pound (450g) of your favorite short pasta shape. Rotini, fusilli, penne, farfalle (bow ties), or even elbow macaroni all work wonderfully. The ridges and shapes help the dressing cling!
    • Vegetables:
      • 1 cup cherry tomatoes, halved or quartered if large. Choose ripe, flavorful tomatoes for the best taste.
      • 1 cucumber, about 6-8 inches long, peeled or unpeeled (your preference), seeded, and diced. Seeding the cucumber prevents the salad from becoming watery.
      • 1 red bell pepper, cored, seeded, and diced. Red peppers offer sweetness and a vibrant color. You could also use yellow or orange.
      • 1/2 red onion, finely diced. Red onion adds a bit of bite. If you prefer a milder flavor, soak the diced red onion in cold water for 10 minutes, then drain well before adding to the salad. This takes away some of the sharpness.
      • 1/2 cup Kalamata olives, pitted and halved. These add a salty, briny flavor. You can use other types of olives if you prefer.
    • Cheese (Optional but Recommended): 4 ounces (115g) of feta cheese, crumbled. Feta provides a salty, tangy counterpoint to the vegetables and dressing. Fresh mozzarella balls (bocconcini), halved or quartered, are another great option for a milder, creamier cheese.
    • Fresh Herbs: 1/4 cup fresh parsley, chopped, and 1/4 cup fresh basil, chopped. Fresh herbs are key to bright flavor! Other good choices include oregano, dill, or chives.
    • Dressing:
      • 1/2 cup extra virgin olive oil. Use good quality olive oil for the best flavor in your dressing.
      • 1/4 cup red wine vinegar. Red wine vinegar provides a classic tangy base. You could also use white wine vinegar, balsamic vinegar (for a sweeter, richer flavor), or lemon juice for a brighter, citrusy dressing.
      • 2 tablespoons Dijon mustard. Dijon mustard adds depth and emulsifies the dressing, helping it to thicken and cling to the pasta.
      • 1 clove garlic, minced. Freshly minced garlic is best for flavor.
      • 1 teaspoon dried oregano. Oregano complements the Mediterranean flavors of this salad.
      • 1/2 teaspoon salt, or to taste. Start with 1/2 teaspoon and adjust to your preference.
      • 1/4 teaspoon black pepper, or to taste. Freshly ground black pepper is always preferable.
      • Pinch of red pepper flakes (optional, for a little heat).

    Let’s Get Cooking (Instructions):

    1. Cook the Pasta to Perfection: Fill a large pot with salted water and bring it to a rolling boil. The water should be generously salted – think “sea water” salty. This seasons the pasta from the inside out. Add the pasta and cook according to package directions for “al dente.” Al dente means “to the tooth” in Italian, and the pasta should be slightly firm to the bite, not mushy. Start checking for doneness about 1-2 minutes before the package time. Overcooked pasta will become soggy in the salad.
      • Tip: Don’t add oil to the pasta water. It’s a myth that it prevents sticking and can actually make it harder for the dressing to cling to the pasta.
    2. Drain and Rinse (Crucial Step!): Once the pasta is cooked al dente, drain it immediately in a colander. Now, this is important for cold pasta salad: rinse the pasta under cold running water until it is completely cool. This stops the cooking process instantly and removes excess starch, preventing the pasta from sticking together and becoming gummy in the salad. Let the pasta drain thoroughly.
      • Trick for Extra Cool Pasta: After rinsing, you can even toss the drained pasta with a tablespoon of olive oil. This further prevents sticking and adds a little extra flavor.
    3. Prep the Veggies: While the pasta is cooking and cooling, prepare your vegetables.
      • Tomatoes: Wash and halve or quarter the cherry tomatoes. If using larger tomatoes, core and dice them.
      • Cucumber: Wash the cucumber. You can peel it if you prefer a smoother texture, or leave the skin on for added nutrients and texture. Slice the cucumber lengthwise, scoop out the seeds with a spoon (this prevents watery salad), and then dice the cucumber into bite-sized pieces.
      • Bell Pepper: Wash the bell pepper, cut around the stem, remove the core and seeds, and dice the pepper into pieces similar in size to the cucumber.
      • Red Onion: Peel the red onion and finely dice it. Remember the tip about soaking in cold water if you want a milder flavor.
      • Olives: Drain and halve the Kalamata olives if they are whole. If they are already pitted and sliced, you can use them as is or halve them for better distribution in the salad.
      • Herbs: Wash and thoroughly dry the parsley and basil. Chop them finely. Drying the herbs ensures they don’t make the salad watery.
    4. Make the Dressing: In a small bowl or jar, whisk together the olive oil, red wine vinegar, Dijon mustard, minced garlic, dried oregano, salt, pepper, and red pepper flakes (if using). Whisk vigorously until the dressing is well combined and slightly emulsified (it will look a bit thicker and slightly opaque). If using a jar, simply put all the ingredients in the jar, close the lid tightly, and shake vigorously until emulsified.
      • Taste and Adjust: This is crucial! Taste the dressing and adjust the seasonings to your liking. Does it need more salt? More vinegar for tanginess? A touch more mustard for depth? Now is the time to perfect it!
    5. Assemble the Salad: In a large bowl, combine the cooled pasta, diced cucumber, bell pepper, red onion, halved tomatoes, and olives. Add the crumbled feta cheese (if using) and the chopped fresh parsley and basil.
    6. Dress and Toss: Pour the dressing over the pasta and vegetable mixture. Gently toss everything together until the pasta and vegetables are evenly coated with the dressing. Be careful not to over-mix, especially if using feta, as it can crumble further.
    7. Chill and Let the Flavors Mingle: Cover the pasta salad and refrigerate it for at least 30 minutes, or ideally 1-2 hours, before serving. Chilling allows the flavors to meld together beautifully and the pasta salad to become even more refreshing.
      • Make Ahead Tip: Pasta salad is fantastic made ahead! You can prepare it up to a day in advance. If making ahead, you might want to reserve some of the dressing and add it just before serving, as pasta can absorb some of the dressing as it sits. Give it a good toss before serving to refresh everything.
    8. Serve and Enjoy! Give the pasta salad one final toss before serving. Taste and adjust seasoning one last time if needed. Serve chilled and enjoy the delicious, refreshing flavors of your homemade cold pasta salad!

    Make it Your Own: Flavor Variations and Additions!

    • Protein Power: Add grilled chicken, shrimp, chickpeas, cannellini beans, or salami for a heartier salad.
    • Mediterranean Twist: Add sun-dried tomatoes, artichoke hearts (canned or marinated), roasted red peppers, or capers.
    • Italian Inspired: Use balsamic vinaigrette instead of red wine vinegar dressing, add fresh mozzarella and basil, and consider adding pepperoni or salami.
    • Creamy Version: Swap out some of the olive oil in the dressing for mayonnaise or Greek yogurt for a creamier texture. Be mindful that creamy dressings are best consumed within 2-3 days.
    • Spice it Up: Add a pinch of red pepper flakes to the dressing, or include some chopped pickled jalapeños or pepperoncini peppers in the salad.
    • Vegetable Swap: Feel free to swap out or add other vegetables you love, like zucchini, carrots, broccoli florets (blanched), or corn (fresh or frozen, thawed).

    Summer Sorted: Your Cold Pasta Salad Masterpiece!

    This cold pasta salad recipe is more than just a dish; it’s a blank canvas for your culinary creativity. Don’t be afraid to experiment with different ingredients and dressings to create your own signature pasta salad. Whether you’re heading to a picnic, need a quick and easy lunch, or want a refreshing side dish for dinner, this recipe will become your go-to. Enjoy the process, and most importantly, enjoy every delicious bite!

  • Unlock the Secret to Perfectly Juicy Oven Baked Chicken Breast

    Unlock the Secret to Perfectly Juicy Oven Baked Chicken Breast

    Chicken breast. It’s a staple in so many kitchens. Versatile, healthy, and a great source of protein. But let’s be honest, oven-baked chicken breast can sometimes end up dry and bland. Fear not! Today, we’re diving deep into the art of baking chicken breast to juicy, flavorful perfection. Forget dry, rubbery chicken – we’re about to unlock the secrets to consistently delicious results. Get ready to master easy and foolproof oven-baked chicken breast recipes that will become your go-to for quick weeknight dinners and meal prep success.

    The Ultimate Guide to Basic Oven Baked Chicken Breast: Juicy Every Time

    Let’s start with the foundation – the perfect basic oven-baked chicken breast. This recipe is all about technique and simple seasonings to let the natural flavor of the chicken shine, while ensuring it stays incredibly juicy.

    Ingredients for 2 servings:

    • 2 boneless, skinless chicken breasts (about 6-8 ounces each), try to choose breasts of similar size for even cooking
    • 1 tablespoon olive oil (or any cooking oil you prefer)
    • 1 teaspoon salt (kosher salt is recommended, but table salt works too – adjust amount if using table salt as it’s saltier)
    • 1/2 teaspoon black pepper, freshly ground
    • 1/2 teaspoon garlic powder (optional, but adds a nice savory note)
    • 1/4 teaspoon dried herbs (like thyme, rosemary, or oregano – choose your favorite or a mix) – optional for a more herby flavor

    Equipment:

    • Baking sheet
    • Meat thermometer (highly recommended for accuracy)
    • Optional: Plastic wrap or resealable bag for pounding

    Preparation:

    1. Preheat your oven to 400°F (200°C). Make sure your oven is properly preheated. This is crucial for even cooking and preventing the chicken from drying out. A preheated oven ensures the chicken starts cooking immediately when it goes in.
    2. Prepare the chicken breasts: Take your chicken breasts and pat them dry with paper towels. This is a key step! Drying the chicken breast is essential for getting a nice sear and preventing it from steaming in the oven. Excess moisture will hinder browning.
    3. Pound the chicken breasts for even thickness (Optional but Recommended): If your chicken breasts are unevenly thick (thicker at one end than the other), it’s a good idea to pound them to a more uniform thickness. This ensures they cook evenly. Place the chicken breast between two pieces of plastic wrap or inside a resealable bag. Using a rolling pin or the flat side of a meat mallet, gently pound the thicker parts until the breast is about 1/2 inch thick all over. Don’t pound too hard, you just want to even it out, not make it paper thin. If your chicken breasts are already relatively thin and uniform, you can skip this step.
    4. Season generously: Place the chicken breasts on a baking sheet. Drizzle them with olive oil, ensuring both sides are lightly coated. This helps with browning and adds flavor. Now, season generously with salt, pepper, garlic powder (if using), and dried herbs (if using). Don’t be shy with the seasoning! Chicken breast is lean and needs proper seasoning to taste flavorful. Rub the seasonings into both sides of the chicken breasts, ensuring they are evenly coated.
    5. Bake in the preheated oven: Place the baking sheet with the seasoned chicken breasts in the preheated oven. Bake for 20-30 minutes, or until the chicken is cooked through. The exact baking time will depend on the thickness of your chicken breasts and your oven.
    6. Check for doneness using a meat thermometer: The most accurate way to know when chicken breast is cooked is to use a meat thermometer. Insert the thermometer into the thickest part of the chicken breast. Chicken breast is cooked when it reaches an internal temperature of 165°F (74°C). Avoid overcooking, as this will make the chicken dry. Start checking the temperature around the 20-minute mark and check every few minutes after that.
    7. Rest the chicken (Crucial for Juiciness!): Once the chicken reaches 165°F (74°C), remove it from the oven and let it rest for 5-10 minutes before slicing or serving. This resting time is absolutely vital for juicy chicken. During resting, the juices redistribute throughout the meat, resulting in a more tender and flavorful chicken breast. Don’t skip this step! You can loosely tent the chicken with foil while it rests, but don’t wrap it tightly as it can steam and lose its crisp exterior.
    8. Serve and enjoy! After resting, your perfectly baked chicken breast is ready to be sliced and served. It’s delicious on its own, sliced over salads, in sandwiches, or as part of a complete meal with your favorite sides.

    Tips and Tricks for Basic Baked Chicken Breast:

    • Marinades are your friend: For even more flavor and tenderness, marinate your chicken breasts for at least 30 minutes (or up to overnight in the refrigerator) before baking. Simple marinades like Italian dressing, lemon juice and herbs, or soy sauce and ginger work wonders.
    • Don’t overcrowd the baking sheet: Give the chicken breasts some space on the baking sheet. Overcrowding can lead to steaming instead of browning. Use a larger baking sheet or bake in batches if necessary.
    • High heat for searing (Optional): For a more pronounced sear and crispy exterior, you can sear the chicken breasts in a hot skillet on the stovetop for 1-2 minutes per side before transferring them to the oven to finish baking. This is an extra step but can enhance the texture.
    • Variations on seasonings: Get creative with your seasonings! Try different herb and spice combinations like:
      • Italian Herb: Italian seasoning, paprika, onion powder
      • Spicy Cajun: Cajun seasoning, cayenne pepper, smoked paprika
      • Lemon Pepper: Lemon zest, lemon pepper seasoning, dill
    • Serving suggestions: Baked chicken breast is incredibly versatile. Serve it with:
      • Roasted vegetables (broccoli, asparagus, carrots, potatoes)
      • Salad (garden salad, Caesar salad, quinoa salad)
      • Grains (rice, quinoa, couscous)
      • Pasta (with pesto, marinara, or creamy sauce)

    Flavor Boost: Lemon Herb Oven Baked Chicken Breast

    Want to add a bright, zesty twist to your baked chicken breast? This Lemon Herb variation is incredibly refreshing and easy to make.

    Ingredients (in addition to the basic recipe):

    • 1 tablespoon lemon juice, fresh
    • 1 teaspoon lemon zest (zest of about 1/2 lemon)
    • 1 tablespoon fresh herbs, chopped (like parsley, thyme, rosemary, or a mix)

    Instructions:

    1. Follow steps 1-3 of the basic recipe.
    2. In a small bowl, combine olive oil, lemon juice, lemon zest, salt, pepper, garlic powder (if using), dried herbs (if using), and fresh herbs.
    3. Pour the lemon herb mixture over the chicken breasts on the baking sheet, ensuring they are evenly coated.
    4. Follow steps 5-8 of the basic recipe for baking and resting.

    Tips and Tricks for Lemon Herb Chicken Breast:

    • Use fresh lemon zest and juice: Freshly squeezed lemon juice and zest provide a much brighter and more vibrant flavor than bottled juice.
    • Pair with Mediterranean sides: Lemon herb chicken breast pairs beautifully with Mediterranean-inspired sides like roasted vegetables with feta cheese, Greek salad, or couscous with olives and sun-dried tomatoes.

    Flavor Boost: Garlic Parmesan Oven Baked Chicken Breast

    For a richer, more savory flavor, try this Garlic Parmesan baked chicken breast. The parmesan creates a delicious cheesy crust that’s simply irresistible.

    Ingredients (in addition to the basic recipe):

    • 1/4 cup grated Parmesan cheese, finely grated
    • 1 teaspoon garlic powder (you can use 1/2 teaspoon in the basic seasoning and add another 1/2 teaspoon here for extra garlic flavor)

    Instructions:

    1. Follow steps 1-4 of the basic recipe.
    2. In a small bowl, combine grated Parmesan cheese and garlic powder.
    3. Sprinkle the Parmesan mixture evenly over the top of the chicken breasts on the baking sheet, pressing lightly to help it adhere.
    4. Follow steps 5-8 of the basic recipe for baking and resting.

    Tips and Tricks for Garlic Parmesan Chicken Breast:

    • Use finely grated Parmesan: Finely grated Parmesan cheese will melt and create a better crust than coarsely grated Parmesan.
    • Broil for extra crispiness (Optional): For an even crispier Parmesan crust, you can broil the chicken breast for the last 1-2 minutes of baking. Watch it closely to prevent burning!
    • Serve with Italian-inspired dishes: Garlic Parmesan chicken breast is fantastic with Italian-inspired sides like pasta with marinara sauce, creamy risotto, or roasted vegetables with Italian herbs.

    Baked Chicken Breast: Your Kitchen Superstar

    Oven baked chicken breast is truly a kitchen superstar. Mastering these simple techniques and recipes will transform your weeknight dinners and meal prep game. With endless flavor variations and its incredible versatility, you’ll find yourself reaching for this healthy and delicious protein again and again. Enjoy experimenting and creating your own signature baked chicken breast dishes!

  • Perfectly Roasted Eggplant: Simple Steps to Deliciousness!

    Perfectly Roasted Eggplant: Simple Steps to Deliciousness!

    Oven roasted eggplant is a true kitchen chameleon, incredibly versatile and oh-so-delicious! Whether you’re looking for a fantastic side dish, a base for a vegetarian main course, or a flavorful addition to your favorite pasta sauce, roasted eggplant is your answer. Many people are hesitant to cook eggplant, worried it might turn out mushy or bitter. But fear not! With this easy recipe and a few simple tricks, you’ll be roasting eggplant like a pro in no time, achieving that perfect tender and flavorful result every single time. We’ll walk you through each step to unlock the amazing potential of this fantastic vegetable. Let’s dive into the world of oven roasted eggplant!

    Easy Oven Roasted Eggplant – The Basic Recipe

    This recipe is your foolproof entry point to the world of oven-roasted eggplant. It’s incredibly simple, requires just a few ingredients, and forms the perfect foundation for countless other dishes.

    Ingredients:

    • 2 medium-sized eggplants
    • 4-5 tablespoons extra virgin olive oil
    • 1 teaspoon salt (plus more for salting)
    • ½ teaspoon black pepper, freshly ground
    • 1-2 cloves garlic, finely minced (optional)
    • 1 teaspoon dried herbs of your choice (e.g., oregano, thyme, rosemary, optional)
    • Fresh herbs for garnish (e.g., parsley, basil, optional)

    Instructions:

    1. Prepare the eggplant: Wash the eggplants thoroughly under cold running water and dry them with a clean kitchen towel. Trim off the green stem end. Now, you have a few options for cutting the eggplant, depending on how you plan to use it and how long you want it to cook. For this basic recipe, I recommend either slicing the eggplant into rounds about ½ inch to ¾ inch thick, or cutting it into cubes about 1 inch to 1 ½ inches. Slices are great if you plan to use them in sandwiches or layer them, while cubes are perfect as a side dish or for adding to vegetable medleys.
    2. Salt the eggplant (crucial step!): This step is essential to draw out excess moisture and reduce any potential bitterness in the eggplant. Place the eggplant slices or cubes in a colander or on a baking sheet lined with paper towels. Sprinkle them generously with salt – don’t worry, most of the salt will be rinsed or patted off later. Let the eggplant sit for at least 30 minutes, ideally 45-60 minutes. You’ll notice small droplets of water forming on the surface; this is the salt drawing out the moisture.
    3. Preheat the oven: Preheat your oven to 400°F (200°C). Line a baking sheet with parchment paper for easy cleanup.
    4. Rinse and season the eggplant: Rinse the eggplant slices or cubes under cold running water to remove the excess salt. Pat them thoroughly dry with paper towels. This step is important to ensure the eggplant browns nicely in the oven and doesn’t become soggy.
    5. Prepare the marinade: In a bowl, whisk together the olive oil, 1 teaspoon salt, black pepper, minced garlic (if using), and dried herbs (if using).
    6. Marinate the eggplant: Add the dried eggplant to the bowl with the marinade and toss everything together until all pieces are evenly coated with oil and seasonings. You can use your hands to make sure the marinade really gets everywhere.
    7. Roast: Spread the marinated eggplant in a single layer on the prepared baking sheet. Make sure they are not overlapping, as this will prevent them from browning and roasting evenly. Place the baking sheet in the preheated oven and roast for 25-35 minutes. The roasting time may vary depending on the thickness of your eggplant pieces and your oven. Flip the eggplant pieces halfway through the cooking time using a spatula, so they brown nicely on both sides. They are done when they are tender, slightly browned, and easily pierced with a fork. They should yield slightly when pressed.
    8. Serve: Remove the baking sheet from the oven. Garnish the oven roasted eggplant with fresh herbs, such as parsley or basil, if desired. Serve warm as a side dish with meat, fish, or vegetarian mains, or use them in other recipes.

    Tips and Tricks for Perfect Oven Roasted Eggplant:

    • Salting is key: Don’t skip the salting step! It truly makes a difference in reducing bitterness, improving texture, and preventing the eggplant from absorbing too much oil during cooking. It’s a game-changer!
    • Use good quality olive oil: The quality of your olive oil significantly impacts the flavor. Opt for extra virgin olive oil for the best taste and health benefits.
    • Herb it up: Experiment with different herbs! Oregano and thyme provide a wonderful Mediterranean flavor, rosemary adds a savory note, and paprika or chili flakes can introduce a touch of heat. Fresh herbs like chopped parsley, basil, or mint after roasting are also fantastic additions.
    • Garlic love: Garlic and eggplant are a match made in heaven! You can mince the garlic and mix it into the marinade, or roast whole, unpeeled garlic cloves alongside the eggplant and squeeze the soft, roasted garlic pulp out afterward.
    • Even slices/cubes: Try to cut the eggplant into pieces of uniform thickness. This ensures they cook evenly in the oven.
    • Don’t overcrowd the pan: Spread the eggplant pieces in a single layer on the baking sheet. If the pan is too crowded, the eggplant will steam rather than roast, and won’t brown properly. It’s better to use two baking sheets if needed.
    • Variations to explore: This basic recipe is incredibly versatile! You can easily customize your oven roasted eggplant:
      • Cheesy eggplant: Sprinkle grated mozzarella, Parmesan, or feta cheese over the eggplant in the last few minutes of baking and broil until the cheese is melted and golden brown.
      • Mediterranean style: Combine roasted eggplant with chopped olives, capers, sun-dried tomatoes, and crumbled feta cheese after roasting.
      • Asian inspired: Marinate eggplant with soy sauce, ginger, garlic, sesame oil, and chili flakes before roasting.
      • Sweet and savory: Add a drizzle of honey or maple syrup to the marinade for a hint of sweetness.
    • Storage: Leftover oven roasted eggplant can be stored in an airtight container in the refrigerator for 2-3 days. It tastes great cold in salads or can be reheated in the microwave or oven.

    Oven Roasted Eggplant: Your New Favorite Vegetable!

    With this simple recipe and these helpful tips, you’re well on your way to making perfect oven roasted eggplant every time. It’s incredibly flavorful, versatile, and a fantastic way to incorporate more vegetables into your diet. Give it a try and discover the many delicious possibilities this fantastic vegetable has to offer! Enjoy your meal!

  • Perfectly Roasted Pork Tenderloin: Your Go-To Recipe for Juicy, Flavorful Pork

    Perfectly Roasted Pork Tenderloin: Your Go-To Recipe for Juicy, Flavorful Pork

    Pork tenderloin is a fantastic cut of meat – it’s lean, incredibly tender, and cooks up beautifully in the oven. It’s the perfect choice for a weeknight dinner that feels a little special, or for a weekend feast when you want something impressive but not overly complicated. While pork tenderloin is wonderfully easy to cook, it can sometimes dry out if not handled correctly. But don’t worry! This recipe and our foolproof tips will guide you to consistently juicy and flavorful oven-roasted pork tenderloin every single time. Let’s get cooking!

    Ingredients for 4 servings:

    • 1.5 – 2 lbs Pork Tenderloin (about 2 tenderloins): Look for tenderloins that are pink in color and feel firm to the touch. Avoid any that look pale or have a strong odor.
    • 2 tablespoons Olive Oil: For searing and roasting. You can also use avocado oil or another high-heat cooking oil.
    • 1-2 teaspoons Salt: Kosher salt or sea salt is recommended.
    • 1 teaspoon Black Pepper: Freshly ground black pepper is best.
    • 1 teaspoon Garlic Powder: Adds a lovely savory depth.
    • 1 teaspoon Onion Powder: Complements the garlic and other seasonings.
    • 1 teaspoon Paprika (Sweet or Smoked): Provides color and a subtle smoky or sweet note.
    • Optional Flavor Boosters:
      • 1-2 cloves Garlic (freshly minced): For a stronger garlic flavor.
      • Fresh Herbs (Rosemary, Thyme sprigs): Add aromatic freshness during roasting.
      • Dijon Mustard: To coat the tenderloin before seasoning for a tangy crust.
      • Lemon slices or wedges: To brighten the flavor and add zest.
      • Vegetables for roasting: Carrots, potatoes, onions, bell peppers, etc. to roast alongside the pork.

    Step-by-Step Guide to Oven-Roasted Pork Tenderloin Perfection

    Prepping for Success:

    1. Prepare the Pork Tenderloin: Take the pork tenderloin out of the refrigerator about 20-30 minutes before cooking. This allows it to come closer to room temperature, resulting in more even cooking. Pat the tenderloin dry with paper towels. This is crucial for achieving a good sear and crisp exterior.
    2. Trim the Silver Skin (if necessary): Look for a thin, silvery membrane on the surface of the tenderloin called silver skin. If present, you’ll want to remove it as it can become tough and chewy when cooked. To remove silver skin, slide a sharp knife under the edge of it and, angling your knife slightly upwards, run it along the tenderloin to slice it away, pulling gently as you go.
    3. Season the Pork Tenderloin: In a small bowl, combine the salt, pepper, garlic powder, onion powder, and paprika. If using fresh minced garlic, add it to the spice mixture now. Tip: For extra flavor and a beautiful crust, you can lightly coat the pork tenderloin with Dijon mustard before applying the spice rub. The mustard acts as a binder for the spices and adds a subtle tang.
    4. Apply the Spice Rub: Rub the olive oil all over the pork tenderloin. Then, generously sprinkle the spice mixture over all sides of the tenderloin, pressing lightly to ensure it adheres well. Make sure to coat every surface for maximum flavor.

    Searing for Extra Flavor (Optional but Highly Recommended):

    1. Preheat Oven and Sear Pan (if searing): Preheat your oven to 400°F (200°C). If you are searing (which we highly recommend for enhanced flavor and texture), use an oven-safe skillet, preferably cast iron or stainless steel. Place the skillet in the oven while it preheats. This will get the pan screaming hot, perfect for searing. Safety Tip: Be extremely careful when removing a hot skillet from the oven. Use oven mitts and be aware of the hot handle.
    2. Sear the Tenderloin (if searing): Carefully remove the hot skillet from the oven and place it on the stovetop over medium-high heat. Add a tablespoon of olive oil to the hot skillet. Once the oil is shimmering, carefully place the seasoned pork tenderloin in the hot skillet. Sear for 2-3 minutes per side, until nicely browned. Searing creates a delicious crust and locks in juices. Don’t overcrowd the pan; sear in batches if necessary.

    Roasting in the Oven:

    1. Roast in the Oven: If you seared the tenderloin in an oven-safe skillet, simply place the skillet with the pork tenderloin directly into the preheated oven. If you didn’t sear, or used a regular skillet, transfer the seasoned pork tenderloin to a roasting pan or baking sheet lined with parchment paper for easier cleanup.
    2. Roasting Time and Temperature: Roast for 15-25 minutes, depending on the thickness of your tenderloin and your desired level of doneness. The most accurate way to determine doneness is to use a meat thermometer. For slightly pink and juicy pork (recommended), aim for an internal temperature of 145°F (63°C). For well-done pork, cook to 160°F (71°C). Insert the meat thermometer into the thickest part of the tenderloin, avoiding bone if present.
    3. Add Vegetables (Optional): If you are roasting vegetables alongside the pork, add them to the roasting pan around the pork tenderloin about 20 minutes before you expect the pork to be done. Toss the vegetables with olive oil, salt, and pepper. Heartier vegetables like potatoes and carrots may need to be added earlier or cut into smaller pieces to ensure they cook through.

    Resting is Non-Negotiable!

    1. Rest the Pork Tenderloin: Once the pork tenderloin reaches your desired internal temperature, remove it from the oven. Crucially, let the pork tenderloin rest for 5-10 minutes before slicing. Tent it loosely with foil while it rests. Resting allows the juices to redistribute throughout the meat, resulting in a much more tender and juicy final product. Don’t skip this step!

    Slicing and Serving:

    1. Slice the Pork Tenderloin: After resting, slice the pork tenderloin against the grain into medallions about ½ to ¾ inch thick. Slicing against the grain ensures maximum tenderness.
    2. Serve and Enjoy: Arrange the sliced pork tenderloin on a platter and serve immediately. Drizzle any pan juices over the sliced pork for extra flavor. Garnish with fresh herbs like parsley or rosemary, if desired. Serve with your favorite sides.

    Tips & Tricks for the Best Oven-Roasted Pork Tenderloin:

    • Don’t Overcook: Pork tenderloin is lean and can become dry if overcooked. Use a meat thermometer to ensure perfect doneness. Aim for 145°F (63°C) for the best balance of tenderness and juiciness.
    • Rest is Key: Resting is not optional! It’s essential for juicy pork. Allow the pork to rest for at least 5 minutes before slicing.
    • Searing Enhances Flavor: Searing the pork tenderloin before roasting is highly recommended for a richer, more complex flavor and a beautiful crust.
    • Marinades for Extra Flavor: For even more flavor, consider marinating the pork tenderloin for 30 minutes to a few hours before roasting. A simple marinade of olive oil, lemon juice, garlic, and herbs works wonderfully.
    • Customize Your Seasoning: Feel free to adjust the seasonings to your liking. Experiment with different spice blends, herbs, or rubs.
    • Roast Vegetables Alongside: Make it a complete meal by roasting vegetables in the same pan as the pork tenderloin. This saves time and effort.
    • Pan Sauce Magic: Don’t discard the pan drippings! They are packed with flavor. Deglaze the pan with a little wine, broth, or balsamic vinegar after roasting, scraping up any browned bits, to create a simple and delicious pan sauce.

    Serving Suggestions and Flavor Variations:

    • Classic Sides: Mashed potatoes, roasted vegetables, rice pilaf, green beans, or a fresh salad.
    • Sauce It Up: Serve with a creamy mushroom sauce, a tangy Dijon mustard sauce, a fruity apple chutney, or a vibrant chimichurri.
    • Herb Infusion: Stuff sprigs of rosemary and thyme under kitchen twine wrapped around the tenderloin before roasting for an aromatic herb-infused flavor.
    • Bacon Wrapped: Wrap the pork tenderloin in bacon before roasting for added richness and smoky flavor. Secure with kitchen twine.
    • Citrus Burst: Stuff the tenderloin cavity with lemon slices and fresh herbs before roasting for a bright, citrusy flavor.

    Juicy and Flavorful Pork Tenderloin Awaits!

  • Oven-Baked Pork Tenderloin Recipe – Tender and Juicy

    Oven-Baked Pork Tenderloin Recipe – Tender and Juicy

    Oven-Baked Pork Tenderloin Recipes

    Oven-Baked Pork Tenderloin Recipes: Tender, Juicy, Versatile!

    Pork tenderloin is a premium cut of meat that’s perfectly suited for oven baking. It’s lean, tender, and incredibly versatile. Whether classically marinated, elegantly stuffed, or simply seasoned with herbs and spices, oven-baked pork tenderloin always turns out wonderfully and is a highlight for any occasion. In this article, we’ll show you how to prepare pork tenderloin perfectly in the oven, ensuring it stays juicy and develops a delicious crust. Discover the best tips and tricks for successful oven-baked pork tenderloin!

    Basic Recipe: Oven-Baked Pork Tenderloin (Plain)

    This basic recipe serves as a foundation for many variations and shows you how to prepare a juicy and flavorful pork tenderloin in the oven.

    Ingredients (for 4 servings):

    • 1 pork tenderloin (approx. 500-600g / 1.1-1.3 lbs), trimmed
    • 2 tablespoons olive oil
    • 1 teaspoon salt
    • ½ teaspoon black pepper
    • 1 teaspoon dried thyme or rosemary (or fresh herbs of your choice)
    • 1-2 cloves of garlic (optional), peeled and lightly crushed
    • Optional: 1 tablespoon butter
    Oven-Baked Pork Tenderloin Instructions

    Instructions:

    1. Prepare the Pork Tenderloin: Remove the pork tenderloin from its packaging and pat it dry with paper towels. Trim away any silverskin or tendons (trimming). Trimming ensures a more tender result by removing tough areas.
      Tip: A sharp, flexible knife makes trimming easier.
    2. Season the Tenderloin: Rub the pork tenderloin all over with salt and pepper. Then, evenly distribute the dried herbs (thyme or rosemary) over the tenderloin. If using fresh herbs, chop them finely and distribute them over the tenderloin as well. Optionally, add the lightly crushed garlic cloves. These will release their aroma while roasting.
    3. Sear the Tenderloin (optional, but recommended): Searing creates Maillard reaction flavors and a beautiful crust, intensifying the taste of the pork tenderloin. Heat the olive oil in an oven-safe skillet or roasting pan (that can later go into the oven) over medium-high heat. Once the oil is hot, place the seasoned pork tenderloin in the pan and sear it on all sides (about 2-3 minutes per side) until it has a nice brown color.
      Tip for extra flavor: Towards the end of searing, add a tablespoon of butter to the pan and let it foam. Baste the tenderloin several times with the butter while searing.
    4. Transfer to the Oven: Once the pork tenderloin is seared on all sides, remove the skillet from the stovetop and place it in the preheated oven.
    5. Preheat the Oven: Preheat the oven to 180°C (350°F) for conventional oven settings (top and bottom heat). For convection oven, set to 160°C (320°F).
    6. Baking Time: The baking time for pork tenderloin in the oven depends on the thickness of the tenderloin and the desired level of doneness. For a medium-rare result (recommended), the baking time is about 15-20 minutes. For well-done tenderloin, extend the baking time to about 25-30 minutes.
      Doneness Test with Meat Thermometer: The most reliable method to determine doneness is to use a meat thermometer. For medium-rare, the core temperature should be around 58-60°C (136-140°F), for well-done around 65-70°C (149-158°F). Insert the thermometer into the thickest part of the tenderloin, without touching any bones if present.
    7. Resting Time: Once the pork tenderloin has reached the desired core temperature, remove the skillet from the oven. Transfer the tenderloin to a cutting board and loosely cover it with aluminum foil. Let it rest for about 5-10 minutes. Resting time is crucial because it allows the meat juices to redistribute evenly throughout the tenderloin, preventing them from running out when slicing. The result is a juicier tenderloin.
    8. Slice and Serve: Slice the pork tenderloin against the grain into approximately 1-2 cm (½-¾ inch) thick slices. Serve immediately and enjoy the tender and juicy flavor. Suitable side dishes include potatoes (e.g., potato gratin, rosemary potatoes, mashed potatoes), vegetables (e.g., green asparagus, green beans, ratatouille), or salads. A light sauce based on the pan drippings (deglazed with a little broth, cream, or wine) perfectly complements the dish.
    Pork Tenderloin Tips and Serving Suggestions

    Tips and Tricks for Perfect Oven-Baked Pork Tenderloin:

    • Quality of the Meat: Pay attention to the quality of the pork tenderloin. Meat from good sources, such as organic quality or from regional providers, often has a better flavor and finer texture.
    • Trimming: Trimming the tenderloin is important to remove tough areas and silverskin, resulting in a more tender outcome.
    • Searing for Flavor: Searing the tenderloin before baking is optional but highly recommended. It creates delicious Maillard reaction flavors and a beautiful crust.
    • Avoid Overcooking: Pork tenderloin can quickly become dry if left in the oven for too long. Pay attention to the baking time and ideally use a meat thermometer to determine the doneness accurately. Medium-rare (core temperature around 58-60°C / 136-140°F) is ideal for a particularly juicy result.
    • Resting Time is Key: Resting time after baking is crucial for the juiciness of the tenderloin. Be sure to include this time in your cooking plan.
    • Oven-Safe Skillet/Roasting Pan: Use an oven-safe skillet or roasting pan to sear the tenderloin first and then bake it directly in the oven. This saves dishes and keeps the tenderloin warm.
    • Vary Herbs and Spices: Experiment with different herbs and spices to vary the flavor of the pork tenderloin. In addition to thyme and rosemary, sage, garlic, paprika powder, or a Mediterranean herb mix also work wonderfully.
    • Stuffings: Pork tenderloin can also be wonderfully stuffed. To do this, slice the tenderloin lengthwise, open it up, and fill it as desired (e.g., with cream cheese, herbs, sun-dried tomatoes, bacon, mushrooms). Then tie it with kitchen twine and prepare as described in the basic recipe.
    • Sauce from Pan Drippings: The pan drippings in the skillet are the basis for a quick and delicious sauce. After searing and baking, deglaze the pan drippings with a little broth, wine, or cream, reduce the liquid briefly, and season it with salt, pepper, and possibly a little mustard or lemon juice.

    Serving Suggestions:

    Classic

    With potato gratin and green beans.

    Mediterranean

    With rosemary potatoes and ratatouille.

    Festive

    With mashed potatoes, glazed carrots, and a red wine sauce.

    Light

    With a fresh salad and herb quark (herb-flavored fresh cheese).

    Rustic

    With fried potatoes and bacon-wrapped green beans.

    Oven-baked pork tenderloin is a true all-rounder and can be reinvented again and again. Try this basic recipe and discover the variety of oven-baked pork tenderloin recipes! Enjoy your meal!

Pin It on Pinterest