Author: Stella

  • 7 Delicious Veggie Stir-Fry Combinations to Try Tonight

    7 Delicious Veggie Stir-Fry Combinations to Try Tonight

    Veggie stir-fry is a quick and colorful dish that packs a punch of nutrition and flavor. With just a handful of fresh vegetables and your favorite sauce, you can whip up a delightful meal in no time. Perfect for busy weeknights or as a tasty side, this dish truly makes healthy eating a breeze!

    Colorful Bell Pepper Medley
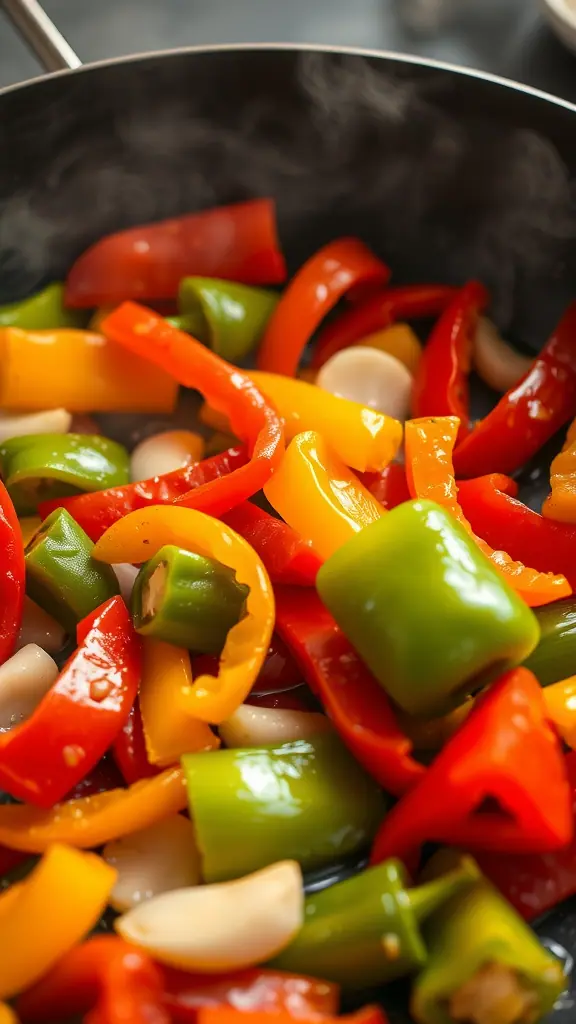
    A colorful medley of sliced bell peppers in a skillet.

    This Colorful Bell Pepper Medley is a delightful way to enjoy fresh veggies. Packed with vibrant flavors, the mix of red, yellow, green, and orange bell peppers creates a dish that’s not only beautiful but also delicious. Stir-frying these peppers allows their natural sweetness to come out while keeping them crisp. Perfect as a side or a main dish, it’s a simple recipe that anyone can whip up in no time!

    With just a few ingredients and steps, this stir-fry is a breeze to make. The combination of crunchy peppers and aromatic garlic adds a punch to your meal. Serve it alongside rice or noodles, and you have a satisfying dish ready to enjoy!

    Ingredients

    • 1 red bell pepper, sliced
    • 1 yellow bell pepper, sliced
    • 1 green bell pepper, sliced
    • 1 orange bell pepper, sliced
    • 3 cloves garlic, minced
    • 2 tablespoons olive oil
    • 1 tablespoon soy sauce
    • Salt and pepper to taste

    Instructions

    1. Heat olive oil in a large skillet over medium-high heat.
    2. Add the minced garlic and sauté for about 30 seconds until fragrant.
    3. Stir in the sliced bell peppers and cook for 5-7 minutes, stirring occasionally, until they are tender-crisp.
    4. Pour in the soy sauce and season with salt and pepper. Mix well and cook for another minute.
    5. Remove from heat and serve hot, either on its own or over rice or noodles.

    Mushroom and Snow Pea Harmony
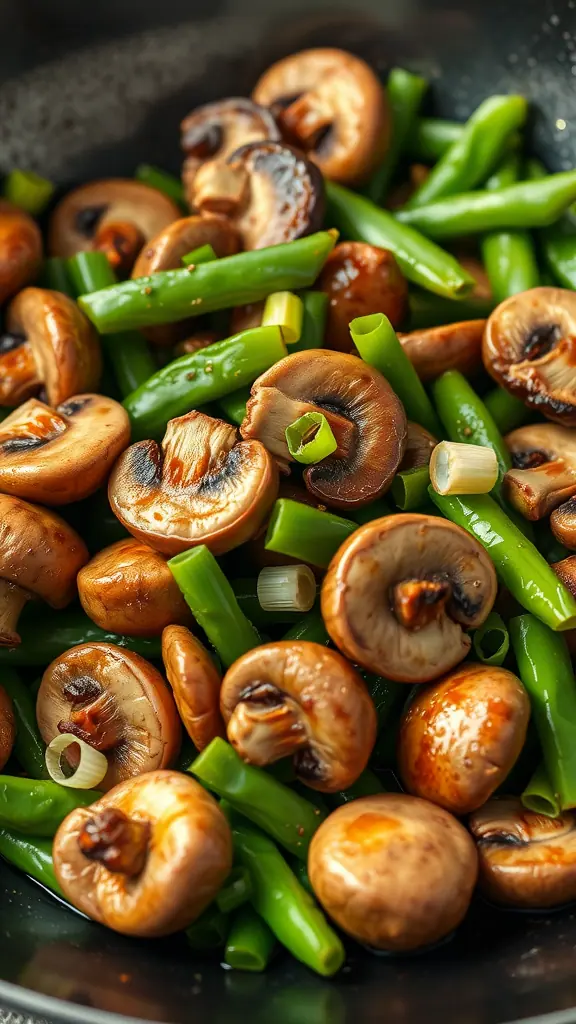
    Delicious stir-fried mushrooms and snow peas

    This Mushroom and Snow Pea Harmony is a delightful stir-fry that marries the earthy flavors of mushrooms with the crisp freshness of snow peas. It’s not only tasty but also super simple to whip up, making it perfect for a quick weeknight dinner or a healthy lunch option.

    The mushrooms add a savory depth, while the snow peas bring a light crunch, creating a satisfying texture contrast. Toss in a few seasonings, and you’ve got a dish that’s both nutritious and bursting with flavor!

    Ingredients

    • 2 cups snow peas, trimmed
    • 2 cups sliced mushrooms (button or shiitake work great)
    • 2 tablespoons olive oil
    • 2 cloves garlic, minced
    • 1 tablespoon soy sauce
    • 1 teaspoon sesame oil
    • Salt and pepper, to taste
    • Optional: sliced green onions for garnish

    Instructions

    1. Heat olive oil in a large skillet or wok over medium-high heat. Add the garlic and sauté for about 30 seconds until fragrant.
    2. Add the sliced mushrooms and cook for 3-4 minutes, stirring occasionally, until they start to brown.
    3. Stir in the snow peas and cook for another 2-3 minutes until they are bright green and tender-crisp.
    4. Drizzle in the soy sauce and sesame oil, stirring to combine. Season with salt and pepper to taste.
    5. Remove from heat and garnish with sliced green onions if desired. Serve hot over rice or enjoy as is!

    Crispy Tofu and Broccoli Delight
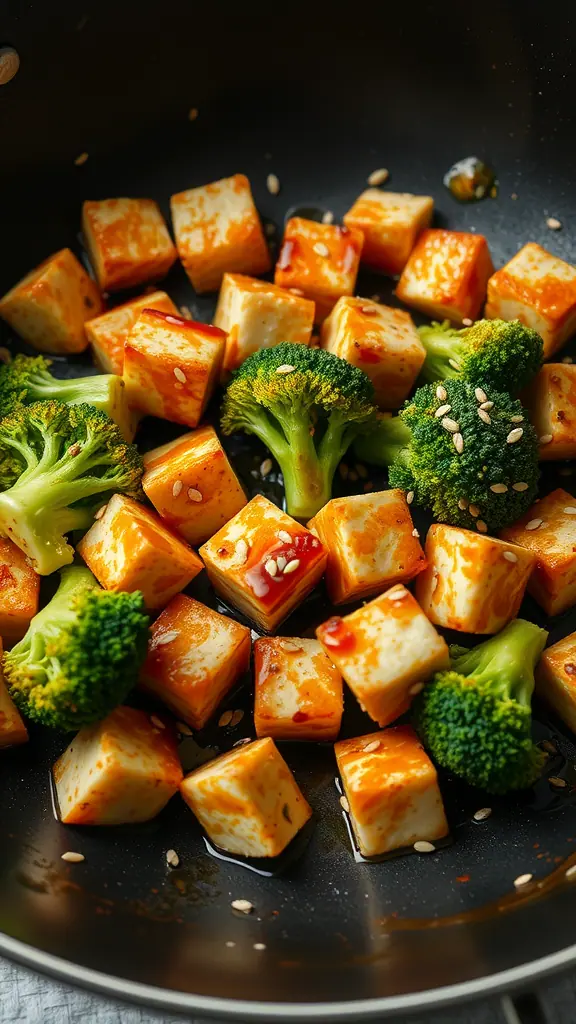
    Crispy tofu and broccoli stir-fry in a pan

    This Crispy Tofu and Broccoli Delight is a quick and tasty recipe that packs a punch. The crispy tofu, sautéed to golden perfection, pairs wonderfully with fresh broccoli, creating a delightful balance of textures. Tossed in a simple yet flavorful sauce, this dish is both satisfying and healthy, making it perfect for any meal.

    Not only is it easy to prepare, but it also brings together bold flavors that will leave your taste buds happy. Whether you’re a tofu enthusiast or just looking to add more veggies to your plate, this stir-fry is a fantastic choice. Let’s get cooking!

    Ingredients

    • 14 oz firm tofu, drained and pressed
    • 2 cups broccoli florets
    • 2 tablespoons vegetable oil
    • 3 tablespoons soy sauce
    • 1 tablespoon sesame oil
    • 2 tablespoons rice vinegar
    • 1 tablespoon honey or maple syrup
    • 2 cloves garlic, minced
    • 1 teaspoon ginger, grated
    • 1 tablespoon sesame seeds (optional)

    Instructions

    1. Prepare the Tofu: Cut the tofu into bite-sized cubes. Heat vegetable oil in a large skillet over medium-high heat. Add the tofu and cook until golden brown on all sides, about 8-10 minutes. Remove and set aside.
    2. Sauté the Broccoli: In the same skillet, add broccoli florets and a splash of water. Cover and steam for about 3-4 minutes until tender but still bright green. Remove the lid and add the tofu back to the skillet.
    3. Make the Sauce: In a small bowl, mix soy sauce, sesame oil, rice vinegar, honey, garlic, and ginger. Pour the sauce over the tofu and broccoli, stirring to coat evenly. Cook for an additional 2-3 minutes, allowing the flavors to meld.
    4. Serve: Sprinkle with sesame seeds if desired and serve hot over rice or noodles.

    Zucchini and Carrot Noodles

    A colorful dish of zucchini and carrot noodles with cherry tomatoes and basil.

    Looking for a fresh and fun twist on traditional noodle dishes? Zucchini and carrot noodles are a fantastic way to enjoy your veggies while creating a light and vibrant meal. These noodles offer a satisfying crunch and a slight sweetness, making them a delightful addition to any stir-fry. Plus, they’re super easy to whip up, perfect for a quick weeknight dinner!

    This dish bursts with color and flavor, featuring bright zucchini and carrots tossed together with juicy cherry tomatoes and fresh herbs. It’s a simple recipe that lets the ingredients shine, and you can customize it to your taste. Let’s jump into the ingredients and how to make this tasty veggie medley!

    Ingredients

    • 2 medium zucchinis
    • 2 medium carrots
    • 1 cup cherry tomatoes, halved
    • 2 cloves garlic, minced
    • 2 tablespoons olive oil
    • 1 teaspoon salt
    • 1/2 teaspoon black pepper
    • 1/4 cup fresh basil, chopped
    • 3 tablespoons soy sauce
    • 1 tablespoon sesame oil

    Instructions

    1. Prepare the Veggies: Using a spiralizer, create noodles from the zucchinis and carrots. If you don’t have a spiralizer, you can use a vegetable peeler to create thin strips.
    2. Sauté: In a large skillet, heat olive oil over medium heat. Add minced garlic and sauté for about 30 seconds until fragrant.
    3. Add Noodles: Toss in the zucchini and carrot noodles, and sauté for 3-4 minutes, just until they’re tender but still slightly crisp.
    4. Mix in Tomatoes: Add the halved cherry tomatoes, salt, and pepper. Cook for another 2-3 minutes until the tomatoes soften slightly.
    5. Finish: Drizzle with soy sauce and sesame oil, and stir to combine. Remove from heat and mix in fresh basil before serving.

    Spicy Cashew Vegetable Stir-Fry
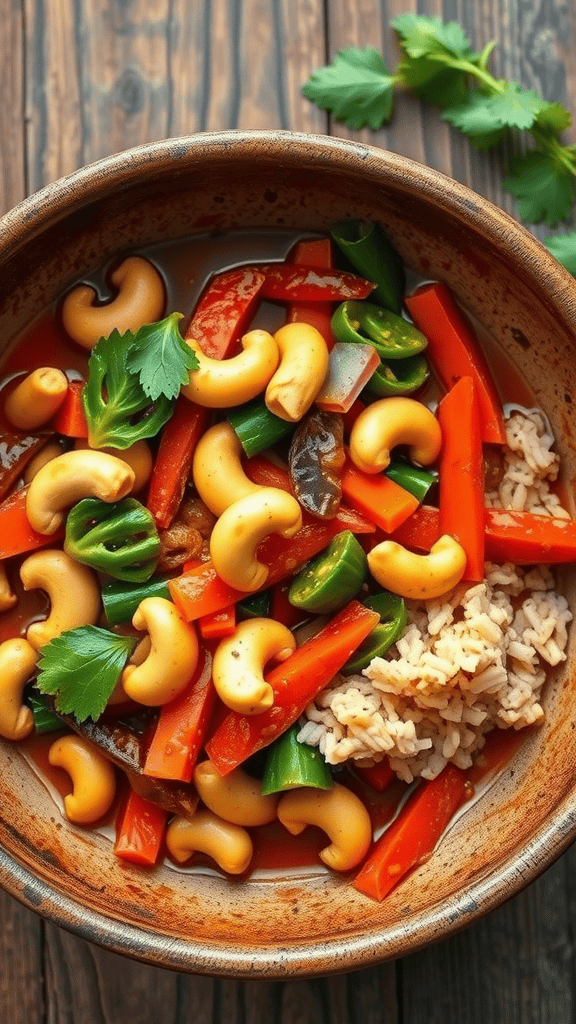
    A colorful bowl of spicy cashew vegetable stir-fry featuring bell peppers, broccoli, snap peas, carrots, and cashews served with rice.

    This Spicy Cashew Vegetable Stir-Fry is a delightful mix of vibrant veggies and crunchy cashews, all tossed in a zesty sauce. The combination of flavors is sure to excite your taste buds, making it a perfect dish for anyone who loves a bit of heat in their meals.

    Not only is this stir-fry packed with nutrients, but it’s also super simple to make. Just grab your favorite vegetables, some cashews, and a few pantry staples, and you’re ready to go!

    Ingredients

    • 2 tablespoons vegetable oil
    • 1 bell pepper, sliced
    • 1 cup broccoli florets
    • 1 cup snap peas
    • 1 carrot, julienned
    • 1/2 cup cashews
    • 3 garlic cloves, minced
    • 1 tablespoon ginger, minced
    • 2 tablespoons soy sauce
    • 1 tablespoon chili paste (adjust to taste)
    • 1 tablespoon honey or maple syrup
    • Cooked rice or quinoa, for serving

    Instructions

    1. Heat the vegetable oil in a large pan over medium-high heat. Add the garlic and ginger, sautéing for about 30 seconds until fragrant.
    2. Add the bell pepper, broccoli, snap peas, and carrot to the pan. Stir-fry for about 5-7 minutes, or until the veggies are tender-crisp.
    3. Stir in the cashews and cook for another 2 minutes.
    4. In a small bowl, whisk together the soy sauce, chili paste, and honey. Pour this sauce over the stir-fry, tossing everything to coat evenly. Cook for an additional minute.
    5. Serve the stir-fry over cooked rice or quinoa and enjoy your delicious creation!

    Garlic and Ginger Bok Choy

    Garlic and Ginger Bok Choy on a plate with chopsticks

    This Garlic and Ginger Bok Choy recipe is a simple and tasty way to enjoy this nutritious vegetable. With its crisp texture and fresh flavors, it makes a perfect side dish for any meal. The combination of garlic and ginger adds a delightful kick, making every bite exciting.

    Plus, it’s quick to prepare! In just a few minutes, you can transform bok choy into a vibrant dish that’s not only healthy but also visually appealing. Perfect for a weeknight dinner or a gathering with friends, this recipe will definitely impress!

    Ingredients

    • 2 heads bok choy, halved
    • 2 tablespoons vegetable oil
    • 3 cloves garlic, minced
    • 1 inch ginger, grated
    • 1 tablespoon soy sauce
    • Sesame seeds for garnish
    • Salt and pepper to taste

    Instructions

    1. Heat the vegetable oil in a large skillet over medium heat. Add the minced garlic and grated ginger, and sauté for about 1 minute until fragrant.
    2. Add the halved bok choy to the skillet, cut side down. Cook for 2-3 minutes until slightly browned.
    3. Flip the bok choy and drizzle the soy sauce over it. Season with salt and pepper. Cook for another 2-3 minutes until tender.
    4. Remove from heat and sprinkle with sesame seeds before serving.

    Sweet and Sour Pineapple Stir-Fry

    A colorful Sweet and Sour Pineapple Stir-Fry featuring vibrant vegetables and pineapple chunks.

    This Sweet and Sour Pineapple Stir-Fry is a delightful dish that brings together the juicy sweetness of pineapple with the savory crunch of fresh vegetables. It’s a simple recipe that’s packed with flavor, making it perfect for a quick weeknight dinner or a colorful addition to any meal. The combination of sweet and tangy flavors will awaken your taste buds and leave you wanting more.

    Preparing this stir-fry is a breeze! With just a few ingredients and a quick cooking time, you can whip up a tasty dish that’s sure to impress. Whether you’re a seasoned cook or just starting in the kitchen, this recipe is straightforward and fun to make.

    Ingredients

    • 2 cups pineapple, diced
    • 1 red bell pepper, sliced
    • 1 green bell pepper, sliced
    • 1 cup snap peas
    • 1/2 onion, sliced
    • 2 tablespoons vegetable oil
    • 3 tablespoons soy sauce
    • 2 tablespoons rice vinegar
    • 1 tablespoon brown sugar
    • 1 teaspoon cornstarch mixed with 2 tablespoons water
    • Salt and pepper to taste

    Instructions

    1. Heat the vegetable oil in a large skillet or wok over medium-high heat.
    2. Add the sliced onion and bell peppers. Stir-fry for about 3 minutes until they start to soften.
    3. Stir in the snap peas and pineapple, cooking for another 2 minutes.
    4. In a small bowl, mix the soy sauce, rice vinegar, brown sugar, and cornstarch mixture. Pour this sauce over the vegetables and stir well.
    5. Cook for an additional 2-3 minutes until the sauce thickens slightly. Season with salt and pepper to taste.
    6. Serve hot over rice or noodles for a complete meal.
  • 7 Delicious Vegetarian Chili Recipes You Need to Try

    7 Delicious Vegetarian Chili Recipes You Need to Try

    Vegetarian chili is a hearty and comforting dish that’s perfect for any occasion. Packed with beans, veggies, and lots of spices, it’s a delicious way to enjoy a meat-free meal that satisfies even the biggest appetites. Whether you’re serving it up for game day or cozying up on a chilly night, this chili is sure to hit the spot!

    Spicy Roasted Vegetable Chili

    A bowl of spicy roasted vegetable chili with vibrant vegetables and herbs.

    This spicy roasted vegetable chili is a comforting and hearty dish that’s loaded with flavor. Perfect for chilly days, it combines a variety of colorful vegetables like bell peppers, zucchini, and corn, all roasted to perfection before being simmered in a rich, spicy broth. The result is a vibrant mix of flavors and textures that will warm you up from the inside out.

    Easy to make, this chili comes together in a single pot, making both prep and cleanup a breeze. Whether you’re a seasoned cook or just starting out, this recipe will have you feeling like a pro in no time. Plus, it’s perfect for meal prep or a cozy family dinner!

    Ingredients

    • 1 medium zucchini, diced
    • 1 bell pepper, chopped
    • 1 cup corn (fresh or frozen)
    • 1 can (15 oz) black beans, drained and rinsed
    • 1 can (15 oz) diced tomatoes
    • 1 tablespoon olive oil
    • 1 onion, diced
    • 3 cloves garlic, minced
    • 2 teaspoons chili powder
    • 1 teaspoon cumin
    • 1/2 teaspoon smoked paprika
    • Salt and pepper to taste
    • Fresh cilantro for garnish

    Instructions

    1. Preheat your oven to 400°F (200°C). Toss the zucchini, bell pepper, and corn with olive oil, salt, and pepper on a baking sheet. Roast for about 20 minutes until tender and slightly caramelized.
    2. In a large pot, heat some olive oil over medium heat. Add the diced onion and garlic, sautéing until the onion is translucent.
    3. Stir in the roasted vegetables, black beans, diced tomatoes, chili powder, cumin, and smoked paprika. Mix well and let simmer for 15-20 minutes, allowing the flavors to meld together.
    4. Adjust seasoning as needed. Serve hot, garnished with fresh cilantro.

    Smoky Chipotle and Sweet Potato Blend

    A bowl of vegetarian chili with sweet potatoes and black beans, garnished with lime and cilantro.

    This smoky chipotle and sweet potato blend is a delicious take on vegetarian chili that brings warmth and comfort to any meal. The sweetness of the potatoes pairs perfectly with the smoky, spicy notes from chipotle peppers, creating a rich and satisfying flavor profile. It’s easy to prepare and makes for a hearty dish that everyone will love.

    Simple ingredients come together to create a dish that is both nutritious and filling. Whether you’re cooking for a cozy night in or meal prepping for the week, this chili is perfect for any occasion. Plus, it’s a great way to sneak in some veggies!

    Ingredients

    • 2 medium sweet potatoes, diced
    • 1 can black beans, drained and rinsed
    • 1 can diced tomatoes
    • 1 onion, chopped
    • 2 cloves garlic, minced
    • 2-3 chipotle peppers in adobo sauce, chopped
    • 1 tablespoon olive oil
    • 1 teaspoon cumin
    • 1 teaspoon smoked paprika
    • Salt and pepper to taste
    • Fresh cilantro and lime wedges for garnish

    Instructions

    1. Heat the olive oil in a large pot over medium heat. Add the chopped onion and garlic, sautéing until softened.
    2. Add the diced sweet potatoes and cook for about 5-7 minutes until slightly tender.
    3. Stir in the black beans, diced tomatoes, chipotle peppers, cumin, smoked paprika, salt, and pepper. Mix well.
    4. Pour in enough water to cover the ingredients and bring to a boil. Reduce heat and let simmer for about 20 minutes or until sweet potatoes are tender.
    5. Serve hot, garnished with fresh cilantro and lime wedges.

    Chili Topped Sweet Potato Boats

    Sweet potato boats filled with vegetarian chili, topped with sour cream and green onions.

    Chili Topped Sweet Potato Boats are a delightful twist on two classic dishes. The sweet, tender flesh of baked sweet potatoes pairs perfectly with a hearty vegetarian chili, creating a dish that’s both filling and nutritious. The combination of smoky spices and creamy toppings makes each bite a burst of flavor.

    This recipe is simple to prepare and perfect for any occasion, whether you’re hosting friends or just looking for a cozy weeknight meal. With minimal prep time and straightforward cooking steps, you’ll have a delicious meal ready in no time!

    Ingredients

    • 4 medium sweet potatoes
    • 1 can black beans, rinsed and drained
    • 1 can kidney beans, rinsed and drained
    • 1 bell pepper, diced
    • 1 small onion, chopped
    • 2 cloves garlic, minced
    • 1 can diced tomatoes
    • 2 tablespoons chili powder
    • 1 teaspoon cumin
    • Salt and pepper to taste
    • 1 cup corn (fresh or frozen)
    • 1 avocado, diced (for topping)
    • Sour cream or yogurt (for serving)
    • Chopped green onions (for garnish)

    Instructions

    1. Preheat your oven to 400°F (200°C). Wash the sweet potatoes and poke holes in them with a fork. Place them on a baking sheet and bake for about 45 minutes, or until tender.
    2. While the sweet potatoes are baking, heat a large skillet over medium heat. Add the onion and bell pepper, sautéing until soft. Stir in the garlic and cook for another minute.
    3. Add the black beans, kidney beans, diced tomatoes, corn, chili powder, cumin, salt, and pepper to the skillet. Simmer for about 10-15 minutes, allowing the flavors to meld.
    4. Once the sweet potatoes are done, remove them from the oven and let them cool slightly. Cut them in half lengthwise and scoop out a little of the flesh to make room for the chili.
    5. Spoon the chili mixture into each sweet potato half. Top with diced avocado, a dollop of sour cream or yogurt, and sprinkle with chopped green onions before serving.

    Hearty Three-Bean Chili

    A bowl of hearty three-bean chili topped with avocado and cilantro, accompanied by cornbread.

    Hearty three-bean chili is a satisfying dish that brings together a medley of flavors and textures. With a mix of kidney beans, black beans, and pinto beans, each spoonful is packed with protein and goodness. The combination of spices adds warmth and depth, making it the perfect meal for any occasion.

    This chili is simple to make and can be prepared in one pot, making cleanup a breeze. It’s a great option for weeknight dinners or meal prep. Serve it with some crusty bread or over rice for a filling meal that everyone will love.

    Ingredients

    • 1 tablespoon olive oil
    • 1 onion, diced
    • 2 cloves garlic, minced
    • 1 bell pepper, diced
    • 2 carrots, diced
    • 1 can (14.5 oz) diced tomatoes
    • 1 can (15 oz) kidney beans, drained and rinsed
    • 1 can (15 oz) black beans, drained and rinsed
    • 1 can (15 oz) pinto beans, drained and rinsed
    • 2 cups vegetable broth
    • 1 tablespoon chili powder
    • 1 teaspoon cumin
    • 1 teaspoon smoked paprika
    • Salt and pepper to taste
    • Fresh cilantro, for garnish
    • Avocado, sliced, for serving

    Instructions

    1. Heat olive oil in a large pot over medium heat. Add onion, garlic, and bell pepper, cooking until softened, about 5 minutes.
    2. Add carrots and cook for another 3 minutes. Stir in the diced tomatoes, kidney beans, black beans, pinto beans, vegetable broth, chili powder, cumin, and smoked paprika.
    3. Bring the mixture to a boil, then reduce heat and let it simmer for 30 minutes, stirring occasionally. Season with salt and pepper to taste.
    4. Serve the chili hot, garnished with fresh cilantro and slices of avocado.

    Creamy White Bean and Spinach Chili

    A bowl of creamy white bean and spinach chili with a slice of bread

    This creamy white bean and spinach chili is a delightful twist on traditional chili recipes. It combines the hearty texture of white beans with the freshness of spinach, creating a comforting bowl that’s both satisfying and nourishing. The blend of spices gives it a gentle warmth, and the creaminess makes every spoonful feel indulgent.

    Making this chili is straightforward, perfect for a weeknight dinner. Just throw the ingredients together in one pot, let it simmer, and you’ll have a tasty meal ready in no time. Plus, it’s a vegetarian option that everyone will love!

    Ingredients

    • 2 tablespoons olive oil
    • 1 medium onion, chopped
    • 3 cloves garlic, minced
    • 1 teaspoon ground cumin
    • 1 teaspoon smoked paprika
    • 1/2 teaspoon chili powder
    • 1 can (15 oz) white beans, drained and rinsed
    • 4 cups vegetable broth
    • 2 cups fresh spinach
    • 1 cup canned diced tomatoes
    • Salt and pepper to taste
    • Grated parmesan cheese for serving (optional)
    • Crusty bread for serving

    Instructions

    1. Heat olive oil in a large pot over medium heat. Add chopped onion and sauté until soft, about 5 minutes.
    2. Stir in minced garlic, cumin, smoked paprika, and chili powder. Cook for another minute until fragrant.
    3. Add white beans, vegetable broth, diced tomatoes, salt, and pepper. Bring to a simmer.
    4. Reduce heat and let it simmer for 15-20 minutes, allowing flavors to meld.
    5. Just before serving, stir in the fresh spinach until wilted. Taste and adjust seasoning as needed.
    6. Serve hot, topped with grated parmesan cheese and alongside crusty bread.

    Mediterranean-Inspired Lentil Chili

    A bowl of Mediterranean-inspired lentil chili topped with olives and feta, accompanied by pita bread.

    This Mediterranean-Inspired Lentil Chili brings a fresh twist to a classic dish. With aromatic spices and hearty lentils, it’s packed with flavor and nutrition. The addition of olives and feta offers a delicious, tangy finish that elevates the dish.

    Not only is this chili simple to prepare, but it also makes a perfect option for meal prep. Just a few ingredients come together quickly, making it an easy weeknight dinner or a satisfying lunch. You’ll love how comforting and wholesome it feels!

    Ingredients

    • 1 cup dried green or brown lentils, rinsed
    • 1 tablespoon olive oil
    • 1 medium onion, diced
    • 2 garlic cloves, minced
    • 1 bell pepper, diced
    • 1 carrot, diced
    • 1 zucchini, diced
    • 1 can (14.5 oz) diced tomatoes
    • 4 cups vegetable broth
    • 1 teaspoon ground cumin
    • 1 teaspoon smoked paprika
    • Salt and pepper to taste
    • 1/2 cup black olives, sliced
    • 1/2 cup feta cheese, crumbled
    • Fresh parsley for garnish

    Instructions

    1. Heat olive oil in a large pot over medium heat. Add onion and garlic, and sauté until fragrant, about 2 minutes.
    2. Add bell pepper, carrot, and zucchini. Cook for another 5 minutes until vegetables are tender.
    3. Stir in the lentils, diced tomatoes, vegetable broth, cumin, smoked paprika, salt, and pepper. Bring to a boil.
    4. Reduce heat and let simmer for about 25-30 minutes, or until lentils are tender.
    5. Once cooked, stir in the olives and feta. Adjust seasoning if needed.
    6. Serve hot, garnished with fresh parsley.

    Classic Tomato-Based Vegetarian Chili

    A bowl of hearty vegetarian chili with tortilla chips and fresh green peppers

    Nothing beats a warm bowl of vegetarian chili, especially when it’s packed with hearty vegetables and a rich tomato base. This recipe is perfect for those chilly nights when you want something comforting yet healthy. The combination of spices and fresh ingredients brings a delightful flavor that everyone will love.

    Making this chili is simple and requires minimal effort. Just chop your veggies, sauté them, and let everything simmer together. You’ll have a wholesome meal ready in no time, ideal for a cozy dinner or meal prep for the week ahead.

    Ingredients

    • 2 tablespoons olive oil
    • 1 onion, diced
    • 2 cloves garlic, minced
    • 1 bell pepper, diced
    • 1 carrot, chopped
    • 1 zucchini, chopped
    • 1 can (14.5 oz) diced tomatoes
    • 2 cups vegetable broth
    • 1 can (15 oz) kidney beans, drained and rinsed
    • 1 can (15 oz) black beans, drained and rinsed
    • 1 tablespoon chili powder
    • 1 teaspoon cumin
    • Salt and pepper to taste
    • Fresh cilantro for garnish

    Instructions

    1. Heat olive oil in a large pot over medium heat. Add the diced onion and garlic, sautéing until softened, about 3-4 minutes.
    2. Add the bell pepper, carrot, and zucchini. Cook for another 5 minutes, stirring occasionally.
    3. Stir in the diced tomatoes, vegetable broth, kidney beans, black beans, chili powder, cumin, and season with salt and pepper.
    4. Bring to a boil, then reduce the heat and let it simmer for about 20-30 minutes, stirring occasionally.
    5. Once the chili has thickened, taste and adjust seasoning if needed. Serve hot, garnished with fresh cilantro.
  • 10 Delicious Veggie Taco Recipes You Need to Try

    10 Delicious Veggie Taco Recipes You Need to Try

    Veggie tacos are a delightful twist on a classic favorite, packing all the flavor and fun without the meat. Loaded with fresh vegetables, herbs, and spices, they’re the perfect choice for a tasty meal that doesn’t skimp on satisfaction. Whether you’re a long-time vegetarian or just looking to mix things up, these tacos are sure to please!

    Zucchini and Corn Tacos with Chipotle Sauce

    Zucchini and corn tacos topped with chipotle sauce and fresh cilantro.

    These Zucchini and Corn Tacos are a delightful mix of flavors and textures. The sweet corn pairs perfectly with tender zucchini, all wrapped up in warm tortillas. Topped with a smoky chipotle sauce, every bite delivers a satisfying kick that makes these tacos an instant favorite.

    Making these tacos is a breeze, making them perfect for a quick weeknight dinner or a casual gathering with friends. You’ll love how simple ingredients come together to create something truly delicious.

    Ingredients

    • 2 medium zucchinis, diced
    • 1 cup corn kernels (fresh or frozen)
    • 1 tablespoon olive oil
    • 1 teaspoon chili powder
    • Salt and pepper to taste
    • 8 small flour or corn tortillas
    • Fresh cilantro, chopped (for garnish)
    • 1/2 cup chipotle sauce

    Instructions

    1. Heat olive oil in a large skillet over medium heat. Add diced zucchini and cook for 5-7 minutes until tender.
    2. Stir in the corn, chili powder, salt, and pepper. Cook for another 3-5 minutes until the corn is heated through.
    3. Warm the tortillas in a separate pan or microwave until pliable.
    4. Assemble the tacos by filling each tortilla with the zucchini and corn mixture. Drizzle with chipotle sauce and top with fresh cilantro.
    5. Serve immediately and enjoy your delicious veggie tacos!

    Cauliflower Buffalo Tacos with Ranch Dressing

    Cauliflower Buffalo Tacos with tomatoes and ranch dressing

    Cauliflower Buffalo Tacos are a delicious twist on traditional tacos, bringing a spicy kick from the buffalo sauce and a satisfying crunch from the roasted cauliflower. These tacos are perfect for anyone looking to enjoy a meatless meal that doesn’t skimp on flavor. The creamy ranch dressing adds a cooling touch, balancing the heat perfectly.

    Not only are these tacos simple to make, but they also come together quickly, making them a great option for a weeknight dinner or a fun gathering with friends. The combination of textures and flavors makes every bite enjoyable, and they’re sure to be a hit!

    Ingredients

    • 1 head of cauliflower, cut into florets
    • 1/2 cup buffalo sauce
    • 1 tablespoon olive oil
    • 1 teaspoon garlic powder
    • 1 teaspoon onion powder
    • Salt and pepper to taste
    • 8 small corn or flour tortillas
    • 1 cup diced tomatoes
    • 1/2 cup fresh cilantro, chopped
    • 1/2 cup ranch dressing

    Instructions

    1. Preheat your oven to 425°F (220°C). Line a baking sheet with parchment paper.
    2. In a bowl, toss the cauliflower florets with olive oil, garlic powder, onion powder, buffalo sauce, salt, and pepper until well coated.
    3. Spread the cauliflower evenly on the baking sheet and roast for about 20-25 minutes, until golden and tender, stirring halfway through.
    4. While the cauliflower is roasting, warm the tortillas in a dry skillet or microwave.
    5. Once the cauliflower is done, assemble the tacos by placing a generous amount of buffalo cauliflower on each tortilla. Top with diced tomatoes, cilantro, and a drizzle of ranch dressing.
    6. Serve immediately and enjoy your spicy, tangy Cauliflower Buffalo Tacos!

    Roasted Cauliflower and Chickpea Tacos

    Roasted cauliflower and chickpea tacos with avocado and cilantro

    Roasted cauliflower and chickpea tacos bring a burst of flavor and a satisfying crunch to your dinner table. These tacos are not just delicious; they are simple to prepare, making them perfect for a quick weeknight meal. The slight smokiness from the roasted cauliflower pairs perfectly with the nutty chickpeas, creating a balance that will please anyone’s palate.

    With fresh toppings like avocado and cilantro, these tacos are colorful and healthy. Plus, they come together in no time, allowing you to enjoy a wholesome meal without the fuss. Let’s dive into this tasty recipe!

    Ingredients

    • 1 medium head of cauliflower, cut into florets
    • 1 can (15 oz) chickpeas, drained and rinsed
    • 2 tablespoons olive oil
    • 1 tablespoon taco seasoning
    • 8 small corn or flour tortillas
    • 1 avocado, sliced
    • Fresh cilantro, for garnish
    • Lime wedges, for serving

    Instructions

    1. Preheat your oven to 425°F (220°C). Line a baking sheet with parchment paper.
    2. In a large bowl, combine cauliflower florets and chickpeas. Drizzle with olive oil and sprinkle with taco seasoning. Toss until everything is evenly coated.
    3. Spread the mixture on the prepared baking sheet in a single layer. Roast for 20-25 minutes, or until the cauliflower is golden and tender.
    4. While the veggies are roasting, warm the tortillas in a dry skillet over medium heat for about 30 seconds on each side.
    5. Assemble the tacos: Fill each tortilla with the roasted cauliflower and chickpea mixture, top with avocado slices, and garnish with fresh cilantro. Serve with lime wedges on the side.

    Mushroom and Spinach Tacos with Feta

    Mushroom and spinach tacos filled with feta cheese in a tortilla

    Mushroom and spinach tacos with feta are a tasty and satisfying meal perfect for any day of the week. The earthy flavors of the mushrooms pair wonderfully with the fresh, vibrant spinach, while the feta adds a creamy, tangy kick that elevates each bite. This recipe is not only flavorful but also simple to make, making it ideal for quick dinners or casual gatherings.

    With just a few ingredients and minimal prep time, you’ll have a delightful dish ready to enjoy in no time. Whether you’re a seasoned cook or just starting out, these tacos are a great way to showcase fresh veggies in a fun and delicious way.

    Ingredients

    • 8 small corn or flour tortillas
    • 2 cups fresh spinach, washed and dried
    • 1 cup mushrooms, sliced
    • 1 tablespoon olive oil
    • 1 teaspoon garlic, minced
    • 1/2 teaspoon salt
    • 1/4 teaspoon black pepper
    • 1/2 cup feta cheese, crumbled
    • Fresh cilantro, for garnish (optional)

    Instructions

    1. Heat the olive oil in a skillet over medium heat. Add the garlic and sauté for about 30 seconds until fragrant.
    2. Add the sliced mushrooms to the skillet. Cook for about 5-7 minutes, stirring occasionally, until the mushrooms are browned and tender.
    3. Season the mushrooms with salt and pepper. Add the spinach and cook for an additional 2-3 minutes, or until wilted.
    4. Warm the tortillas in a separate pan or microwave. Fill each tortilla with the mushroom and spinach mixture, then top with crumbled feta cheese.
    5. Garnish with fresh cilantro if desired, serve immediately, and enjoy!

    Spicy Sweet Potato and Black Bean Tacos

    Spicy Sweet Potato and Black Bean Tacos with cilantro and lime

    Spicy sweet potato and black bean tacos are a delightful way to enjoy a hearty and healthy meal. The combination of roasted sweet potatoes and protein-packed black beans creates a filling option that’s bursting with flavor. With a touch of spice and a hint of sweetness, these tacos are sure to please your taste buds.

    This recipe is simple to make, perfect for a quick weeknight dinner or a casual gathering with friends. Just roast the veggies, assemble the tacos, and enjoy! They’re colorful, nutritious, and satisfying.

    Ingredients

    • 2 large sweet potatoes, peeled and cubed
    • 1 can black beans, drained and rinsed
    • 1 tablespoon olive oil
    • 1 teaspoon chili powder
    • 1/2 teaspoon cumin
    • 1/2 teaspoon paprika
    • Salt and pepper to taste
    • 8 small tortillas
    • Fresh cilantro, for garnish
    • Sliced lime, for serving

    Instructions

    1. Preheat your oven to 400°F (200°C).
    2. In a bowl, toss the cubed sweet potatoes with olive oil, chili powder, cumin, paprika, salt, and pepper until well-coated.
    3. Spread the sweet potatoes on a baking sheet and roast for about 25-30 minutes, or until they are tender and slightly caramelized.
    4. While the potatoes are roasting, warm the black beans in a small saucepan over low heat.
    5. Once the sweet potatoes are ready, assemble the tacos by placing a scoop of sweet potatoes and black beans onto each tortilla.
    6. Top with fresh cilantro and serve with lime wedges for squeezing on top.

    Grilled Vegetable Tacos with Avocado Crema

    Grilled vegetable tacos with avocado crema, garnished with lime and cilantro.

    Grilled vegetable tacos are a delightful way to enjoy fresh, seasonal produce. Packed with flavor, these tacos combine the smokiness of grilled vegetables with the creamy goodness of avocado crema. They’re a simple and satisfying option for any meal, making them perfect for a quick weeknight dinner or a weekend get-together with friends.

    The taste of charred zucchini, sweet bell peppers, and red onions is complemented by a drizzle of zesty avocado crema, adding a creamy, tangy element. Not only are these tacos delicious, but they are also colorful and vibrant, making them a feast for the eyes!

    Ingredients

    • 2 zucchinis, sliced
    • 1 red bell pepper, sliced
    • 1 yellow bell pepper, sliced
    • 1 red onion, sliced
    • 2 tablespoons olive oil
    • 1 teaspoon chili powder
    • 1 teaspoon cumin
    • Salt and pepper, to taste
    • 8 small flour or corn tortillas
    • 1 ripe avocado
    • 1 tablespoon lime juice
    • 1/4 cup sour cream or yogurt
    • Fresh cilantro, for garnish
    • Lime wedges, for serving

    Instructions

    1. Grill the Vegetables: Preheat your grill to medium-high heat. In a large bowl, combine sliced zucchinis, bell peppers, and red onion. Drizzle with olive oil, chili powder, cumin, salt, and pepper. Toss to coat the veggies evenly.
    2. Cook the Vegetables: Place the seasoned vegetables on the grill. Cook for about 5-7 minutes, turning occasionally, until they are tender and have nice grill marks. Remove from the grill and set aside.
    3. Make the Avocado Crema: In a blender, combine the ripe avocado, lime juice, sour cream, and a pinch of salt. Blend until smooth and creamy. Adjust seasoning to taste.
    4. Warm the Tortillas: On the grill, warm the tortillas for about 30 seconds on each side until they are pliable.
    5. Assemble the Tacos: On each tortilla, layer the grilled vegetables and drizzle with avocado crema. Garnish with fresh cilantro and serve with lime wedges on the side. Enjoy your fresh and delicious grilled vegetable tacos!

    Beet and Goat Cheese Tacos

    Beet and goat cheese tacos on a plate with fresh herbs and lemon wedges

    These beet and goat cheese tacos are a delightful twist on traditional tacos, bringing vibrant flavors and textures to the table. The earthy sweetness of roasted beets pairs perfectly with the creamy tang of goat cheese, making this dish a standout. Plus, they’re super simple to whip up, perfect for a quick weeknight meal or a fun weekend gathering.

    With fresh herbs and a squeeze of lemon to brighten everything up, each bite is a tasty experience. Whether you’re a beet lover or new to this root vegetable, these tacos will surely impress your taste buds and anyone you share them with!

    Ingredients

    • 2 cups cooked beets, diced
    • 1 tablespoon olive oil
    • Salt and pepper, to taste
    • 8 small corn or flour tortillas
    • 1/2 cup goat cheese, crumbled
    • 1/4 cup fresh cilantro, chopped
    • 1 tablespoon balsamic glaze
    • 1 lemon, cut into wedges

    Instructions

    1. Preheat your oven to 400°F (200°C). Toss the diced beets with olive oil, salt, and pepper, then spread them on a baking sheet. Roast for about 20 minutes until tender.
    2. While the beets are roasting, warm the tortillas in a dry skillet over medium heat until pliable.
    3. Assemble the tacos by placing a generous amount of roasted beets on each tortilla. Top with crumbled goat cheese and fresh cilantro.
    4. Drizzle with balsamic glaze and serve with lemon wedges on the side for an extra zing.

    Garden Fresh Salsa and Grilled Tofu Tacos

    Veggie tacos with grilled tofu and fresh salsa on a marble serving board

    These veggie tacos are a celebration of fresh flavors, featuring grilled tofu paired with a zesty garden salsa. The crispy tofu adds a delightful texture, while the salsa bursts with the taste of ripe tomatoes and tangy lime. It’s a simple recipe that comes together quickly and is perfect for any day of the week.

    Each bite offers a refreshing crunch and a savory kick, making it a satisfying meal that everyone will love. Plus, with just a handful of ingredients, you can easily whip up this delicious dish at home!

    Ingredients

    • 1 block firm tofu, pressed and sliced
    • 2 tablespoons olive oil
    • 1 teaspoon chili powder
    • 1 teaspoon garlic powder
    • Salt and pepper to taste
    • 8 small corn tortillas
    • 1 cup diced tomatoes
    • 1/4 cup diced red onion
    • 1 jalapeño, finely chopped
    • 1/4 cup chopped fresh cilantro
    • Juice of 1 lime

    Instructions

    1. Prepare the Tofu: In a bowl, mix olive oil, chili powder, garlic powder, salt, and pepper. Coat the tofu slices in the mixture and let marinate for 15 minutes.
    2. Grill the Tofu: Heat a grill pan over medium-high heat. Grill the tofu slices for about 5 minutes on each side until golden brown and crispy.
    3. Make the Salsa: In a separate bowl, combine diced tomatoes, red onion, jalapeño, cilantro, and lime juice. Mix well and season with salt to taste.
    4. Assemble the Tacos: Warm the corn tortillas on the grill or in a pan. Layer grilled tofu and top with the fresh salsa.
    5. Serve: Enjoy these tacos warm, garnished with extra lime wedges if desired.

    Lentil and Avocado Tacos

    Three lentil and avocado tacos topped with tomatoes and cilantro on a wooden background

    Lentil and avocado tacos are a treat that combines hearty, protein-packed lentils with creamy avocado for a delicious bite. The flavors meld together beautifully, creating a satisfying meal that’s both nutritious and tasty.

    These tacos are super easy to whip up, making them perfect for a quick weeknight dinner or a casual gathering with friends. The fresh toppings add a nice crunch and color, making every taco feel special!

    Ingredients

    • 1 cup dried lentils (any variety)
    • 2 cups vegetable broth
    • 1 tsp cumin
    • 1 tsp chili powder
    • 1/2 tsp garlic powder
    • Salt and pepper to taste
    • 8 small corn or flour tortillas
    • 2 ripe avocados, sliced
    • 1 cup diced tomatoes
    • 1/2 cup fresh cilantro, chopped
    • 1 lime, cut into wedges

    Instructions

    1. Cook the Lentils: Rinse the lentils under cold water and combine them with vegetable broth in a pot. Bring to a boil, then reduce heat and simmer for about 20-25 minutes until tender.
    2. Season: Once the lentils are cooked, stir in cumin, chili powder, garlic powder, salt, and pepper. Mix well and let simmer for an additional 5 minutes to blend the flavors.
    3. Warm the Tortillas: In a dry skillet, warm the tortillas over medium heat for about 30 seconds on each side until they are pliable.
    4. Assemble the Tacos: Spoon a generous amount of the lentil mixture onto each tortilla. Top with sliced avocado, diced tomatoes, and chopped cilantro.
    5. Serve: Squeeze fresh lime juice over the tacos before serving. Enjoy your flavorful lentil and avocado tacos!

    Rainbow Veggie Tacos with Lime Vinaigrette

    Colorful rainbow veggie tacos with various vegetables and lime vinaigrette

    Rainbow veggie tacos are a burst of colors, flavors, and nutrients all wrapped up in a soft tortilla. These tacos are not only pleasing to the eye but also loaded with a variety of fresh vegetables that add crunch and sweetness. The lime vinaigrette brings a refreshing zing, making every bite enjoyable and light.

    This recipe is simple and quick to prepare, perfect for a busy weeknight dinner or a fun gathering with friends. With just a few ingredients and minimal cooking, you can whip up a delightful dish that everyone will love.

    Ingredients

    • 8 small flour or corn tortillas
    • 1 cup diced bell peppers (red, yellow, and green)
    • 1 cup diced cucumber
    • 1 cup shredded carrots
    • 1/2 cup diced red onion
    • 1 cup corn kernels (fresh or frozen)
    • 1 avocado, diced
    • 1/4 cup chopped fresh cilantro
    • 1 lime, juiced
    • 2 tablespoons olive oil
    • 1 teaspoon honey or agave syrup
    • Salt and pepper to taste

    Instructions

    1. Prepare the Vinaigrette: In a small bowl, whisk together lime juice, olive oil, honey, salt, and pepper until well combined.
    2. Assemble the Tacos: In a large bowl, mix together the diced bell peppers, cucumber, carrots, red onion, corn, and avocado. Drizzle the lime vinaigrette over the veggies and toss gently to coat.
    3. Warm the Tortillas: Heat the tortillas in a dry skillet over medium heat for about 30 seconds on each side until warm.
    4. Fill the Tortillas: Spoon the colorful veggie mixture into each tortilla. Sprinkle with fresh cilantro before serving.
    5. Serve: Enjoy your rainbow veggie tacos immediately while they’re fresh and vibrant!
  • 5 Delicious Eggplant Parmesan Recipes to Try Today

    5 Delicious Eggplant Parmesan Recipes to Try Today

    Eggplant Parmesan is a comforting classic that combines layers of crispy, breaded eggplant, zesty marinara sauce, and gooey mozzarella cheese. It’s the perfect dish for those who enjoy hearty, vegetarian meals that don’t skimp on flavor. Whether you’re serving it up for a cozy dinner or impressing friends at a gathering, this dish doesn’t disappoint!

    Layered Eggplant Slices

    Layered eggplant slices with marinara sauce and mozzarella cheese.

    Eggplant Parmesan brings a delightful twist to classic Italian flavors. The dish features layers of crispy, golden-fried eggplant slices that harmonize beautifully with rich marinara sauce and gooey melted cheese. Each bite offers a satisfying crunch followed by a warm, comforting taste that can make anyone feel at home.

    This recipe is quite simple to make, making it perfect for both seasoned cooks and beginners. With just a few basic ingredients and straightforward steps, you’ll have a scrumptious dish that’s sure to impress family and friends.

    Ingredients

    • 2 medium eggplants, sliced into 1/4-inch rounds
    • Salt, for drawing out moisture
    • 1 cup all-purpose flour
    • 3 large eggs, beaten
    • 2 cups breadcrumbs
    • 1 cup marinara sauce
    • 2 cups shredded mozzarella cheese
    • 1/2 cup grated Parmesan cheese
    • Fresh basil leaves, for garnish

    Instructions

    1. Prep the Eggplant: Sprinkle salt over the eggplant slices and let them sit for about 30 minutes. This helps to draw out excess moisture and bitterness.
    2. Coat the Slices: Rinse the eggplant slices and pat them dry. Dredge each slice in flour, dip in beaten eggs, and then coat with breadcrumbs.
    3. Fry the Eggplant: Heat oil in a large skillet over medium heat. Fry the eggplant slices in batches until golden brown on both sides. Drain on paper towels.
    4. Layer the Ingredients: In a baking dish, spread a layer of marinara sauce on the bottom. Add a layer of fried eggplant, followed by mozzarella and Parmesan cheese. Repeat the layers until all ingredients are used, finishing with cheese on top.
    5. Bake: Preheat the oven to 375°F (190°C). Cover the dish with foil and bake for 25 minutes. Remove the foil and bake for an additional 15 minutes until the cheese is bubbly and golden.
    6. Serve: Let it cool for a few minutes before slicing. Garnish with fresh basil leaves and enjoy!

    Homemade Marinara Sauce Preparation

    A pot of homemade marinara sauce with fresh ingredients

    Homemade marinara sauce is a delicious addition to any meal, especially for dishes like eggplant parmesan. The rich, tangy flavor balances beautifully with the creamy cheese and tender eggplant, creating a comforting dish that’s perfect for any occasion. Plus, it’s simple to make, allowing you to enjoy fresh, vibrant flavors right in your own kitchen.

    To start, gather your ingredients and get ready to whip up a batch of this versatile sauce. With just a few fresh items and a bit of time, you’ll have a sauce that’s much better than anything from a jar. It’s perfect for ladling over pasta, spreading on pizzas, or, of course, enhancing your eggplant parmesan!

    Ingredients

    • 2 tablespoons olive oil
    • 1 medium onion, finely chopped
    • 3 cloves garlic, minced
    • 1 can (28 ounces) crushed tomatoes
    • 1 teaspoon dried oregano
    • 1 teaspoon dried basil
    • 1/2 teaspoon red pepper flakes (optional)
    • Salt and pepper to taste

    Instructions

    1. Heat the olive oil in a large saucepan over medium heat. Add the chopped onion and sauté until translucent, about 5 minutes.
    2. Stir in the minced garlic and cook for an additional minute, making sure it doesn’t burn.
    3. Add the crushed tomatoes, oregano, basil, and red pepper flakes if using. Season with salt and pepper.
    4. Bring the sauce to a simmer and reduce the heat. Let it cook for about 20-30 minutes, stirring occasionally, until it thickens and the flavors meld together.
    5. Taste and adjust seasoning as needed. Use immediately or store in the fridge for up to a week.

    Serving with Garlic Bread

    A plate of Eggplant Parmesan served with garlic bread and a fresh salad on the side.

    Eggplant Parmesan is a delightful dish that combines layers of tender eggplant, rich marinara sauce, and melted cheese. The flavors meld beautifully, creating a comforting meal that’s sure to please anyone at the table. Plus, it’s pretty simple to whip up, making it a great choice for both weeknight dinners and special occasions.

    To elevate your Eggplant Parmesan experience, serve it with warm garlic bread. The crunchy, buttery bread complements the juicy, cheesy layers perfectly. It’s an easy addition that makes the meal even more satisfying, allowing you to soak up every bit of that delicious sauce!

    Ingredients

    • 2 medium eggplants, sliced into 1/2-inch rounds
    • 2 cups marinara sauce
    • 2 cups shredded mozzarella cheese
    • 1 cup grated Parmesan cheese
    • 1 cup all-purpose flour
    • 3 large eggs, beaten
    • 2 cups breadcrumbs
    • 1/4 cup fresh basil, chopped
    • 4 cloves garlic, minced
    • 1/2 cup unsalted butter, softened
    • Salt and pepper to taste

    Instructions

    1. Prepare the Eggplant: Preheat the oven to 375°F (190°C). Season the eggplant slices with salt and let them sit for about 30 minutes to draw out moisture. Then, rinse and pat dry.
    2. Bread the Eggplant: Set up a breading station with flour, beaten eggs, and breadcrumbs. Dip each eggplant slice into the flour, then the egg, and finally coat with breadcrumbs.
    3. Fry the Eggplant: In a skillet, heat oil over medium heat. Fry the breaded eggplant slices until golden brown on both sides, about 3-4 minutes per side. Drain on paper towels.
    4. Layer the Dish: In a baking dish, spread a layer of marinara sauce, followed by a layer of eggplant, some mozzarella, and Parmesan cheese. Repeat the layers until all ingredients are used, finishing with cheese on top.
    5. Bake: Cover the dish with foil and bake for 25 minutes. Remove the foil and bake for an additional 15 minutes until the cheese is bubbly and golden.
    6. Prepare Garlic Bread: While the eggplant bakes, mix softened butter with minced garlic and spread it onto sliced bread. Toast in the oven until golden brown.
    7. Serve: Let the Eggplant Parmesan cool for a few minutes before serving alongside the garlic bread. Enjoy your meal!

    Golden Brown Cheese Melting

    A close-up of golden brown melted cheese over layers of eggplant and marinara sauce.

    Eggplant Parmesan is a delightful dish that combines layers of tender eggplant, rich marinara sauce, and gooey melted cheese. The taste is a perfect balance of savory and creamy, making it a comforting meal that everyone will love. Plus, it’s simple enough for a weeknight dinner, yet impressive enough for guests.

    The magic happens when the cheese melts to a golden brown, creating a crispy layer on top that contrasts beautifully with the soft eggplant underneath. Each bite offers a warm, satisfying flavor that brings together Italian tradition and home-cooked goodness. You’ll find yourself going back for seconds!

    Ingredients

    • 2 large eggplants, sliced into 1/2-inch rounds
    • Salt, for sweating the eggplant
    • 2 cups marinara sauce
    • 4 cups shredded mozzarella cheese
    • 1/2 cup grated Parmesan cheese
    • 1 teaspoon dried oregano
    • 1 teaspoon garlic powder
    • Olive oil, for drizzling

    Instructions

    1. Prepare the Eggplant: Sprinkle salt on both sides of the eggplant slices and let them sit for about 30 minutes to draw out excess moisture. Rinse and pat dry.
    2. Layer the Dish: Preheat your oven to 375°F (190°C). In a baking dish, spread a layer of marinara sauce. Add a layer of eggplant, followed by a layer of mozzarella and a sprinkle of Parmesan. Repeat layers until all ingredients are used, finishing with cheese on top.
    3. Season: Sprinkle oregano and garlic powder over the top layer of cheese. Drizzle with olive oil.
    4. Bake: Cover the dish with foil and bake for 30 minutes. Remove the foil and bake for an additional 15 minutes, or until the cheese is bubbly and golden brown.
    5. Serve: Allow to cool slightly before serving. Enjoy your delicious Eggplant Parmesan!

    Fresh Basil Garnish

    Eggplant Parmesan with fresh basil garnish

    Eggplant Parmesan is a delicious Italian dish that combines layers of eggplant, marinara sauce, and cheese, creating a warm, comforting meal. The flavors are rich and savory, with each bite offering a delightful blend of textures from the soft eggplant and gooey mozzarella.

    This recipe is simple to make, perfect for both weeknight dinners and special occasions. The addition of fresh basil not only enhances the dish’s presentation but also adds a refreshing note that complements the hearty flavors beautifully.

    Ingredients

    • 2 medium eggplants, sliced into 1/4-inch rounds
    • Salt for sweating the eggplant
    • 2 cups marinara sauce
    • 3 cups shredded mozzarella cheese
    • 1 cup grated Parmesan cheese
    • 1 cup all-purpose flour
    • 3 large eggs, beaten
    • 2 cups breadcrumbs
    • Fresh basil leaves for garnish

    Instructions

    1. Prepare the Eggplant: Sprinkle the eggplant slices with salt and let them sit for about 30 minutes to draw out moisture. Rinse and pat dry.
    2. Bread the Eggplant: Set up a breading station with flour, beaten eggs, and breadcrumbs. Dip each eggplant slice in flour, then in the eggs, and finally coat with breadcrumbs.
    3. Fry the Eggplant: Heat oil in a large skillet over medium heat. Fry the eggplant slices until golden brown on both sides, about 3-4 minutes per side. Drain on paper towels.
    4. Layer the Dish: In a baking dish, spread a layer of marinara sauce, followed by a layer of fried eggplant slices, a layer of mozzarella, and a sprinkle of Parmesan. Repeat the layers until all ingredients are used, finishing with cheese on top.
    5. Bake: Preheat the oven to 375°F (190°C). Bake for 30-35 minutes until the cheese is melted and bubbly. Let it cool slightly before serving.
    6. Garnish: Top with fresh basil leaves before serving for an extra pop of flavor.
  • 5 Delicious Buddha Bowl Recipes You Need to Try

    5 Delicious Buddha Bowl Recipes You Need to Try

    Buddha bowls are a colorful and nutritious meal option that brings together grains, veggies, proteins, and tasty sauces in one delightful dish. Perfect for meal prep or a quick dinner, these bowls are all about balance and flavor, making it easy to eat healthy without skimping on taste. Whether you’re a seasoned veggie lover or just looking to mix things up, Buddha bowls offer endless combinations to satisfy your cravings.

    Colorful Tropical Fruit and Coconut Bowl

    A colorful bowl filled with tropical fruits, shredded coconut, and beans, garnished with mint leaves.

    This Tropical Fruit and Coconut Bowl is a delightful treat that bursts with vibrant flavors and colors. It combines sweet and juicy fruits with creamy coconut, creating a refreshing meal that’s perfect for breakfast or a light snack. The blend of textures makes each bite exciting, and it’s incredibly simple to whip up.

    With just a few fresh ingredients, you can enjoy a healthy bowl in no time. The sweet mango and crunchy bell pepper provide a beautiful contrast, while the shredded coconut adds a tropical twist. It’s a fun and nutritious way to fuel your day!

    Ingredients

    • 1 ripe mango, diced
    • 1 red bell pepper, diced
    • 1 cup shredded coconut
    • 1 cup cooked quinoa or rice
    • 1/2 cup black beans, rinsed and drained
    • Fresh mint leaves for garnish

    Instructions

    1. Prepare the Base: In a bowl, layer the cooked quinoa or rice as the base.
    2. Add the Fruits: Top with diced mango and red bell pepper for a burst of color.
    3. Incorporate Coconut: Sprinkle shredded coconut generously over the top.
    4. Add Black Beans: Scatter the black beans evenly for added protein.
    5. Garnish: Finish with fresh mint leaves for a refreshing touch.

    Mediterranean-Inspired Bowl with Hummus

    Mediterranean-inspired bowl with hummus, tomatoes, olives, and parsley

    This Mediterranean-Inspired Bowl with Hummus is a delightful mix of fresh flavors and textures. It features creamy hummus topped with juicy tomatoes, black olives, and fresh herbs, making it both refreshing and satisfying. Simple to prepare, this dish is perfect for a quick lunch or a light dinner, and it’s a great way to enjoy healthy ingredients.

    The combination of the smooth hummus and crisp vegetables creates a lovely balance that’s sure to please your taste buds. Plus, you can easily customize it with your favorite toppings or add grains for extra heartiness. Dive into this colorful bowl for a taste of the Mediterranean!

    Ingredients

    • 1 cup hummus
    • 1 cup cherry tomatoes, halved
    • 1/2 cup black olives, pitted
    • 1/4 cup fresh parsley, chopped
    • 1 tablespoon olive oil
    • Salt and pepper to taste
    • Optional: cooked quinoa or couscous for a heartier meal

    Instructions

    1. Scoop the hummus into a bowl and smooth the top with a spoon.
    2. Arrange the halved cherry tomatoes and black olives over the hummus.
    3. Drizzle olive oil on top and season with salt and pepper.
    4. Garnish with chopped parsley.
    5. If desired, serve over a bed of cooked quinoa or couscous for added texture.

    Nourishing Quinoa and Roasted Veggie Bowl

    A vibrant bowl of quinoa and roasted vegetables, topped with a creamy dressing.

    This nourishing quinoa and roasted veggie bowl is a delightful meal that combines fresh veggies with nutty quinoa. It’s not only colorful and vibrant but also packed with nutrients that make it a fantastic choice for a wholesome lunch or dinner.

    With a simple preparation process, you can easily whip this dish together in about 30 minutes. The roasted veggies bring out a rich, caramelized flavor that pairs perfectly with the quinoa’s earthy notes. Drizzled with a creamy dressing, it’s both satisfying and refreshing!

    Ingredients

    • 1 cup quinoa
    • 2 cups water or vegetable broth
    • 1 bell pepper, diced
    • 1 zucchini, chopped
    • 1 cup cherry tomatoes, halved
    • 1 cup purple grapes, halved
    • 1 tablespoon olive oil
    • Salt and pepper to taste
    • Fresh parsley, for garnish
    • 1/4 cup tahini
    • 2 tablespoons lemon juice
    • 2 tablespoons water (to thin the dressing)
    • 1 clove garlic, minced

    Instructions

    1. Preheat the oven to 400°F (200°C).
    2. Rinse the quinoa under cold water. In a pot, combine quinoa and water or broth, bring to a boil, then reduce heat and simmer for 15 minutes until fluffy.
    3. While quinoa cooks, toss bell pepper, zucchini, and cherry tomatoes with olive oil, salt, and pepper. Spread on a baking sheet and roast for 20 minutes.
    4. Prepare the dressing: In a bowl, whisk together tahini, lemon juice, minced garlic, and water until smooth.
    5. Once everything is cooked, assemble the bowl: start with a base of quinoa, top with roasted veggies and grapes, and drizzle with tahini dressing. Garnish with fresh parsley and enjoy!

    Spicy Sriracha Tofu and Brown Rice

    A bowl featuring spicy Sriracha tofu on a bed of brown rice, garnished with cucumber slices and carrots.

    Spicy Sriracha Tofu and Brown Rice is a vibrant and scrumptious dish that packs a punch of flavor. The crispy tofu, marinated in spicy Sriracha sauce, pairs perfectly with the nutty brown rice, creating a satisfying meal that’s both hearty and healthy. This recipe is not only delicious but also simple to whip up, making it perfect for busy weeknights or a relaxing weekend lunch.

    The combination of textures and flavors in this dish is truly delightful. The crispy tofu complements the chewy brown rice, while the fresh veggies add a refreshing crunch. It’s colorful, nourishing, and will surely impress anyone at your table. Whether you’re a seasoned cook or a kitchen novice, this recipe is a breeze to make.

    Ingredients

    • 1 block (14 oz) firm tofu, drained and pressed
    • 2 tablespoons Sriracha sauce
    • 1 tablespoon soy sauce
    • 1 tablespoon olive oil
    • 2 cups cooked brown rice
    • 1 cucumber, sliced
    • 1 carrot, julienned
    • Fresh cilantro for garnish

    Instructions

    1. Prepare the Tofu: Cut the pressed tofu into bite-sized cubes. In a bowl, mix Sriracha sauce, soy sauce, and olive oil. Toss the tofu in the marinade and let it sit for at least 15 minutes.
    2. Cook the Tofu: Heat a non-stick skillet over medium-high heat. Add the marinated tofu cubes and cook for about 5-7 minutes, turning occasionally until golden and crispy on all sides.
    3. Assemble the Bowl: In serving bowls, layer the cooked brown rice, crispy tofu, sliced cucumber, and julienned carrot. Garnish with fresh cilantro for a burst of flavor.
    4. Serve: Enjoy your Spicy Sriracha Tofu and Brown Rice warm, and feel free to drizzle extra Sriracha for an added kick!

    Creamy Avocado and Chickpea Delight

    A colorful Buddha bowl filled with sliced avocado, chickpeas, mixed greens, and cherry tomatoes

    This Creamy Avocado and Chickpea Delight is a fresh and vibrant dish that blends the creaminess of ripe avocados with the hearty texture of chickpeas. It’s not just delicious; it’s a breeze to whip up, making it perfect for a quick lunch or a light dinner. The combination of flavors is refreshing, with the nutty chickpeas complementing the smooth avocado perfectly.

    With just a few simple ingredients, you can create a nourishing bowl that’s both satisfying and colorful. It’s a fantastic way to pack in healthy fats, protein, and greens, all in one meal. Let’s get into the recipe!

    Ingredients

    • 1 ripe avocado, sliced
    • 1 can of chickpeas, drained and rinsed
    • 2 cups mixed greens (spinach, arugula, or your choice)
    • 1 green apple, thinly sliced
    • 1/4 cup cherry tomatoes, halved
    • 2 tablespoons sunflower seeds
    • 1 tablespoon olive oil
    • 1 tablespoon lemon juice
    • Salt and pepper to taste

    Instructions

    1. Prepare the Base: In a large bowl, layer the mixed greens as the base.
    2. Add Chickpeas: Scatter the drained chickpeas evenly over the greens.
    3. Layer Ingredients: Place the avocado slices, apple slices, and cherry tomatoes on top.
    4. Dress the Salad: In a small bowl, whisk together the olive oil, lemon juice, salt, and pepper. Drizzle the dressing over the bowl.
    5. Top with Seeds: Finish by sprinkling sunflower seeds over the top. Serve immediately and enjoy!
  • 5 Delicious Tofu Scramble Recipes to Try Today

    5 Delicious Tofu Scramble Recipes to Try Today

    Tofu scramble is a fantastic breakfast option that’s both tasty and packed with protein. Simple to whip up, it transforms ordinary tofu into a vibrant, savory dish. With the addition of your favorite veggies and spices, it becomes a deliciously satisfying meal any time of the day. Perfect for plant-based eaters or anyone looking to switch up their routine!

    Mediterranean Tofu Scramble with Feta

    A vibrant Mediterranean tofu scramble with cherry tomatoes, black olives, and feta on a plate.

    This Mediterranean Tofu Scramble with Feta is a delightful twist on traditional scrambled eggs. The blend of fresh vegetables, tangy feta, and soft tofu creates a satisfying dish that bursts with flavor. Perfect for breakfast or brunch, it brings a taste of the Mediterranean right to your table.

    Simple to prepare, this recipe takes minimal time, making it a go-to for busy mornings or lazy weekends. You’ll enjoy the vibrant colors and fresh ingredients, making every bite a tasty experience.

    Ingredients

    • 1 block firm tofu, drained and crumbled
    • 1 cup cherry tomatoes, halved
    • 1/2 cup black olives, sliced
    • 1/2 cup feta cheese, crumbled
    • 1 tablespoon olive oil
    • 1 teaspoon turmeric powder
    • 1 teaspoon garlic powder
    • Salt and pepper to taste
    • Fresh herbs (like parsley or basil) for garnish

    Instructions

    1. Heat olive oil in a pan over medium heat. Add crumbled tofu and sauté for about 5 minutes until heated through.
    2. Stir in turmeric and garlic powder, mixing well to coat the tofu.
    3. Add halved cherry tomatoes and olives to the pan, cooking for another 3-4 minutes until the tomatoes soften.
    4. Remove from heat and gently fold in crumbled feta cheese. Season with salt and pepper to taste.
    5. Serve warm, garnished with fresh herbs. Enjoy your Mediterranean Tofu Scramble!

    Spicy Southwest Tofu Scramble

    A colorful bowl of spicy southwest tofu scramble with black beans, corn, and avocado slices.

    This Spicy Southwest Tofu Scramble is a satisfying and flavorful dish that’s perfect for breakfast, brunch, or even a quick dinner. It’s packed with protein from the tofu and vibrant veggies that bring a kick of heat. Simple to whip up, it offers a delightful mix of textures and tastes, making it a favorite among those looking for a hearty, plant-based meal.

    The combination of spices and fresh ingredients creates a zesty experience that will wake up your taste buds. Whether served with toast, in a burrito, or on its own, this scramble is sure to become a go-to recipe for anyone seeking a tasty and nutritious option.

    Ingredients

    • 1 block (14 oz) firm tofu, drained and crumbled
    • 1 tablespoon olive oil
    • 1 small onion, diced
    • 1 bell pepper, diced
    • 1 cup corn (fresh, frozen, or canned)
    • 1 can (15 oz) black beans, drained and rinsed
    • 2 cloves garlic, minced
    • 1 teaspoon smoked paprika
    • 1 teaspoon cumin
    • 1/2 teaspoon chili powder
    • Salt and pepper to taste
    • Fresh jalapeños, sliced (for garnish)
    • Fresh cilantro, chopped (for garnish)
    • Avocado slices (for serving)

    Instructions

    1. Heat olive oil in a large skillet over medium heat. Add diced onion and bell pepper, sautéing until softened, about 5 minutes.
    2. Add minced garlic and cook for another minute until fragrant.
    3. Stir in crumbled tofu, corn, and black beans. Mix well to combine.
    4. Sprinkle in smoked paprika, cumin, chili powder, salt, and pepper. Cook for about 5-7 minutes, stirring occasionally, until everything is heated through.
    5. Adjust seasoning if needed and serve hot, garnished with jalapeños, cilantro, and avocado slices.

    Classic Tofu Scramble with Vegetables

    A colorful tofu scramble with vegetables, featuring diced tofu, red bell peppers, chopped spinach, and onions.

    This classic tofu scramble is a delightful dish that brings together the earthy flavor of tofu and the freshness of vibrant vegetables. It’s packed with protein and incredibly satisfying, making it a perfect breakfast or brunch option. The combination of spices adds warmth and depth, while the colorful veggies ensure each bite is full of flavor.

    What’s great about this recipe is how simple it is to make. With just a few ingredients and a quick cooking process, you can whip up a nutritious meal in no time. It’s a wonderful way to enjoy plant-based eating without the fuss, and you can easily customize it to suit your taste preferences!

    Ingredients

    • 1 block firm tofu, drained and crumbled
    • 1 tablespoon olive oil
    • 1 small onion, chopped
    • 1 bell pepper, diced
    • 2 cups spinach, chopped
    • 2 cloves garlic, minced
    • 1 teaspoon turmeric
    • 1 teaspoon cumin
    • Salt and pepper, to taste
    • Fresh herbs for garnish (optional)

    Instructions

    1. Heat olive oil in a large skillet over medium heat. Add chopped onion and bell pepper, sautéing until softened, about 5 minutes.
    2. Stir in the minced garlic and cook for an additional minute until fragrant.
    3. Add the crumbled tofu, turmeric, cumin, salt, and pepper. Cook for about 5-7 minutes, stirring occasionally, until the tofu is heated through and slightly golden.
    4. Fold in the chopped spinach and cook until wilted, about 2 minutes.
    5. Serve warm, garnished with fresh herbs if desired. Enjoy your delicious tofu scramble!

    Indian-Inspired Tofu Scramble

    A colorful dish of Indian-inspired tofu scramble with peas and cherry tomatoes, served with naan.

    This Indian-inspired tofu scramble is a delightful twist on a classic breakfast dish. It’s both vibrant and packed with flavor, thanks to spices like turmeric and cumin. This simple recipe is a great way to enjoy a nutritious meal that’s quick to prepare and perfect for any time of the day.

    The combination of tofu, fresh vegetables, and spices creates a satisfying dish that’s not only good for you but also full of warmth and comfort. Serve it with some naan or rice for a truly delicious experience!

    Ingredients

    • 1 block firm tofu, crumbled
    • 1 tablespoon olive oil
    • 1 teaspoon turmeric powder
    • 1/2 teaspoon cumin powder
    • 1/2 teaspoon garam masala
    • 1 cup green peas (fresh or frozen)
    • 1 cup cherry tomatoes, halved
    • Salt and pepper to taste
    • Fresh cilantro, chopped (for garnish)

    Instructions

    1. Heat olive oil in a large skillet over medium heat. Add the crumbled tofu and sauté for about 5 minutes until lightly browned.
    2. Stir in turmeric, cumin, and garam masala. Cook for another 2 minutes, mixing well to coat the tofu.
    3. Add green peas and cherry tomatoes to the skillet. Cook for an additional 5-7 minutes until the vegetables are tender.
    4. Season with salt and pepper to taste. Garnish with fresh cilantro before serving.

    Mushroom and Spinach Tofu Scramble

    A delicious mushroom and spinach tofu scramble in a skillet.

    This Mushroom and Spinach Tofu Scramble is a delightful dish that packs a flavorful punch while being quick and easy to prepare. Combining the earthy taste of mushrooms with the freshness of spinach and the protein-rich goodness of tofu, this scramble makes for a perfect breakfast or light meal.

    The ingredients come together to create a satisfying dish that’s not only nutritious but also comforting. It’s a simple recipe that showcases how easy it can be to whip up a delicious plant-based meal. You’ll love the vibrant colors and the delicious aroma wafting through your kitchen!

    Ingredients

    • 1 block firm tofu, drained and crumbled
    • 1 cup mushrooms, sliced (any variety)
    • 2 cups fresh spinach
    • 1 small onion, diced
    • 2 cloves garlic, minced
    • 1 tablespoon olive oil
    • 1 teaspoon turmeric powder
    • Salt and pepper to taste
    • Fresh herbs for garnish (optional)

    Instructions

    1. Heat olive oil in a skillet over medium heat. Add diced onion and sauté until translucent.
    2. Add minced garlic and sliced mushrooms to the skillet. Cook until mushrooms are browned and tender.
    3. Stir in the crumbled tofu and turmeric powder, mixing well. Cook for about 5 minutes, allowing the tofu to absorb the flavors.
    4. Add fresh spinach and cook until wilted. Season with salt and pepper to taste.
    5. Serve warm, garnished with fresh herbs if desired.
  • 6 Delicious Vegetarian Dishes to Satisfy Your Cravings

    6 Delicious Vegetarian Dishes to Satisfy Your Cravings

    Feeling hungry and tired of the same old meals? Try these six vegetarian dishes that will hit the spot and satisfy every craving. From hearty entrees to light bites, these options are perfect for anyone looking to spice up their meatless meals without compromising on flavor!

    7 Delicious Vegetarian Chili Recipes You Need to Try

    A bowl of colorful vegetarian chili topped with avocado slices, surrounded by fresh ingredients.

    The image showcases a vibrant bowl of vegetarian chili brimming with colors and textures. You can spot juicy red and yellow tomatoes, crunchy corn, and a medley of beans. The creamy avocado slices on top add a nice touch, making the dish not just delicious but visually appealing too.

    This bowl of chili promises a hearty meal that’s perfect for any occasion. Rich in nutrients and full of flavor, it’s a great option for everyone, whether you’re a seasoned vegetarian or just looking to try something new. You can easily whip up a batch during the week and enjoy it for days.

    For those eager to try their hand at making a fantastic chili, check out these amazing recipes here: 7 Delicious Vegetarian Chili Recipes You Need to Try. With a variety of ingredients and spices, each recipe offers a unique twist that will surely satisfy your cravings.

    5 Delicious Eggplant Parmesan Recipes to Try Today

    A plate of eggplant parmesan topped with fresh basil and marinara sauce.

    Eggplant Parmesan is a classic dish that never fails to impress. This image shows a beautiful serving of eggplant slices layered with rich marinara sauce and melted cheese. The fresh basil on top adds a pop of color and flavor. It’s the kind of meal that warms the heart and satisfies hunger.

    To whip up this delightful dish, you’ll need some key ingredients: eggplant, mozzarella cheese, marinara sauce, and fresh basil. The process involves slicing the eggplant, breading it, frying or baking it until golden, and then layering it with the sauce and cheese before baking it all together. It’s simple, yet absolutely rewarding.

    If you’re looking to expand your Eggplant Parmesan repertoire, check out these recipes for inspiration. Each one brings a unique twist to this beloved dish. You can find more details and variations at 5 Delicious Eggplant Parmesan Recipes to Try Today. You’ll be amazed at how versatile this dish can be!

    5 Delicious Tofu Scramble Recipes to Try Today

    A colorful tofu scramble with spinach, tomatoes, and bread.

    Tofu scrambles are a fantastic way to enjoy a hearty and healthy meal. The vibrant colors in the image show a delightful mix of ingredients. You see golden tofu cubes, fresh spinach, and juicy cherry tomatoes all tossed together. This dish is not just visually appealing; it’s packed with flavor and nutrition.

    Pairing the tofu with whole grain bread adds a satisfying crunch. The sliced avocado and colorful peppers bring in extra nutrients and a pop of color. This combination makes for a filling breakfast or brunch option.

    If you’re interested in trying your hand at making this delicious dish, check out 5 Delicious Tofu Scramble Recipes. You’ll find easy steps to whip up your own tasty tofu scrambles that can satisfy any craving!

    5 Delicious Buddha Bowl Recipes You Need to Try

    A delicious Buddha bowl filled with quinoa, chickpeas, roasted sweet potatoes, and drizzled with tahini dressing.

    Buddha bowls are not just a meal; they’re a colorful, tasty way to pack in nutrients. This vibrant dish, filled with roasted sweet potatoes, chickpeas, and fresh greens, is a feast for the eyes and the stomach. The creamy dressing drizzled on top brings everything together, making each bite delightful.

    Creating your own Buddha bowl is simple. Start with a base of grains like quinoa or brown rice. Then, layer in your favorite roasted veggies and protein sources. Don’t forget to add fresh greens for that crunch! The drizzling of tahini or any dressing you love can elevate the flavors even more. Check out this collection of Buddha bowl recipes that will inspire your next meal.

    10 Delicious Veggie Taco Recipes You Need to Try

    A wooden board with stacked veggie tacos filled with roasted sweet potatoes, black beans, and fresh toppings.

    Take a look at these vibrant veggie tacos, piled high with fresh ingredients. These tacos showcase roasted sweet potatoes, black beans, and colorful toppings like cilantro and diced tomatoes. Each bite promises a burst of flavor, making them a perfect option for lunch or dinner.

    These tacos are a delightful twist on a classic favorite. The warm tortillas cradle a mix of tasty ingredients, making them not just a meal, but a celebration of color and taste. Pair these with your favorite salsa for an extra kick!

    If you’re looking for inspiration, check out this list of veggie taco recipes that will satisfy your cravings. Each recipe offers a unique combination of flavors and textures, ensuring there’s something for everyone.

    7 Delicious Veggie Stir-Fry Combinations to Try Tonight

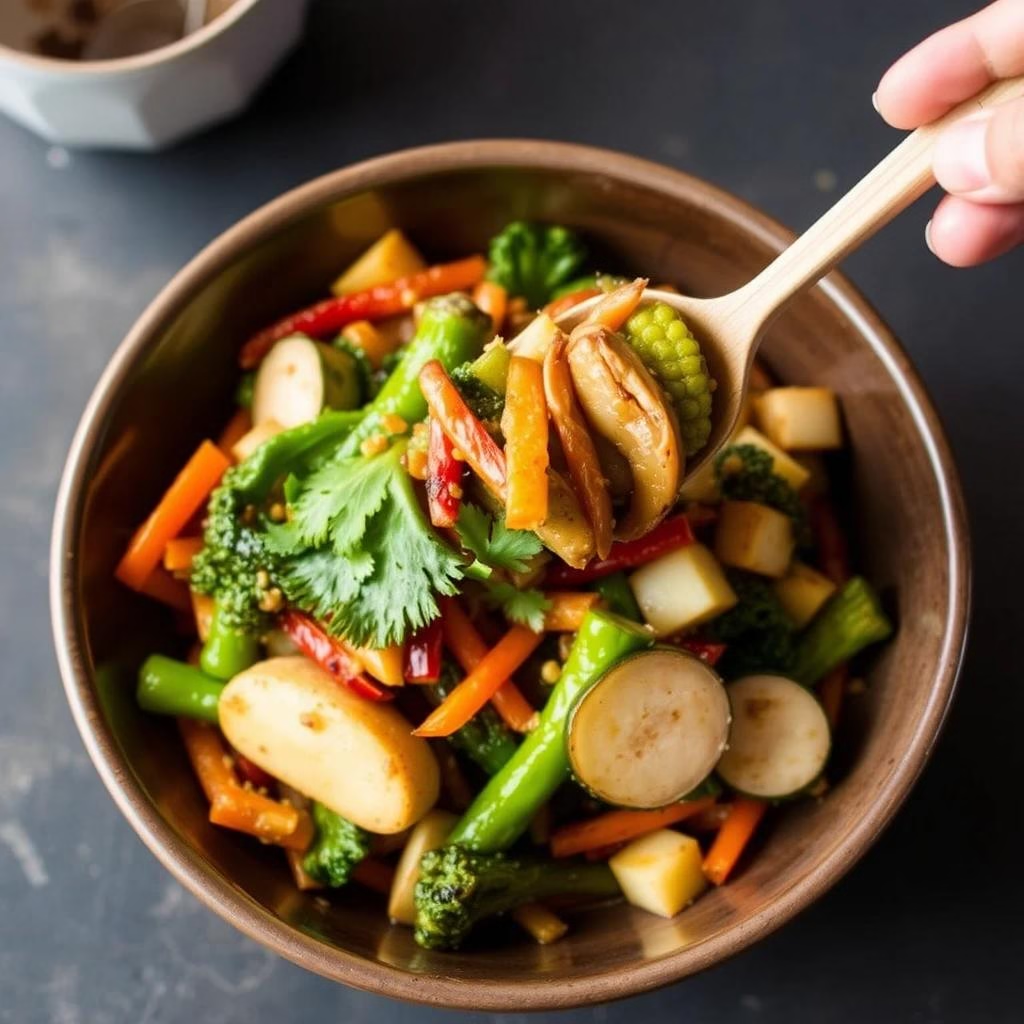
    A colorful veggie stir-fry with tofu, broccoli, and bell peppers in a pan

    Stir-fries are a fantastic way to enjoy a colorful medley of vegetables, and this image perfectly captures the essence of a scrumptious veggie stir-fry. The vibrant red, yellow, and green bell peppers paired with fresh broccoli and cubes of tofu create an inviting and healthy dish. Drizzling some sauce over the mix adds a glossy finish, making the meal even more appealing.

    To whip up this delightful dish, start with an array of your favorite vegetables. Bell peppers, broccoli, and onions are excellent choices. For protein, tofu works great and absorbs flavors well. Don’t forget to toss in a flavorful sauce, like soy or teriyaki, to bring everything together.

    If you’re looking for more ideas, you can check out this list of 7 delicious veggie stir-fry combinations that will satisfy every craving. Stir-fries are quick, easy, and a great way to get your veggies in!

  • 7 Irresistible Brownie Recipes You Need to Try

    7 Irresistible Brownie Recipes You Need to Try

    Brownies are a delightful treat that combine rich chocolate flavors with a fudgy texture, making them a favorite for many dessert lovers. Whether enjoyed warm with a scoop of ice cream or simply on their own, these bite-sized squares are perfect for any occasion, from casual get-togethers to special celebrations. Baking up a batch is not only easy, but it fills the air with an irresistible aroma that’s hard to resist!

    Brownie Sundae Delight

    A delicious brownie sundae with whipped cream and a cherry on top.

    Brownie Sundae Delight is a fun and indulgent dessert that combines rich, fudgy brownies with creamy ice cream, topped with chocolate sauce and a cherry. The warm brownies melt slightly with the cold ice cream, creating a delicious contrast of flavors and textures. This recipe is simple to make, perfect for satisfying your sweet tooth or impressing guests with minimal effort.

    Every bite of this dessert is a delightful experience. The combination of the dense brownie, smooth ice cream, and sweet toppings makes it a favorite for chocolate lovers. Plus, it’s easy to customize—add your favorite nuts, sprinkles, or even a drizzle of caramel to make it your own!

    Ingredients

    • 1 batch of homemade or store-bought brownies
    • 2 cups vanilla ice cream
    • 1/2 cup chocolate sauce
    • whipped cream (for topping)
    • 2-3 maraschino cherries

    Instructions

    1. Prepare the Brownies: Bake your favorite brownie recipe or use a store-bought mix. Allow them to cool completely, then cut them into squares.
    2. Assemble the Sundae: In a serving bowl or cup, place a square of brownie at the bottom. Add a scoop of vanilla ice cream on top, followed by another brownie square if desired.
    3. Top with Sauce: Drizzle chocolate sauce generously over the ice cream and brownie layers.
    4. Add Whipped Cream: Finish with a swirl of whipped cream and place a cherry on top.
    5. Serve Immediately: Enjoy your Brownie Sundae Delight right away for the best experience!

    Vegan Brownie Recipes

    Delicious vegan brownies topped with nuts and chocolate chips

    These vegan brownies are rich, fudgy, and utterly satisfying. They deliver a deep chocolate flavor that chocolate lovers will adore, all while being completely plant-based. The recipe is easy to follow, making it a great option for both seasoned bakers and kitchen novices.

    With simple ingredients and minimal prep time, you can whip up a batch in no time. They’re perfect for a quick dessert or a sweet snack. Enjoy them on their own or topped with your favorite vegan ice cream for an indulgent treat!

    Ingredients

    • 1 cup all-purpose flour
    • 1 cup unsweetened cocoa powder
    • 1/2 cup granulated sugar
    • 1/2 cup brown sugar
    • 1/2 cup coconut oil, melted
    • 1/2 cup almond milk
    • 1 teaspoon vanilla extract
    • 1 teaspoon baking powder
    • 1/4 teaspoon salt
    • 1/2 cup dairy-free chocolate chips

    Instructions

    1. Preheat the oven to 350°F (175°C) and grease an 8×8 inch baking pan.
    2. In a large bowl, mix together the flour, cocoa powder, granulated sugar, brown sugar, baking powder, and salt.
    3. Add the melted coconut oil, almond milk, and vanilla extract to the dry ingredients. Stir until well combined.
    4. Fold in the dairy-free chocolate chips.
    5. Pour the batter into the prepared baking pan and spread it evenly.
    6. Bake for 25-30 minutes, or until a toothpick inserted comes out with a few moist crumbs.
    7. Let them cool in the pan before cutting into squares and serving. Enjoy!

    Gluten-Free Brownies

    A tray of gluten-free brownies topped with almonds and served with fresh strawberries on the side.

    These gluten-free brownies are a chocolate lover’s dream! They are rich, fudgy, and incredibly easy to make. Perfect for satisfying your sweet tooth without any gluten worries, these brownies deliver all the indulgence without the guilt.

    With a delightful balance of chocolate and sweetness, they are sure to please everyone, whether you follow a gluten-free diet or not. The simple ingredients come together quickly, making this recipe great for a last-minute treat or a fun baking project with friends!

    Ingredients

    • 1 cup almond flour
    • 1/2 cup cocoa powder
    • 1/2 cup granulated sugar
    • 1/4 cup honey or maple syrup
    • 1/2 cup unsweetened applesauce
    • 1/4 cup melted coconut oil
    • 1 teaspoon vanilla extract
    • 1/2 teaspoon baking soda
    • 1/4 teaspoon salt
    • 1/2 cup chocolate chips (dairy-free if desired)

    Instructions

    1. Preheat your oven to 350°F (175°C) and grease an 8×8 inch baking pan or line it with parchment paper.
    2. In a large bowl, mix almond flour, cocoa powder, granulated sugar, baking soda, and salt until well combined.
    3. Add in the melted coconut oil, honey (or maple syrup), applesauce, and vanilla extract. Stir until the batter is smooth and fully combined.
    4. Fold in the chocolate chips, then pour the batter into your prepared pan, spreading it evenly.
    5. Bake for 25-30 minutes or until the edges are firm and the center looks set. Let cool in the pan before cutting into squares.

    Nutty Brownie Variations

    Delicious nutty brownies topped with pecans on a wooden board.

    Nuts add a delightful crunch and rich flavor to brownies, taking them to a whole new level. Whether you prefer walnuts, pecans, or almonds, these nutty variations are simple to make and incredibly satisfying.

    The combination of chocolate and nuts creates a delicious contrast in texture and taste. Perfect for any occasion, these brownies are not just a treat but also a crowd-pleaser.

    Ingredients

    • 1 cup unsalted butter
    • 2 cups granulated sugar
    • 4 large eggs
    • 1 teaspoon vanilla extract
    • 1 cup all-purpose flour
    • 1 cup unsweetened cocoa powder
    • 1/2 teaspoon salt
    • 1 cup chopped nuts (walnuts or pecans)
    • 1 cup chocolate chips (optional)

    Instructions

    1. Preheat your oven to 350°F (175°C) and grease a 9×13 inch baking pan.
    2. In a saucepan, melt the butter over medium heat. Remove from heat and stir in the sugar until well combined.
    3. Add the eggs one at a time, mixing well after each addition. Stir in the vanilla extract.
    4. In a separate bowl, whisk together the flour, cocoa powder, and salt. Gradually add the dry ingredients to the wet mixture, stirring until just combined.
    5. Fold in the chopped nuts and chocolate chips if using. Pour the batter into the prepared baking pan and spread evenly.
    6. Bake for 25-30 minutes, or until a toothpick inserted into the center comes out with a few moist crumbs. Let cool before cutting into squares and serving.

    Brownies with a Twist

    Delicious brownies topped with colorful sprinkles

    These brownies bring a delightful surprise with each bite, combining rich chocolate flavor with a unique twist that makes them stand out. Imagine dense, fudgy brownies topped with a layer of creamy frosting and colorful sprinkles that add a fun crunch.

    Not only do these brownies taste amazing, but they’re also simple to make. Whether you’re an experienced baker or just starting out, this recipe is straightforward and perfect for any occasion, from casual get-togethers to festive celebrations.

    Ingredients

    • 1/2 cup unsalted butter, melted
    • 1 cup granulated sugar
    • 2 large eggs
    • 1 teaspoon vanilla extract
    • 1/3 cup unsweetened cocoa powder
    • 1/2 cup all-purpose flour
    • 1/4 teaspoon salt
    • 1/4 teaspoon baking powder
    • 1 cup chocolate frosting
    • 1/4 cup colorful sprinkles

    Instructions

    1. Preheat your oven to 350°F (175°C) and grease an 8×8 inch baking pan.
    2. In a large bowl, mix the melted butter and sugar until well combined. Add in the eggs and vanilla, and stir until smooth.
    3. In another bowl, combine cocoa powder, flour, salt, and baking powder. Gradually add this mixture to the wet ingredients, stirring until just combined.
    4. Pour the brownie batter into the prepared pan and spread evenly. Bake for 20-25 minutes, or until a toothpick inserted in the center comes out clean.
    5. Let the brownies cool completely, then spread the chocolate frosting on top. Finally, sprinkle with colorful sprinkles before cutting into squares and serving.

    Chewy Fudgy Brownies

    Chewy fudgy brownies drizzled with chocolate on a white plate.

    These chewy fudgy brownies are a dream for chocolate lovers. With their rich flavor and soft texture, they create a perfect balance of gooey and cakey that is hard to resist. Easy to whip up, this recipe is ideal for both novice bakers and seasoned pros looking for a quick treat.

    Each bite is a burst of chocolatey goodness that melts in your mouth. Topped with a drizzle of melted chocolate, these brownies are great for any occasion. They’re perfect for sharing, but you might just want to keep them all to yourself!

    Ingredients

    • 1/2 cup unsalted butter
    • 1 cup granulated sugar
    • 2 large eggs
    • 1 teaspoon vanilla extract
    • 1/3 cup unsweetened cocoa powder
    • 1/2 cup all-purpose flour
    • 1/4 teaspoon salt
    • 1/4 teaspoon baking powder
    • 1/2 cup chocolate chips (optional)

    Instructions

    1. Preheat your oven to 350°F (175°C) and grease an 8-inch square baking dish.
    2. In a medium saucepan, melt the butter over low heat. Remove from heat and stir in sugar, eggs, and vanilla until well combined.
    3. Add cocoa powder, flour, salt, and baking powder to the mixture, stirring until smooth. If using, fold in the chocolate chips for an extra chocolatey treat.
    4. Pour the brownie batter into the prepared dish and spread it evenly.
    5. Bake for 20-25 minutes, or until a toothpick inserted into the center comes out with a few moist crumbs. Let them cool before cutting into squares.

    Brownie Baking Tips

    Delicious brownies with ingredients including chocolate, flour, and eggs.

    Brownies are a beloved treat known for their rich, chocolatey flavor and fudgy texture. They make for a simple and delightful dessert that can please any crowd. Plus, they’re incredibly versatile—whether you like them chewy or cakey, there’s a brownie recipe for everyone!

    To get the best result when baking brownies, a few tips can make a big difference. Start with high-quality chocolate for a deep flavor. Be careful not to overmix the batter; folding in the ingredients just until combined keeps your brownies soft and tender. Lastly, remember to let them cool before cutting for cleaner slices!

    Ingredients

    • 1/2 cup unsalted butter
    • 1 cup granulated sugar
    • 2 large eggs
    • 1 teaspoon vanilla extract
    • 1/3 cup unsweetened cocoa powder
    • 1 cup all-purpose flour
    • 1/4 teaspoon salt
    • 1/4 teaspoon baking powder
    • 1 cup chocolate chips (optional)

    Instructions

    1. Preheat your oven to 350°F (175°C) and grease a 9×9-inch baking pan.
    2. Melt the butter in a medium saucepan over low heat. Once melted, remove from heat and stir in the sugar, eggs, and vanilla.
    3. Mix in cocoa powder, flour, salt, and baking powder until just combined. Fold in chocolate chips if desired.
    4. Pour the batter into the prepared baking pan and spread evenly.
    5. Bake for 20-25 minutes or until a toothpick inserted comes out with a few moist crumbs. Let cool before cutting into squares.
  • 7 Irresistible Chocolate Chip Cookie Recipes to Try

    7 Irresistible Chocolate Chip Cookie Recipes to Try

    Chocolate chip cookies are a classic treat that combines the comforting flavors of buttery dough and rich chocolate in every bite. They’re a go-to for any occasion, from after-school snacks to cozy gatherings, and their irresistible aroma wafting from the oven can instantly brighten anyone’s day. Get ready to whip up a batch that’s crunchy on the outside and chewy on the inside!

    Classic Chocolate Chip Cookie Recipe

    Stack of freshly baked chocolate chip cookies

    Chocolate chip cookies are a timeless treat that brings comfort with every bite. Their soft and chewy texture combined with the rich, melting chocolate pieces create a delightful experience. This classic recipe is simple enough for anyone to master, making it perfect for baking novices or seasoned pros alike.

    With just a few basic ingredients, you can whip up a batch of these cookies in no time. Whether you’re enjoying them fresh out of the oven or sharing with friends, these cookies are sure to please any crowd.

    Ingredients

    • 1 cup unsalted butter, softened
    • 3/4 cup granulated sugar
    • 3/4 cup brown sugar, packed
    • 1 teaspoon vanilla extract
    • 2 large eggs
    • 2 1/4 cups all-purpose flour
    • 1 teaspoon baking soda
    • 1/2 teaspoon salt
    • 2 cups semi-sweet chocolate chips

    Instructions

    1. Preheat the oven to 350°F (175°C) and line baking sheets with parchment paper.
    2. In a large bowl, cream together the softened butter, granulated sugar, and brown sugar until light and fluffy. Mix in the vanilla extract and eggs until well combined.
    3. In another bowl, whisk together the flour, baking soda, and salt. Gradually add the dry mixture to the wet ingredients, mixing until just combined. Fold in the chocolate chips.
    4. Drop spoonfuls of dough onto the prepared baking sheets, spacing them about 2 inches apart.
    5. Bake for 10-12 minutes, or until the edges are golden brown. Let the cookies cool on the baking sheets for a few minutes before transferring them to wire racks to cool completely.

    Vegan Chocolate Chip Cookie Variations

    Vegan chocolate chip cookies on a colorful plate with chocolate pieces scattered around.

    Vegan chocolate chip cookies are a delightful treat that’s both satisfying and guilt-free. They bring together the rich taste of chocolate with a soft, chewy texture that everyone loves. Plus, they’re surprisingly simple to whip up, making them perfect for a quick baking session.

    With endless variations, you can easily customize your vegan cookies to suit your taste. Whether you prefer nutty flavors, a hint of spice, or extra chocolate chunks, there’s a combination that will please everyone. Let’s dive into a classic vegan chocolate chip cookie recipe!

    Ingredients

    • 1 cup almond butter
    • 1/2 cup brown sugar
    • 1/4 cup maple syrup
    • 1 teaspoon vanilla extract
    • 1 cup all-purpose flour
    • 1/2 teaspoon baking soda
    • 1/4 teaspoon salt
    • 1 cup vegan chocolate chips

    Instructions

    1. Preheat your oven to 350°F (175°C) and line a baking sheet with parchment paper.
    2. In a large bowl, mix together almond butter, brown sugar, maple syrup, and vanilla until smooth.
    3. Add flour, baking soda, and salt, and stir until combined. Gently fold in the vegan chocolate chips.
    4. Using a tablespoon, scoop out the dough and place it on the prepared baking sheet, spacing them about 2 inches apart.
    5. Bake for 10-12 minutes or until the edges are lightly golden. Let them cool on the baking sheet for a few minutes before transferring to a wire rack to cool completely.

    How to Achieve Perfectly Baked Cookies

    A tray of freshly baked chocolate chip cookies

    Chocolate chip cookies are a classic treat that everyone loves. They have a delightful mix of sweetness from the chocolate and a hint of buttery goodness that makes them irresistible. Plus, baking them is simple and fun, making it a favorite activity for both seasoned bakers and beginners.

    To achieve that perfect cookie, focus on balancing ingredients and timing. The right mix of flour, sugar, and chocolate will yield a chewy, delicious cookie. And remember, the secret to a great cookie lies in the baking time—too long, and they become hard; too short, and they’re doughy. Let’s get started with a delicious chocolate chip cookie recipe!

    Ingredients

    • 2 1/4 cups all-purpose flour
    • 1 teaspoon baking soda
    • 1/2 teaspoon salt
    • 1 cup unsalted butter, softened
    • 3/4 cup granulated sugar
    • 3/4 cup brown sugar, packed
    • 1 teaspoon vanilla extract
    • 2 large eggs
    • 2 cups semisweet chocolate chips

    Instructions

    1. Preheat your oven to 350°F (175°C).
    2. In a small bowl, whisk together flour, baking soda, and salt. Set aside.
    3. In a large bowl, cream together the softened butter, granulated sugar, brown sugar, and vanilla extract until smooth.
    4. Add eggs one at a time, beating well after each addition. Gradually mix in the flour mixture until just combined.
    5. Fold in the chocolate chips.
    6. Drop rounded tablespoons of dough onto ungreased baking sheets, spacing them about 2 inches apart.
    7. Bake for 10-12 minutes, or until the edges are golden brown. Allow to cool on the baking sheets for a few minutes before transferring them to wire racks to cool completely.

    Secret Ingredients for Extra Chewy Cookies

    Ingredients and prepared chocolate chip cookies laid out on a wooden surface.

    Chocolate chip cookies are a classic treat loved by many for their rich flavor and chewy texture. To take these cookies to the next level, incorporating a few secret ingredients can make all the difference. Imagine biting into a warm cookie that’s not just soft but also has that perfect chewiness that keeps you coming back for more!

    This recipe is simple to make and perfect for bakers of all levels. With a few tweaks and special additions, you can create cookies that are not only delicious but also have that desirable texture. Get ready to enjoy a batch of cookies that will impress your friends and family!

    Ingredients

    • 1 cup unsalted butter, softened
    • 1 cup brown sugar, packed
    • 1/2 cup granulated sugar
    • 2 large eggs
    • 1 teaspoon vanilla extract
    • 2 1/4 cups all-purpose flour
    • 1 teaspoon baking soda
    • 1/2 teaspoon salt
    • 2 cups semi-sweet chocolate chips
    • 1/4 cup instant pudding mix (vanilla or chocolate)

    Instructions

    1. Preheat your oven to 350°F (175°C) and line a baking sheet with parchment paper.
    2. In a large bowl, cream together the softened butter, brown sugar, and granulated sugar until smooth and fluffy. Add the eggs one at a time, mixing well after each addition, then stir in the vanilla extract.
    3. In another bowl, whisk together the flour, baking soda, salt, and pudding mix. Gradually add this dry mixture to the wet mixture, stirring until combined.
    4. Fold in the chocolate chips, ensuring they are evenly distributed throughout the dough.
    5. Drop tablespoon-sized balls of dough onto the prepared baking sheet, spacing them a few inches apart.
    6. Bake for 10-12 minutes, or until the edges are lightly golden. Remove from the oven and let them cool on the sheet for a few minutes before transferring to a wire rack to cool completely.

    Gluten-Free Chocolate Chip Cookies

    Plate of freshly baked gluten-free chocolate chip cookies

    These gluten-free chocolate chip cookies are a delightful treat for everyone, whether you’re avoiding gluten or just looking for a tasty snack. They are soft, chewy, and packed with rich chocolate flavor, making them a perfect indulgence for any cookie lover.

    The best part? This recipe is simple to make, requiring just a few basic ingredients you likely already have at home. With every bite, you’ll enjoy the sweet, buttery goodness that melts in your mouth, giving you that classic comfort food feel.

    Ingredients

    • 2 cups almond flour
    • 1/2 teaspoon baking soda
    • 1/4 teaspoon salt
    • 1/2 cup unsalted butter, softened
    • 1/2 cup brown sugar, packed
    • 1/4 cup granulated sugar
    • 1 teaspoon vanilla extract
    • 1 large egg
    • 1 cup gluten-free chocolate chips

    Instructions

    1. Preheat the Oven: Start by preheating your oven to 350°F (175°C) and line a baking sheet with parchment paper.
    2. Mix Dry Ingredients: In a bowl, combine almond flour, baking soda, and salt. Set it aside.
    3. Cream Butter and Sugars: In a separate bowl, beat together the softened butter, brown sugar, and granulated sugar until light and fluffy. Add in the vanilla extract and egg, mixing until well combined.
    4. Combine Mixtures: Gradually add the dry ingredients to the wet ingredients, mixing until just combined. Fold in the gluten-free chocolate chips.
    5. Scoop and Bake: Using a cookie scoop or tablespoon, drop dough onto the prepared baking sheet, spacing them about 2 inches apart. Bake for 10-12 minutes or until the edges are golden brown.
    6. Cool and Enjoy: Allow the cookies to cool on the baking sheet for a few minutes before transferring them to a wire rack to cool completely. Enjoy your delicious gluten-free cookies!

    Innovative Add-Ins for Unique Flavor

    Delicious chocolate chip cookies with nuts and dried fruits on a wooden surface

    Chocolate chip cookies are a timeless treat that can be made even more exciting with a few innovative add-ins. The classic buttery sweetness combined with rich chocolate makes for a delightful cookie, but why stop there? With a little creativity, you can elevate your cookies to a whole new level of flavor and texture.

    Think about mixing in ingredients like toasted nuts, dried fruits, or even a sprinkle of sea salt on top for a sweet-savory contrast. Each bite can surprise you with a burst of flavor, and these variations are simple to incorporate. Get ready to impress your friends and family with cookies that are uniquely yours!

    Ingredients

    • 2 1/4 cups all-purpose flour
    • 1/2 teaspoon baking soda
    • 1 teaspoon salt
    • 1 cup unsalted butter, softened
    • 3/4 cup granulated sugar
    • 3/4 cup packed brown sugar
    • 1 teaspoon vanilla extract
    • 2 large eggs
    • 2 cups semi-sweet chocolate chips
    • 1/2 cup chopped nuts (walnuts or pecans)
    • 1/2 cup dried cranberries or cherries
    • Sea salt for sprinkling (optional)

    Instructions

    1. Preheat the Oven: Preheat your oven to 350°F (175°C) and line a baking sheet with parchment paper.
    2. Mix the Dry Ingredients: In a bowl, whisk together flour, baking soda, and salt. Set aside.
    3. Cream the Butter and Sugars: In a large mixing bowl, beat the softened butter, granulated sugar, and brown sugar until light and fluffy. Add the vanilla and eggs, mixing until combined.
    4. Combine Mixtures: Gradually add the dry ingredients to the butter mixture, mixing until just combined. Stir in the chocolate chips, nuts, and dried fruits.
    5. Shape and Bake: Drop tablespoon-sized balls of dough onto the prepared baking sheet, spacing them about 2 inches apart. Sprinkle with sea salt if desired. Bake for 10-12 minutes, or until edges are golden brown.
    6. Cool: Allow cookies to cool on the baking sheet for a few minutes before transferring them to a wire rack to cool completely.

    Chocolate Chip Cookie Decorating Ideas

    Decorated chocolate chip cookies on a decorative plate.

    Chocolate chip cookies are a classic treat loved by many. Their warm, buttery flavor combined with gooey chocolate makes them irresistible. Making these cookies is simple, and decorating them adds a fun twist to the traditional recipe.

    To take your cookies to the next level, consider using colorful icing, sprinkles, or edible decorations. You can create festive shapes and designs that are perfect for celebrations or just for a fun weekend activity. Let your creativity shine while enjoying the delightful taste of homemade chocolate chip cookies!

    Ingredients

    • 1 cup unsalted butter, softened
    • 3/4 cup granulated sugar
    • 3/4 cup brown sugar, packed
    • 1 teaspoon vanilla extract
    • 2 large eggs
    • 2 1/4 cups all-purpose flour
    • 1 teaspoon baking soda
    • 1/2 teaspoon salt
    • 2 cups semi-sweet chocolate chips
    • Assorted icing colors and decorations (sprinkles, edible glitter, etc.)

    Instructions

    1. Preheat your oven to 350°F (175°C). In a large bowl, cream together the softened butter, granulated sugar, brown sugar, and vanilla until smooth. Beat in the eggs one at a time.
    2. In another bowl, combine the flour, baking soda, and salt. Gradually blend the dry ingredients into the wet mixture. Stir in the chocolate chips.
    3. Drop rounded tablespoons of dough onto ungreased cookie sheets. Bake for 9-11 minutes or until the edges are golden brown.
    4. Let the cookies cool on the baking sheets for a few minutes before transferring them to wire racks.
    5. Once cooled, use icing to decorate the cookies. Create shapes and patterns, then sprinkle with edible decorations for added flair.
  • 7 Delectable Cheesecake Recipes You Need to Try

    7 Delectable Cheesecake Recipes You Need to Try

    Cheesecake is a creamy and delicious dessert that has won the hearts of many. With its rich, smooth texture and endless flavor possibilities, it’s perfect for any occasion. Whether you like it classic with a simple graham cracker crust or topped with fresh fruit, there’s a cheesecake out there for everyone to enjoy!

    Matcha Green Tea Cheesecake

    A slice of matcha green tea cheesecake on a black plate with the whole cheesecake in the background.

    Matcha green tea cheesecake is a delightful twist on the classic dessert. Combining the creamy richness of cheesecake with the earthy, slightly bitter notes of matcha creates a unique flavor profile that is both refreshing and indulgent. This dessert is perfect for matcha lovers and anyone looking to impress their guests with something a little different.

    Making matcha green tea cheesecake is simpler than it might seem. With just a few ingredients and a bit of patience, you can whip up this beautiful dessert that will leave everyone asking for seconds. The smooth texture and vibrant green color make it not just tasty but also visually stunning.

    Ingredients

    • 1 1/2 cups graham cracker crumbs
    • 1/4 cup unsalted butter, melted
    • 2 cups cream cheese, softened
    • 1 cup granulated sugar
    • 1 tablespoon all-purpose flour
    • 3 large eggs
    • 1/4 cup heavy cream
    • 2 tablespoons matcha green tea powder
    • 1 teaspoon vanilla extract

    Instructions

    1. Preheat the oven to 325°F (160°C). In a bowl, mix graham cracker crumbs and melted butter. Press the mixture firmly into the bottom of a 9-inch springform pan to form the crust.
    2. In a large mixing bowl, beat the cream cheese until smooth. Gradually add the sugar and flour, mixing well. Add the eggs one at a time, mixing until just combined.
    3. Mix in the heavy cream, matcha powder, and vanilla extract until smooth and evenly colored.
    4. Pour the batter into the prepared crust and smooth the top. Bake for about 50-60 minutes, until the center is set but still slightly jiggly.
    5. Let the cheesecake cool at room temperature, then refrigerate for at least 4 hours or overnight before serving. Enjoy your matcha green tea cheesecake with a dusting of matcha on top!

    No-Bake Strawberry Cheesecake

    Delicious no-bake strawberry cheesecake with fresh strawberries on top

    No-bake strawberry cheesecake is a delightful dessert that combines creamy cheesecake with fresh strawberries. It’s light, refreshing, and perfect for any occasion. The best part? You don’t have to turn on the oven!

    This cheesecake is super simple to prepare, making it great for both beginners and seasoned bakers. The rich, creamy filling pairs perfectly with the sweet-tart strawberries, creating a delicious treat that everyone will love.

    Ingredients

    • 1 ½ cups graham cracker crumbs
    • ½ cup unsalted butter, melted
    • 2 cups cream cheese, softened
    • 1 cup powdered sugar
    • 1 teaspoon vanilla extract
    • 1 ½ cups whipped cream
    • 2 cups fresh strawberries, sliced

    Instructions

    1. Prepare the Crust: In a bowl, mix the graham cracker crumbs with melted butter until combined. Press the mixture firmly into the bottom of a pie dish to form the crust.
    2. Make the Filling: In a large bowl, beat the cream cheese until smooth. Gradually add powdered sugar and vanilla extract, combining well. Fold in the whipped cream until fully incorporated.
    3. Assemble: Spread the cheesecake filling over the crust evenly. Top with sliced strawberries, arranging them as desired.
    4. Chill: Cover the cheesecake and refrigerate for at least 4 hours, or until set. Serve chilled and enjoy!

    Classic New York Cheesecake

    A slice of classic New York cheesecake with raspberry topping on a plate.

    New York cheesecake is a creamy, rich dessert that everyone loves. It has a smooth texture and a slightly tangy flavor that balances perfectly with its sweet crust. This cheesecake is a classic favorite for any occasion and is surprisingly simple to make, making it great for both novice bakers and seasoned pros.

    With just a few key ingredients, you can whip up a delicious cheesecake that will impress your friends and family. It’s perfect on its own or topped with fresh fruit or a fruit sauce for an extra burst of flavor. Try this recipe, and you’ll see just how easy it is to create this timeless dessert!

    Ingredients

    • 2 cups graham cracker crumbs
    • 1/4 cup sugar
    • 1/2 cup unsalted butter, melted
    • 4 (8-ounce) packages cream cheese, softened
    • 1 cup sugar
    • 1 teaspoon vanilla extract
    • 4 large eggs
    • 1 cup sour cream
    • 1 tablespoon lemon juice

    Instructions

    1. Preheat the oven to 325°F (160°C). Grease a 9-inch springform pan.
    2. Make the crust: In a bowl, mix graham cracker crumbs, 1/4 cup sugar, and melted butter until combined. Press the mixture into the bottom of the prepared pan.
    3. Prepare the filling: In a large mixing bowl, beat the softened cream cheese until smooth. Gradually add 1 cup sugar and vanilla extract, mixing well.
    4. Add the eggs one at a time, mixing on low speed after each addition. Then blend in the sour cream and lemon juice until smooth.
    5. Pour the filling over the crust and smooth the top. Bake for about 60-70 minutes, or until the center is set and the edges are lightly browned.
    6. Turn off the oven and let the cheesecake cool inside with the door slightly ajar for about an hour. Then remove from the oven and refrigerate for at least 4 hours, preferably overnight, before serving.

    Pumpkin Spice Cheesecake

    A delicious pumpkin spice cheesecake topped with whipped cream and garnished with spices.

    Pumpkin spice cheesecake is a delightful twist on the classic dessert, blending creamy cheesecake with the warm, cozy flavors of autumn. It offers a smooth texture and rich taste, making it a perfect treat for fall gatherings or holiday celebrations.

    This recipe is simple enough for anyone to try, featuring a buttery crust that complements the spiced filling beautifully. With a few basic ingredients, you can whip up a cheesecake that will impress family and friends alike!

    Ingredients

    • 1 1/2 cups graham cracker crumbs
    • 1/4 cup granulated sugar
    • 1/2 cup unsalted butter, melted
    • 3 (8-ounce) packages cream cheese, softened
    • 1 cup pumpkin puree
    • 1 cup granulated sugar
    • 3 large eggs
    • 1 teaspoon vanilla extract
    • 1 teaspoon ground cinnamon
    • 1/2 teaspoon ground nutmeg
    • 1/4 teaspoon ground ginger
    • 1/4 teaspoon salt

    Instructions

    1. Prepare the crust: Preheat your oven to 325°F (160°C). In a medium bowl, mix together graham cracker crumbs, sugar, and melted butter until well combined. Press the mixture into the bottom of a 9-inch springform pan.
    2. Make the filling: In a large mixing bowl, beat the cream cheese until smooth. Add the pumpkin puree, sugar, eggs, vanilla, and spices. Mix until fully combined and creamy.
    3. Fill the crust: Pour the cheesecake filling over the prepared crust, smoothing the top with a spatula.
    4. Bake: Place the springform pan in the preheated oven and bake for about 60 minutes, or until the center is set but still slightly jiggly.
    5. Cool and chill: Allow the cheesecake to cool at room temperature for about an hour, then refrigerate for at least 4 hours or overnight before serving.

    Lemon Zest Cheesecake

    A delicious lemon zest cheesecake topped with fresh lemon slices and mint leaves.

    This Lemon Zest Cheesecake is a delightful treat that perfectly balances creamy sweetness with a zesty lemon kick. It’s an easy recipe that anyone can whip up, making it ideal for casual gatherings or a refreshing dessert at the end of a meal.

    The bright lemon flavor shines through in every bite, making this cheesecake feel light and refreshing. With a simple crust and a smooth filling, it’s a dessert that’s sure to impress without requiring much fuss.

    Ingredients

    • 1 1/2 cups graham cracker crumbs
    • 1/3 cup granulated sugar
    • 1/2 cup unsalted butter, melted
    • 4 (8-ounce) packages cream cheese, softened
    • 1 cup granulated sugar
    • 4 large eggs
    • 1/4 cup all-purpose flour
    • 1/4 cup sour cream
    • 3 tablespoons lemon zest
    • 1 teaspoon vanilla extract
    • 1/4 cup fresh lemon juice

    Instructions

    1. Preheat the oven to 325°F (163°C). Grease a 9-inch springform pan.
    2. In a bowl, mix the graham cracker crumbs, 1/3 cup sugar, and melted butter until combined. Press this mixture firmly into the bottom of the prepared pan.
    3. In a large mixing bowl, beat the softened cream cheese until smooth. Gradually add in the 1 cup sugar, mixing well.
    4. Add the eggs one at a time, mixing on low speed after each addition. Then mix in the flour, sour cream, lemon zest, vanilla extract, and lemon juice until smooth.
    5. Pour the cream cheese mixture over the crust in the springform pan and smooth the top with a spatula.
    6. Bake for 50-60 minutes or until the center is set but still slightly jiggly. Turn off the oven and let the cheesecake cool in the oven with the door slightly ajar for about 1 hour.
    7. Remove the cheesecake from the oven and cool completely at room temperature. Refrigerate for at least 4 hours before serving.
    8. Garnish with fresh lemon slices or mint leaves if desired.

    Chocolate Swirl Cheesecake

    A beautifully swirled chocolate cheesecake with a graham cracker crust

    Chocolate Swirl Cheesecake is a delightful twist on the classic dessert. This rich and creamy cheesecake features a luscious chocolate swirl that adds a touch of decadence. The combination of smooth cream cheese and bold chocolate creates a perfect balance that melts in your mouth.

    This recipe is simple to make, making it a great choice for both beginner and experienced bakers. With just a few key ingredients, you’ll whip up a stunning dessert that will impress your guests and satisfy your sweet tooth.

    Ingredients

    • 1 1/2 cups graham cracker crumbs
    • 1/4 cup granulated sugar
    • 1/2 cup unsalted butter, melted
    • 3 (8-ounce) packages cream cheese, softened
    • 1 cup granulated sugar
    • 1 teaspoon vanilla extract
    • 3 large eggs
    • 1 cup sour cream
    • 1 cup semisweet chocolate chips
    • 2 tablespoons cocoa powder

    Instructions

    1. Preheat your oven to 325°F (160°C). Grease a 9-inch springform pan.
    2. Make the crust: In a bowl, mix graham cracker crumbs, 1/4 cup sugar, and melted butter. Press the mixture into the bottom of the prepared pan.
    3. Prepare the filling: In a large bowl, beat the cream cheese and 1 cup sugar until smooth. Add vanilla and mix well. Beat in the eggs one at a time, then stir in the sour cream until combined.
    4. Divide the batter in half. Melt the chocolate chips in the microwave and mix them with one half of the batter. Add cocoa powder for extra flavor.
    5. Spoon the cheesecake batters alternately into the crust, creating a swirl effect with a knife or skewer.
    6. Bake for 50-60 minutes, until the center is set but slightly jiggly. Turn off the oven and crack the door, letting the cheesecake cool for an hour.
    7. Refrigerate for at least 4 hours or overnight before serving. Enjoy your Chocolate Swirl Cheesecake!

    Salted Caramel Cheesecake

    A delicious salted caramel cheesecake with a smooth top and caramel drizzle.

    This salted caramel cheesecake is a delightful combination of creamy, rich flavors and a touch of sweet and salty. The smooth cheesecake pairs perfectly with the luscious caramel drizzle, making it a treat that’s hard to resist. Plus, it’s quite simple to whip up, even if you’re new to baking!

    The buttery crust adds a satisfying crunch, while the caramel topping gives every bite a perfect hint of sweetness. It’s a wonderful dessert for any occasion, and you can easily impress your friends and family with this indulgent cheesecake.

    Ingredients

    • 1 1/2 cups graham cracker crumbs
    • 1/3 cup unsalted butter, melted
    • 1/4 cup granulated sugar
    • 3 (8 oz) packages cream cheese, softened
    • 1 cup granulated sugar
    • 1 teaspoon vanilla extract
    • 3 large eggs
    • 1 cup sour cream
    • 1/2 cup caramel sauce
    • 1/2 teaspoon sea salt
    • Extra caramel sauce for drizzling

    Instructions

    1. Preheat Oven: Preheat your oven to 325°F (160°C) and grease a 9-inch springform pan.
    2. Make the Crust: In a bowl, mix graham cracker crumbs, melted butter, and sugar until combined. Press this mixture firmly into the bottom of the prepared pan.
    3. Prepare the Cheesecake Filling: In a large bowl, beat the softened cream cheese and sugar until smooth. Add the vanilla and mix well. Then, add eggs one at a time, blending until just combined. Stir in sour cream, caramel sauce, and sea salt until smooth.
    4. Pour and Bake: Pour the cheesecake filling over the crust in the springform pan. Bake for 55-60 minutes or until the center is set but slightly jiggly.
    5. Cool and Chill: Turn off the oven and crack the door open, letting the cheesecake cool in the oven for an hour. Remove from the oven and refrigerate for at least 4 hours or overnight.
    6. Serve: Drizzle with additional caramel sauce before serving and enjoy!

Pin It on Pinterest